How to replace a bushing or drive gear
During the life of your Alliance machine it may be necessary to
replace a bushing or drive gear within the mixing shelf.
To do so:
1. Turn off the power to your Alliance mixing machine.
2. Remove the expanding bolt and sha(s) necessary to access
the bushing or drive gear that needs to be replaced. It is
unnecessary to remove the belt.
(See How to repair the machine without disassembling it.)
3. The drive gear can be removed by squeezing the boom of
the gear together and liing it straight up out of the bushing.
4. Once the drive gear is removed, the bushing can be removed
by loosening the two screws used to secure it.
5. To replace the bushing, install the new bushing from the
boom of the shelf and screw it in from the top.
6. To replace the drive gear, gently press it into the bushing unl
it snaps into place. The boom lip of the drive gear should
snap and secure it in place against the boom of the bushing.
Note: It is good pracce to check that all of the other drive gears
are snapped into place and seated correctly before replacing all
of the shas. The drive gears may become dislodged while
moving the shas.
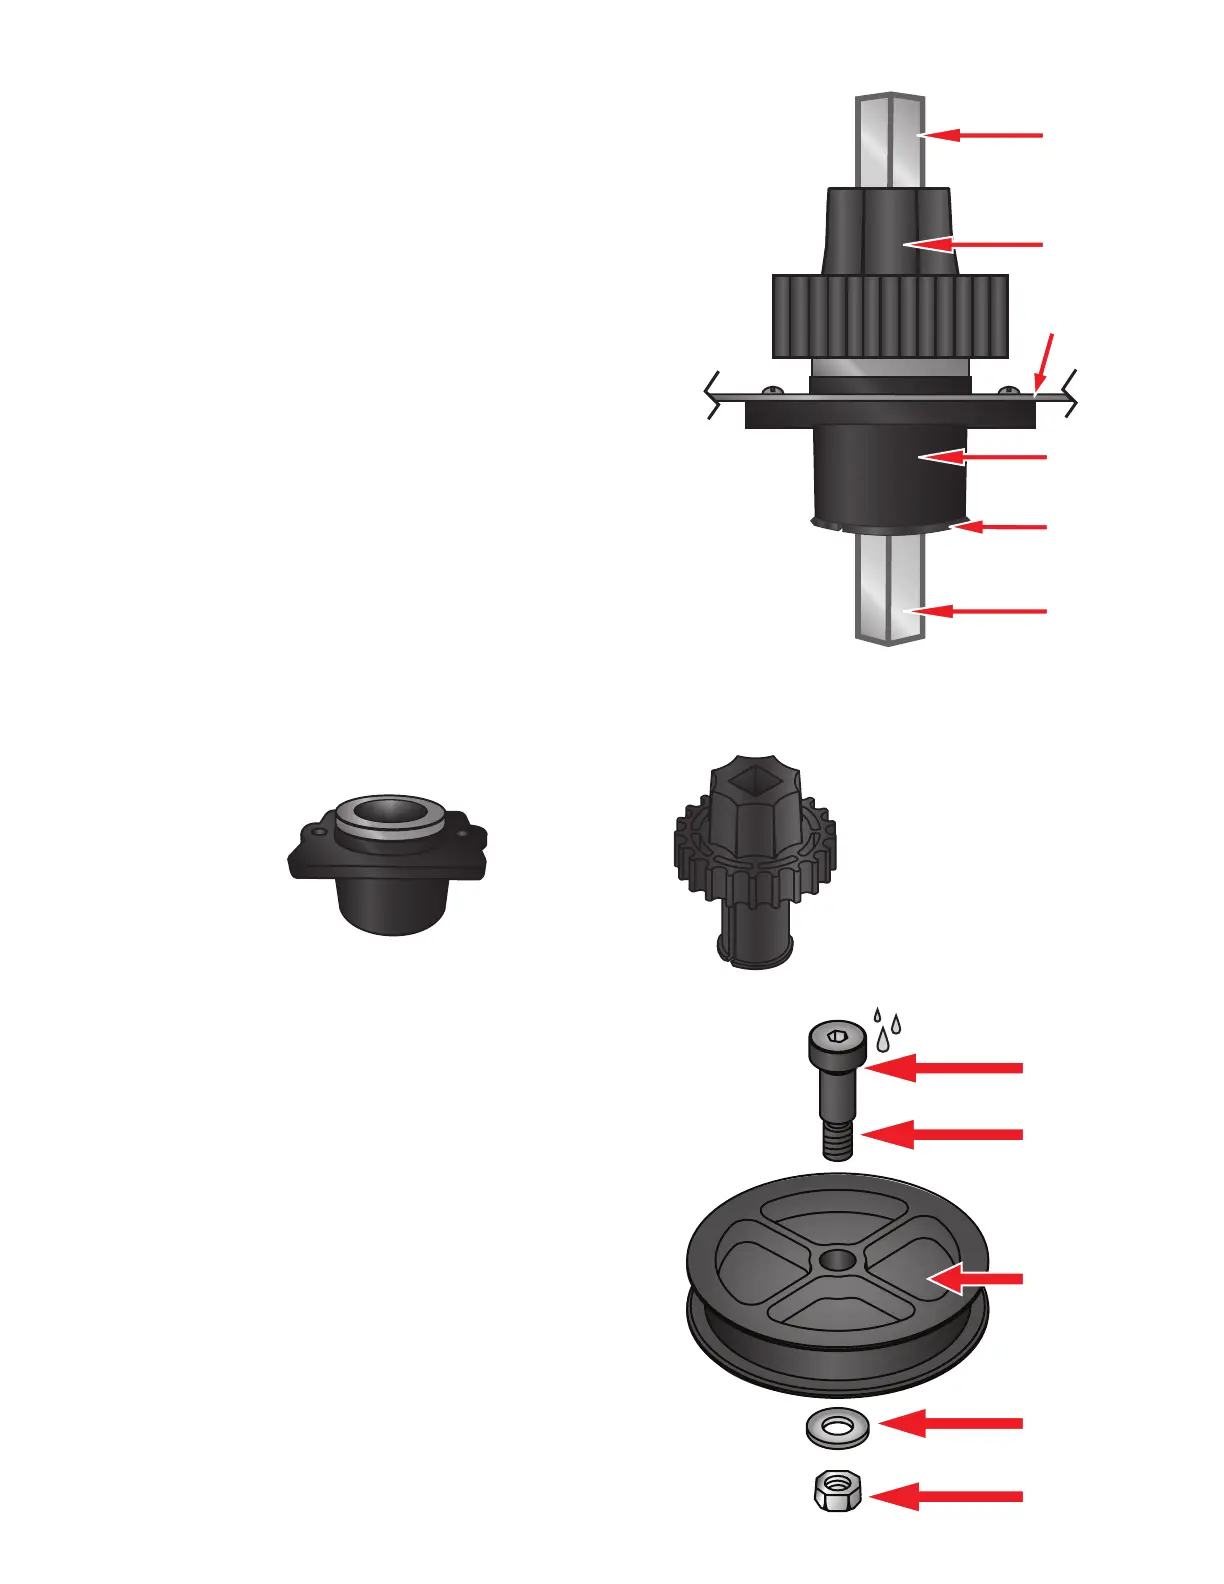
Drive Gear
PN# 5931
Bushing
PN# 5278E-M
Drive Gear
Drive Gear (Lip)
Bushing
Mix Shelf
Lower Shaft
Upper Shaft
Periodic lubricaon to the three pulley shoulder bolts
under each mixing shelf will help maintain quiet
operaon of the machine. A small drop of lubricant
under the head of the shoulder bolt should be all that is
required. Make sure the shoulder bolt is free of dirt
before lubricang. We suggest using Spray Gun Lube or a
lubricant that your paint manufacturer recommends.
The lubricant must be Silicone free.
Note: In extremely dirty environments is may be
necessary to remove the shoulder bolt from the pulley
assembly and clean off the dirt before lubricang.
Shoulder Bolt
PN# 5364
Pulley
PN# 5930
Washer
PN# 5804S
How to lubricate your Alliance machine
Locknut
PN# P0025
Lubricate here