EasyManua.ls Logo

Defender DIAMOND - User Manual

Defender DIAMOND
13 pages
Print Icon
To Next Page IconTo Next Page
Loading...
MANUAL
DIAMOND
Read the instructions carefully before
using the machine.
Congratulations
on purchasing
a rotary machine
DIAMOND!
Question and Answer IconNeed help?

Do you have a question about the Defender DIAMOND and is the answer not in the manual?

Summary

Specifications

Product Dimensions and Power

Details on the machine's length, weight, motor power, voltage range, and rotational speed.

Compatibility and Usage

Information on cartridge compatibility, recommended usage with membrane cartridges, and RCA cable connection.

Included Components

Product Identification and Warranty

Component Breakdown

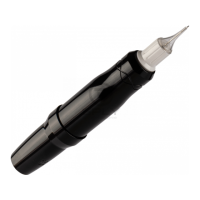
Diagram and list of machine parts including motor, holders, slots, and accessories.

Authenticity and Warranty Information

Details on product authenticity verification and warranty coverage terms.

Operation and Maintenance

Maintenance Instructions

Step-by-step guide for attaching protection film and inserting the needle cartridge.

Needle Adjustment

Guidance on adjusting needle stickout for optimal performance and preventing leakage.

Connection and Setup

Instructions for connecting the device to a power source and setting operational voltage.

Safety and Service

Safety Precautions

Guidelines on safe operation, use of cartridges, needles, gloves, and protective wraps.

Service and Cleaning

Recommendations for device cleaning, O-ring maintenance, and replacement.

Sterilization Procedures

Warranty Details

Troubleshooting

Handling Strange Noises

Explanation for unusual noises when the device is operated in an unintended orientation.

Malfunction and Repair

Procedure for reporting malfunctions and arranging repairs post-warranty period.

Overview

The DEFENDER DIAMOND is a versatile short-stroke rotary machine designed for permanent make-up. It is compatible with all standard modular cartridges, with a strong recommendation to use cartridges equipped with a membrane protecting device to prevent pigment leakage. The device is also compatible with standard power equipment that has an RCA cable connection.

Technical Specifications:

  • Length: 115 mm
  • Weight: 92 g
  • Connector: RCA
  • Motor power: 6 V
  • Voltage: 3-10 V (Working voltage: 3.5-10 V. The device is not designed to operate at higher voltages.)
  • Rotational speed: 10,000 rpm
  • Motor: Faulhaber, Germany
  • Designed: in the USA
  • Short stroke: 2.5 mm
  • Warranty: 1 year

Complement:

The product package includes the device itself, an RCA clipcord, and a Friction Stabilizing O-Ring.

Components:

  1. Motor Faulhaber
  2. Swivel holder
  3. Cartridge slot
  4. RCA slot
  5. RCA clip cord
  6. Friction Stabilizing O-Ring
  7. Warranty card

Usage Features:

Installation and Setup:

  1. Barrier Protection: Attach a special barrier protection film to the clipper and RCA cable (5).
  2. Insert Cartridge: Insert the modular needle (cartridge) into the slot (3). To secure it, turn the cartridge clockwise until the module snaps into place. Note that different manufacturers' modules may have varying fitting dimensions, potentially affecting their fit into the holder.
  3. Adjust Needle Stickout: Adjust the needle stickout by rotating the rotary holder (2). Since the DIAMOND device has a short stroke (2.5 mm), it is highly recommended to adjust the needle stickout to 1-2 mm to prevent pigment leakage.
  4. Connect to Power: Connect the device to the power source using the RCA cable (4).
  5. Power On and Set Voltage: Turn on the power supply. Set the voltage on the power supply to 3-7 V, depending on the needle configuration and working technique. Do not exceed the maximum voltage of 10 V.
  6. Optimize Operation: Set up the device for smooth, quiet operation by adjusting the needle stickout (2) and voltage. All settings are individual and depend on the power unit, application area, and work technique.

Important Operational Notes:

  • Device Orientation: Do not turn the device over during operation. The device is not designed for this and may emit crackling and atypical sounds. Working from the bottom up is not supported.

Maintenance Features:

Cleaning:

  • Regular Cleaning: Keep the device clean. Before and after each use, remove all possible dirt by wiping the machine with a special disinfectant.

Lubrication:

  • O-Ring Maintenance: Remove the Friction Stabilizing O-Ring (6) every 4-6 months and apply a small amount of oil to the thread on the device. Use a special oil designed for rotary or sewing machines.
  • O-Ring Replacement: If necessary, replace the O-ring with a new one. Two spare O-rings are supplied with the device.
  • Pre-lubricated: The machine comes pre-lubricated with grease; do not use any other type of lubricant unless specified for the O-ring.

Sterilization:

  • Holder Sterilization: To sterilize the device, unscrew the holder and place it inside an autoclave with an ultrasonic bath or oven.
  • Temperature Limit for Holder: Do not store the holder in a dry oven at temperatures higher than 100° Celsius (212° Fahrenheit), as this will lead to a change in color.
  • Motor Protection: Sterilizing the entire apparatus (including the motor) in an autoclave, ultrasonic bath, or dry oven will damage and malfunction its motor.
  • Disinfectant Application: Do not spray or pour disinfectants directly onto the device to avoid leakage onto the motor.
  • Cleaning Method: Use cotton pads or disposable paper towels for cleaning. Submerging the entire device in alcohol or any other liquid will damage the unit and its motor. Only the twist-off holder can be sterilized.

Safety:

  • Cartridge Type: Use cartridges with a membrane protecting device to prevent pigment leakage.
  • Hygiene: Always use disposable sterile needles and rubber gloves.
  • Protection: Always use wraps or any kind of protector on your device and RCA cable.
  • Manufacturer Responsibility: The manufacturer is not responsible for contamination, infection, or any material damage to the customer caused by negligence or misuse of the machine or its components.

Warranty and Service:

Warranty Coverage:

  • The device is covered by a 1-year warranty from the date of purchase, covering factory faults.
  • DEFENDERR DIAMOND warrants the product will perform efficiently when used by a Professional Artist. All machine body components not subjected to normal wear and tear are covered for the life of the machine. The motor warranty is for 1 year from the date of purchase.
  • If the product proves defective due to manufacturing issues, DEFENDERR will repair it free of charge. If a machine cannot be repaired, DEFENDERR will replace it with an equivalent model of equal value.

Warranty Exclusions:

The warranty does not apply in the following cases:

  • Input voltage exceeded 11 V (the maximum allowable voltage is 10 V).
  • Damage due to aggressive non-alcoholic antiseptics.
  • Damage due to mechanical impact (falling, hitting a hard surface).
  • Signs of corrosion.
  • Used for improper purposes (i.e., not for permanent make-up and tattooing).
  • Completely immersed in alcohol or any other liquid (except for the twist-off holder).
  • Completely immersed in an autoclave, oven, or ultrasonic bath (except for the twist-off holder).
  • Disassembled or underwent self-repair without the manufacturer's permission.
  • Device or its components have been changed.
  • Warranty is void if the machine has undergone unnecessary rough handling, repeated dropping, overexposure to moisture and/or lubricant, or shows cosmetic damage that compromises its functionality.

Malfunction and Repair:

  • During Warranty: For malfunctions, send an email to service@defenderrsupply.com with a description of the problem and attach a video for primary diagnostics. Estimated response time is 3 business days. Keep your receipt and warranty card.
  • After Warranty: For diagnostics and repair after the warranty period, send an email to service@defenderrsupply.com with a description of the problem to find out the exact cost of repair. Attach a video for primary diagnostics. Repairs are at your own expense.

Contact Information:

  • Website: www.defenderrsupply.com
  • Partnership and Cooperation: info@defenderrsupply.com
  • Instagram:
    • @defenderrsupply (Russian speakers)
    • @defenderrofficial (English speakers)

Defender DIAMOND Specifications

General IconGeneral
BrandDefender
ModelDIAMOND
CategoryPiercing and Tattoo Supplies
LanguageEnglish