NI-029 Rev. 7 ⇒ September 2016
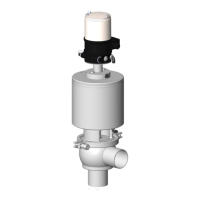
C- Assembling DCX3 automatic valves
Check that the seal-bearing surface inside the body ( 1 ) is clean. Check the position of the seal ( 3 ) on
the actuator ( 5 ). Put the valve in the “open” position. With an N.C. configuration, supply the actuator
( 5 ) with air and insert the shut-off assembly ( 2-3-4-5-6-8-9-10 ) in the body making sure the seals are
not damaged around the ends of the parts. Refit the clamp« 7 ». When using for the first time, check the
bottom connection and top connection(s) for leaks.
NOTE:
− We recommend the use of a medium threadlocker to lock the piston during its reassembly to the
automatic actuator.
− During sawing operations, prevent chips or filings from entering the pipes and rinse the pipes
thoroughly with the valve open to avoid damaging the seals when the valve is put into service.
8
-
STORAGE
We recommend that our valves are stored away from site pollution (abrasive dust, shocks, acid or
chlorinated products, U.V., etc.) for as long as possible and are assembled, where possible, to avoid
mixing up of components.
9
-
EEC CONFORMITY
A - Our valves comply with European regulations (EEC) within the limits of use described in paragraph
B.
The CE mark on the valve indicates conformity to the following regulations :
B - Use limits :
Usage pressure must be lower than 10 bar for all products.
In case of dangerous gas(1) valve diameter (line) must be below 100 mm.
For use outside these limits, please contact our technical service.
(1) dangerous gas : group 1 gas, identified by a letter on the label and on the security card of the
product :
E (for detonating gas), O (for fuel), F+, F and R10 (inflammable), T+ and T (toxic).
For additional information, please see regulation 67/548/EC "Labeling of dangerous products".
10
-
SPARE PARTS AND ACTUATOR DISASSEMBLY
Note the index number on the valve and refer to the general documentation or contact us. Please contact
us in the event of a malfunction.
Actuator disassembly is a simple but delicate operation requiring the use of the appropriate tools and
reference to the valve disassembly instructions.
Please contact us for these instructions or to request maintenance operations at our premises or on site.
N.B.: The valve must be out of service prior to any intervention and disassembly of the components
with the pretensioned spring must be performed in accordance with the instructions on the maintenance
information sheet.
INSTALLATION GUIDE
CONTROL VALVE
www.definox.com
DEFINOX SAS
3 Rue des Papetiers - Z.A.C. de Tabari 2
44190 Clisson - France
: +33 (0)2 28 03 98 50
: +33 (0)2 28 03 88 00
E-mail: info@definox.com
- 89/336 "Electromagnetic compatibility"
- 97/23 "Pressurized equipment"
- 73/23 "Low pressure"