Page 13
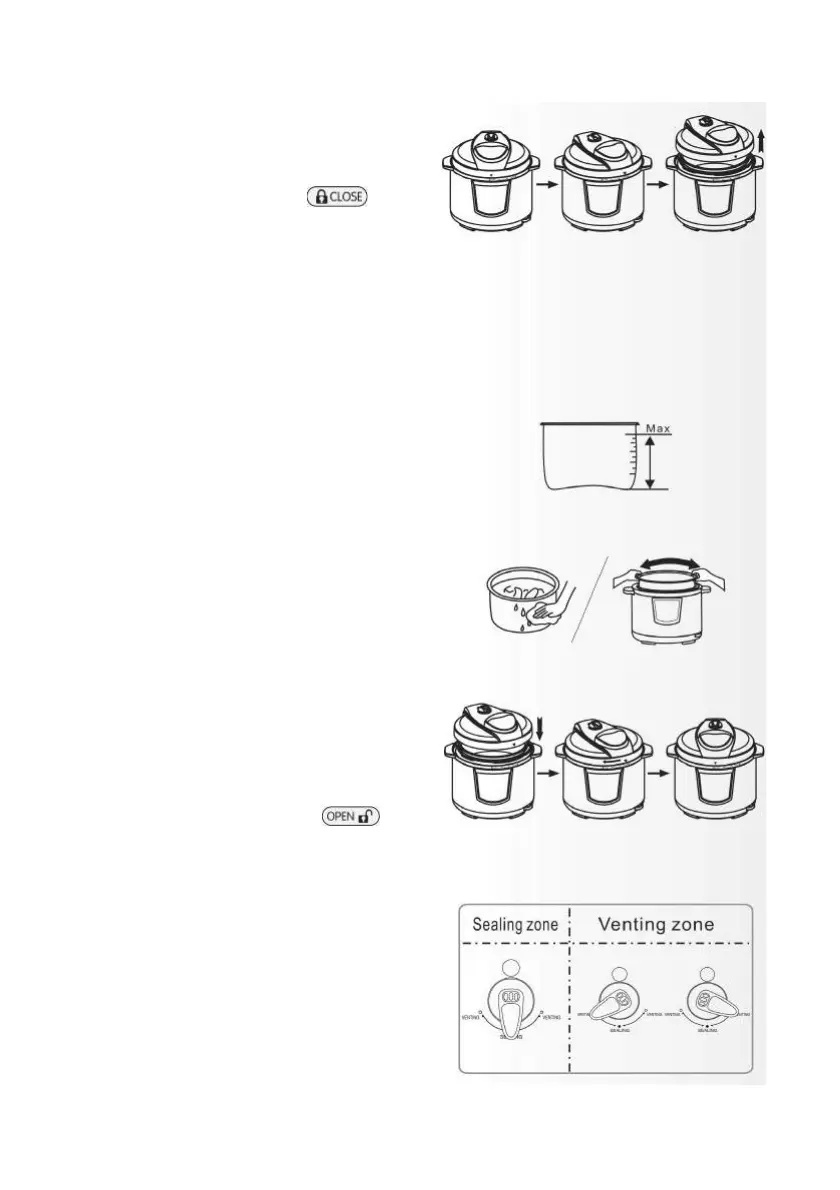
1. Open the cover correctly
Hold the cover handle with one hand, rotate
counter clock wise by approximately 30
degrees until the cover marking “ź” aligns
with the outer casing marking “ ”
and lift the cover.
Cooking preparation
2. Check whether parts on the cover are
mounted properly
Check the float valve and exhaust valve for
obstructions, and ensure parts such as the
gasket and anti-block shield are correctly
installed.
3. Remove the non stick inner pot, then
place food and water into the inner pot
x The total amount of food and water must
not exceed the MAX level of the inner pot
height.
4. Place the inner pot in the electric
pressure cooker
x Before placing the pot, be sure to remove
any foreign objects and water droplets
from the exterior of the inner pot and
inside of the housing;
x After placement, rotate the inner pot
slightly left to right to ensure good contact
between the inner pot and heating plate.
5. Close the cover completely
x Before closing, check whether the gasket
has been placed in the steel rim inside the
cover.
x Hold the cover handle with one hand,
rotate clockwise by approximately 30
degrees until the cover marking “ź” aligns
with the outer casing marking “ ”
6. Position the exhaust valve properly
x Align the small handle of the exhaust
valve with the small sealing icon,
indicating that the pressure cooker is in
the airtight mode;
x When manual exhausting is needed, align
the small handle of the exhaust valve with
the small exhaust icon, indicating that the
pressure cooker is in the exhaust mode;
x Move to the sealing zone and inspect
whether the float valve has fallen (the float
valve falls before heating).
 Loading...