5
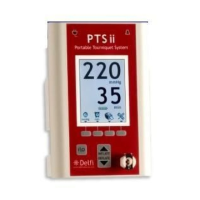
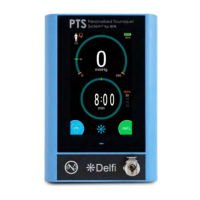
2.3 CONTROLS, INDICATORS, DISPLAYS, AND CONNECTORS
Refer to Figure 2.1 for the locations of the unit's controls, indicators, displays and connectors described
below:
1. ‘ON/STANDBY’ Button
Turns the unit on or sets the unit to standby. In standby mode (powered off), the power to all instrument
functions (i.e. inflation, deflation, etc.) is off, but power continues to supply the battery charging circuitry
whenever AC power is present. This button will not set the unit to standby when there is pressure in the cuff.
Ensure the cuff is fully deflated, and the cuff and limb protection material have been removed from the
patient prior to setting the unit to standby.
2. ‘PRESSURE + ’ Button
Displays and increases the pressure set point in mmHg. Momentarily depressing the ‘PRESSURE + ’ button
will display the pressure set point with a trailing asterisk for 2 seconds. For example, if the set point was 250
mmHg and the user pressed and released the ‘PRESSURE + ’ button, the display would show “250* ” for 2
seconds, then revert to the current cuff pressure (displayed without the trailing asterisk). If the ‘PRESSURE +
’ button is held for more than 1 second, the unit will begin increasing the pressure set point first by 5 mmHg
then by 10 mmHg increments. If the cuff is inflating or inflated, cuff pressure will change to the new pressure
set point.
3. ‘PRESSURE – ‘ Button
Displays and decreases the pressure set point, as described above for the ‘PRESSURE + ’ button.
4. ‘TIME + ’ Button
Displays and increases the time limit set point in minutes. Momentarily depressing the ‘TIME + ’ button will
display the time limit set point with a trailing asterisk for 2 seconds. For example, if the time limit set point
was 60 minutes and the user pressed and released the ‘TIME + ’ button, the display would show “60* “ for 2
seconds, then revert to the current tourniquet elapsed time. If the ‘TIME + ’ button is held in for more than 1
second, the unit advances the time limit set point first by 5 minute then by 10 minute increments.
5. ‘TIME – ‘ Button
Displays and decreases the time limit set point, as described above for the ‘TIME + ’ button.
6. ‘INFLATE’ Button
Inflates the cuff to the pressure set point and starts the elapsed time monitor. Momentarily depressing the
‘INFLATE’ button immediately begins rapid inflation of the cuff.
7. ‘DEFLATE’ Button
Deflates the cuff and stops the elapsed time monitor. To prevent accidental deflation of the cuff, the
‘DEFLATE’ button has a delay and must be pressed and held for approximately 2 seconds before the unit will
deflate the cuff. A short tone is sounded after the 2 second delay to indicate that deflation has started and the
user may then release the ‘DEFLATE’ button. If the user momentary presses then releases the ‘DEFLATE’
button, nothing happens. If the user releases the ‘DEFLATE’ button any time after deflation has begun, the
cuff continues to deflate to zero pressure.
8. Pressure and Time Display
During normal operation with no buttons being pressed, the top line of the pressure and time display shows
the current sensed cuff pressure in mmHg, and the lower line shows the number of minutes the cuff has been
inflated (tourniquet time). Anytime a trailing asterisk (*) appears after the pressure or time value, the value
being displayed is the set point. Under certain conditions the pressure and time displays may show error
codes or alarm messages. The tourniquet time can be reset to zero by pressing the ‘TIME+ ’ and ‘TIME- ‘
buttons simultaneously only when the cuff is deflated. If the cuff is deflated and then reinflated without
zeroing the tourniquet time display, the tourniquet time restarts from the last value, thereby displaying the
cumulative tourniquet time. Switching the P.T.S. to standby also resets the tourniquet time to zero.