This document is an installation, operation, and maintenance manual for Delfield High Performance Refrigerators, specifically refrigerated prep tables. The manual provides original instructions and is updated as new information and models are released.
Function Description:
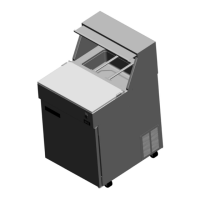
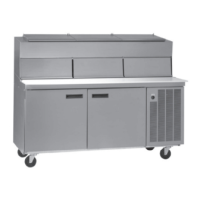
The Delfield High Performance Refrigerators are designed to maintain operational temperatures for food storage, specifically in refrigerated prep tables. These units are intended for indoor use only and are designed to keep food items at safe holding temperatures. The refrigerated base maintains temperatures between 36°F to 40°F (2°C to 4°C), while the refrigerated rail opening maintains temperatures between 33°F to 41°F (0°C to 5°C). Some models feature LiquiTec® technology cold pans, which contain a non-toxic eutectic fluid within a sealed inner liner to maintain cold temperatures. The units are equipped with an ERC112 Temperature Control for managing operation, including cooling cycles and defrost modes.
Important Technical Specifications:
The manual lists various models with their respective volumes, shelf space, dimensions (length, depth, height), BTU/Hour capacity (Base and Rail), Heat of Rejection (Base and Rail), and R290 refrigerant charge.
For example, models like F18MC27-BSNP and F18MC27-BSP have a volume of 6.3 Ft³ and 4.36 Ft² of shelf space. Larger models like F18MC32-BLSP, F18MC32-BSMP, F18MC32-FSP, F18MC33-BLSNP, F18MC33-FSNP, F18MC33-SCSP, F18RC32-FSP, and F18SC32-FSP have a volume of 7.7 Ft³ and 5.32 Ft² of shelf space. The F18SC27-DCP has 6.3 Ft³ volume and 4.36 Ft² shelf space.
Dimensions vary by model, with lengths ranging from 27.32" to 33.32", depths from 33.54" to 35.46", and heights from 42.09" to 54.08".
All listed models have a BTU/Hour Capacity (Base) of 1494 and a Refrigerant Charge (R290) of 150g. Heat of Rejection (Base) is either 244 or 263, and Heat of Rejection (Rail) ranges from 180 to 720, depending on the model.
Electrical specifications for all models include 4.7 Amps, 0.25 HP, 115/60/1 Voltage/Cycle/Phase, and a NEMA 5-15P plug. Units are supplied with approximately 6ft (183cm) cords.
Minimum clearance requirements are 1.00" (25mm) for back, top, and sides.
Usage Features:
- Daily Operation: The unit power switch is located on the back, while the base temperature control display and rail power switch are on the unit nosing. The compressor starts after a 3-6 minute delay upon power-up.
- Evaporator Fan Operation: During cooling, the compressor and evaporator fan run simultaneously. When the compressor is off, the evaporator fan cycles on for 3 minutes and off for 3 minutes. During defrost, the compressor is off, but the evaporator fan runs continuously.
- ERC112 Temperature Control: This digital thermostat manages the compressor, evaporator fan, and condenser fan to maintain box temperature. It includes a defrost mode (dEF) that clears accumulated frost, lasting up to 35 minutes initially. The control monitors evaporator temperature and compressor run time, with defrost cycles occurring as often as every 60 minutes and lasting a minimum of 2 minutes, or until the coil temperature exceeds 41°F (5°C) or a 75-minute time limit is reached.
- Temperature Alarms: The unit features high and low temperature alarms, flashing HI or LO 90 minutes after reaching the alarm set points (50°F/10°C for high, 25°F/-4°C for low) or after a power interruption.
- Display Settings: The ERC112 control allows users to change the temperature display between Fahrenheit (-F) and Celsius (-C) through a password-protected menu.
- Caster Installation: Casters must be installed and screwed in completely. Front casters must be locked once positioned to ensure stability. If casters are replaced, the unit must remain upright for 24 hours before powering up to allow oil return to the compressor sump.
- Drain Connections: If a refrigerated base lacks a condensate evaporator, the condensate line must be connected to a suitable drain to prevent water accumulation.
- Safety Precautions: The manual emphasizes the importance of reading the manual thoroughly, using appropriate safety equipment, and adhering to local and national codes. It warns against operating damaged equipment, misusing the unit, blocking air grills, or using sharp objects to remove ice. It also highlights the risk of instability if the installation area cannot support the equipment's weight.
Maintenance Features:
- Cleaning and Sanitizing: Regular cleaning is crucial for performance and hygiene. The manual outlines daily, weekly, and monthly cleaning tasks for the interior, exterior, gasket, drawers & tracks, drain, condenser coil, and casters.
- Interior Cleaning: Use soap and warm water, ammonia and water, or a non-abrasive liquid cleaner. Avoid high-pressure water jets, steel wool, scrapers, or wire brushes. Acidic items should be stored in sealable containers to prevent blower coil corrosion.
- Exterior Cleaning: Wipe surfaces with a damp cloth, rubbing with the "grain" of the stainless steel. For greasy residue, use mild dish soap and water. Never use acid-based cleaning solutions, steel wool, abrasive pads, chlorinated, citrus-based, or abrasive cleaners.
- Door Gasket Maintenance: Clean daily with warm soapy water to prevent mold and mildew and retain elasticity. Gaskets are "Dart" style and can be pulled out of the groove for replacement; soaking new gaskets in warm water makes them more pliable.
- Drawer Cleaning: Drawer assemblies and tracks should be cleaned weekly. Both are removable without tools and are dishwasher safe or can be cleaned in a sink with detergents and a soft bristle brush. Blue safety clips on the tracks facilitate removal and reassembly.
- Condenser Coil Cleaning: Clean condenser fins monthly with a vacuum cleaner or stiff brush to remove dust, dirt, and grease. Extremely dirty coils may require a commercial condenser cleaner. Failure to maintain a clean coil can lead to high temperatures, excessive run times, and compressor failure, voiding warranties.
- Drain Maintenance: Ensure the internal drain tube is connected to the external condensate evaporator pan and free of obstructions. Proper leveling of the unit is essential for correct drainage.
- Refrigerated Rail Defrosting: Product should be removed from the rail at the end of the day to allow for defrosting and energy saving. Cold pans should be defrosted daily. Never use sharp objects to remove ice/frost from cold pans to avoid puncturing the refrigeration system.
- Door/Hinge Adjustments: Over time, hinges may become loose, causing doors to sag. The manual provides instructions for tightening hinge screws and adding spacers to adjust door height at the handle, using a 5/16" wrench. Plastic hinge bushings should be checked and replaced if missing or worn.