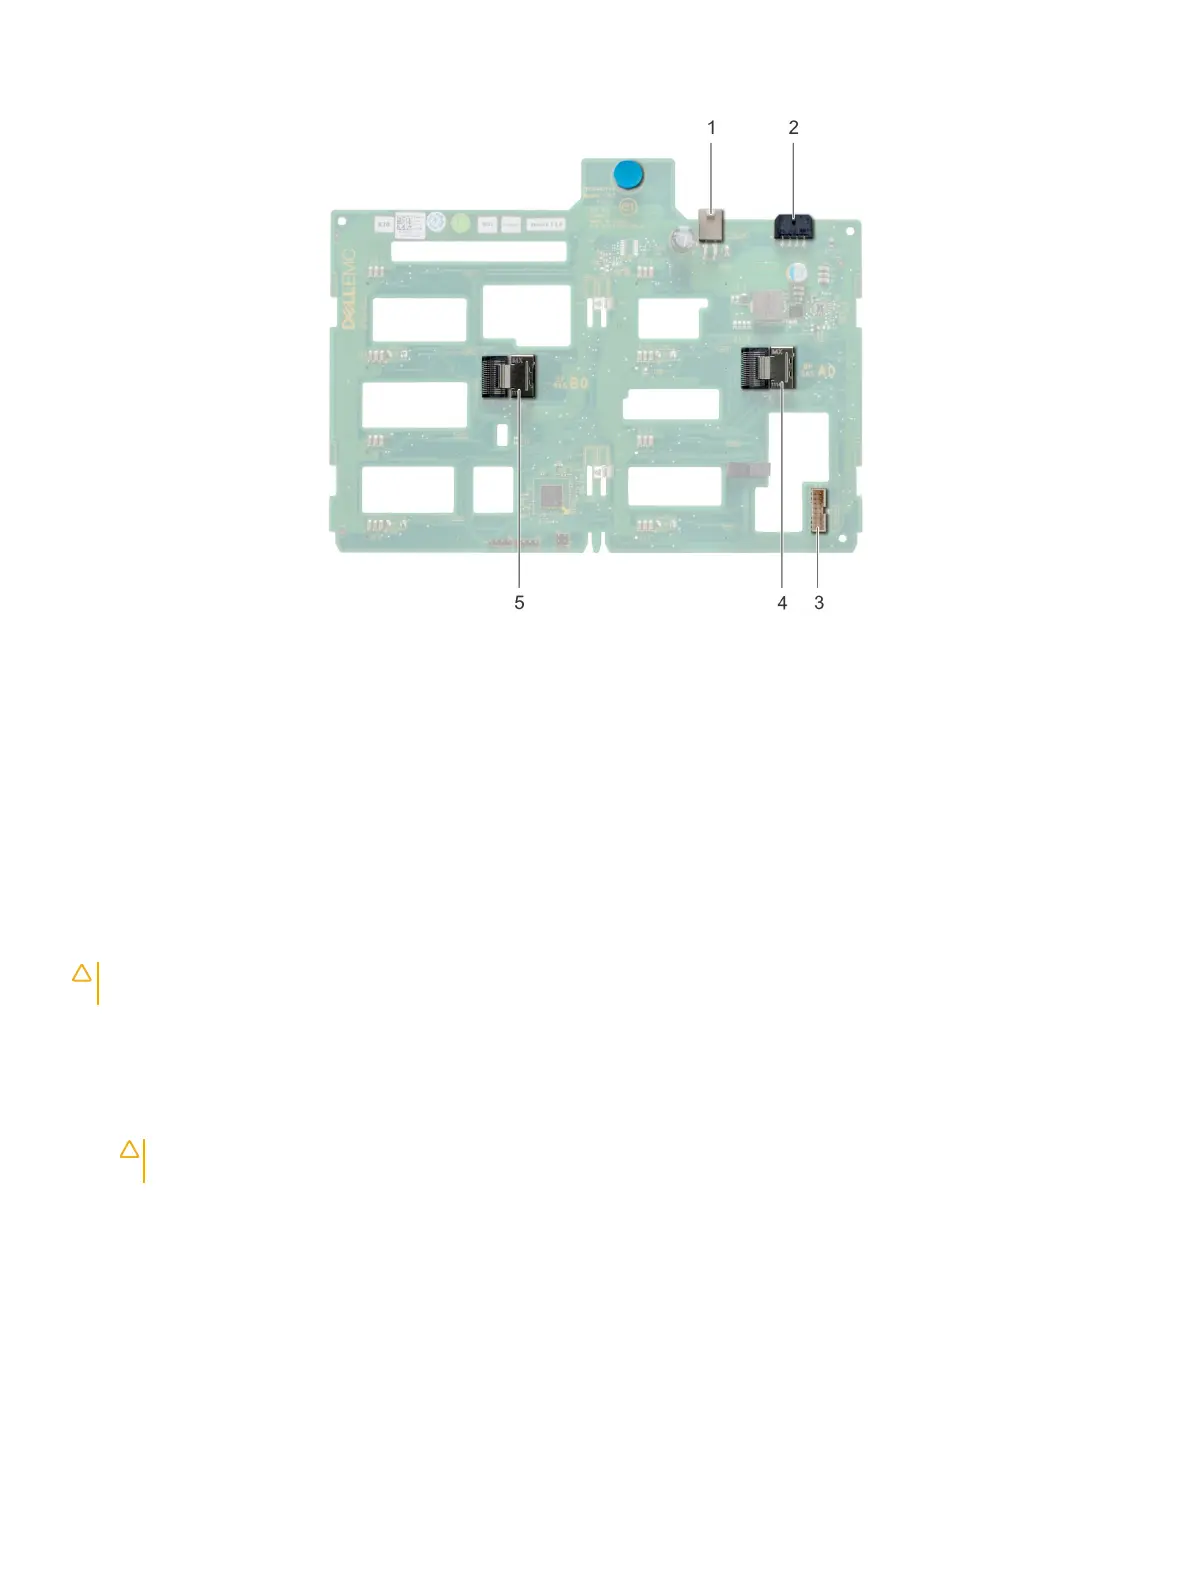
Figure 44. x8 SAS/SATA backplane for 3.5-inch drives
1 ODD power connector (P1)
2 Backplane P4 power connector (BP_PWR)
3 Backplane sideband signal connector (BP_SIG)
4 Mini SAS SAS_A0
5 Mini SAS SAS_B0
Removing the drive backplane
Prerequisites
CAUTION
: Note the number of each drive and temporarily label them before you remove the drive so that you can replace them
in the same location.
1 Follow the safety guidelines listed in Safety instructions.
2 Follow the procedure listed in Before working inside your system.
3 Remove the front bezel.
4 Remove all the drives.
CAUTION
: To prevent damage to the drives and backplane, remove the drives from the system before removing the
backplane.
5 Remove the air shroud.
Steps
1 Disconnect the data, signal, and power cables from the backplane.
2 Pull the release pin to disengage the backplane from the system.
3 Lift the backplane out of the system.
Installing and removing system components
71
 Loading...


