This document serves as a Quick Start Guide for the Dell Mobile Precision Workstation - 7510, providing essential information for setting up and maintaining the device. It is intended for regulatory purposes only.
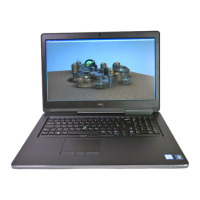
The Dell Mobile Precision Workstation - 7510 is a high-performance mobile computing device designed for professional use, offering robust capabilities for demanding tasks. As a workstation, it is engineered to handle complex applications, data processing, and graphics-intensive operations, making it suitable for fields such as engineering, design, and scientific research. Its mobile nature allows users to maintain productivity and access powerful computing resources on the go.
Usage Features:
The workstation is designed for ease of use, with clear indicators and connectors to facilitate setup and operation.
- Power/Battery Status Light: This indicator provides immediate feedback on the workstation's power state and the current battery status. It helps users quickly ascertain if the device is powered on, off, or in a low-power state, and gives an indication of the battery's charge level.
- AC Adapter Connector: This port is crucial for powering the workstation and charging its battery. Users connect the AC adapter here to ensure continuous operation and to replenish the battery when the device is not in use.
- Battery Status Light: In cases where the main power status light does not provide detailed battery charge information, a dedicated battery status light offers specific insights into the charging process and current battery level.
- Wireless Switch: This physical switch allows users to quickly enable or disable wireless communication, providing a convenient way to manage network connectivity or scan for available wireless signals in the local area.
- Network Connector: For a stable and high-speed internet connection, the network connector allows the workstation to be connected to a wired network or a broadband device. This is particularly useful in environments where wireless connectivity may be unreliable or unavailable.
- VGA Connector: This port enables the workstation to connect to external monitors or projectors, expanding the display capabilities for presentations, multi-monitor setups, or larger viewing experiences.
- USB 2.0 Connector: Multiple USB 2.0 ports are available for connecting a wide range of peripheral devices. These include essential input devices like a mouse and keyboard, as well as printers, external storage drives, and MP3 players, enhancing the workstation's versatility.
- Eject Disc Icon: This icon is associated with an optical drive, indicating the function to eject a disc, facilitating the use of CDs or DVDs for software installation, data backup, or media playback.
- Audio Out/Headphone Connector: This universal audio port allows users to connect headphones for private listening or to send audio to a powered speaker system for a more immersive sound experience.
- Audio In/Microphone Connector: For audio input, this connector supports microphones or other audio input signals, enabling voice communication, recording, or use with audio processing applications.
- Volume Control Icons: Dedicated icons for turning up or down the volume, and muting the sound, provide quick and intuitive control over the workstation's audio output.
- Media Playback Controls: Icons for play/pause, next track/chapter, and previous track/chapter offer convenient control over media playback, enhancing the user experience for multimedia content.
- HDMI Connector: A High-Definition Multimedia Interface (HDMI) connector allows for high-quality digital audio and video output to compatible monitors, projectors, or televisions, supporting high-resolution displays.
- eSATA Connector: This port supports external Serial Advanced Technology Attachment (eSATA) devices, such as hard drives and media bays, for high-speed data transfer. It also maintains compatibility with standard USB devices, offering dual functionality.
- ExpressCard Slot: The workstation includes an ExpressCard slot, supporting 34 mm wide ExpressCards. This slot allows for the addition of various expansion modules, such as additional ports, wireless cards, or specialized hardware. A plastic blank is installed in the slot when shipped to protect it from dust and particles, and users are advised to save it for future use.
- Display Port: Similar to the VGA and HDMI connectors, the Display Port provides another option for connecting the workstation to external monitors or projectors, often supporting higher resolutions and refresh rates.
- SD/MS/MMC/Pro-XD Card Reader: This integrated card reader provides a fast and convenient way to view and share digital photos, music, videos, and documents stored on various types of digital memory cards, including SD, Memory Stick, MultiMediaCard, and xD-Picture Card formats.
- 1394 Firewire: A 1394 Firewire port is included for high-speed data connections to external storage devices and digital media devices, such as still and video cameras, enabling quick transfer of large files.
- Line In Connector: This port allows the connection of audio devices such as receivers and MP3 players, facilitating audio input from external sources.
- Line Out Connector: For audio output to external stereo systems or speakers, the line out connector provides a dedicated port.
- USB Connector: General USB connectors are available for connecting a broad range of peripheral devices, including printers, mice, and keyboards, ensuring broad compatibility.
- Wireless Sync: For select systems, a wireless sync feature allows for synchronization with wireless input devices such as keyboards and mice, reducing cable clutter and enhancing workspace flexibility.
- DVI Connector: A Digital Visual Interface (DVI) connector offers another option for connecting to monitors, projectors, and televisions, particularly useful for digital display connections.
- HD Activity Light: This light illuminates when the hard drive is actively writing or reading data, providing a visual indication of disk activity and system responsiveness.
Maintenance Features:
The guide also provides instructions for basic maintenance, specifically regarding the battery.
- Removing and Replacing a Laptop Computer Battery: The document outlines the procedure for installing and removing the battery. If the workstation is shipped without a battery, users are instructed to install it before proceeding with setup.
- Installation: To install the battery, it should be slid into the battery bay until it clicks into place. For some models, this may require inserting the battery at a 45-degree angle.
- Removal: To remove the battery, the computer must first be turned off, and all external cables, including the AC adapter, must be disconnected. The battery release latch or latches are then slid to the unlock position until they click, after which the battery can be slid out.
- Safety Warnings for Battery Handling: Critical warnings are provided to ensure user safety and prevent damage to the device.
- Users are warned to follow safety instructions that shipped with the computer before performing any procedures.
- A strong warning against using incompatible batteries is given, as it may increase the risk of fire or explosion. Users are advised to only use batteries purchased from Dell and not from other computers.
- Before removing the battery, users are reminded to shut down the computer and disconnect all external cables, including the AC adapter, to prevent electrical hazards or data loss.
Setup and Power Connection:
The guide details the process of connecting the power supply, which is fundamental for initial setup and operation.
- Connecting the Power Supply for External AC Adapters (Notebooks and All-in-One Models): Users are instructed to connect the AC adapter to the computer first, then plug it into an electrical outlet or surge protector. It is emphasized that the AC adapter should remain connected throughout the setup process to ensure consistent power for the operating system to complete configurations and to charge the battery.
- Safety Warning for AC Adapter: A warning highlights that while the AC adapter is designed for worldwide use, power connectors and strips vary by country. Using an incompatible cable or improper connection can lead to fire or permanent damage to the computer.
- Connecting the Power Supply for Internal Power Supply (Desktops): For desktop models, users are advised to connect the power cables for both the display and the computer, plugging them into a surge protector or wall outlet. Reference to the display documentation is made for further details on connecting power cables.
- Connecting the Network Cable (Optional): For wired network connectivity, users can connect a network cable to the workstation.
- Connecting an External Display (Only for Desktops): For desktop users, instructions are provided to connect an external display, with a recommendation to consult the display's manual for specific information.
- Power On: The final step in the initial setup is to press the power button on the computer (and the display if connected) to start the device.
This guide ensures that users can safely and effectively set up their Dell Mobile Precision Workstation - 7510, understand its various features, and perform basic maintenance tasks.