Do you have a question about the Dell OptiPlex 755 and is the answer not in the manual?
Lists essential tools required for component removal and installation procedures.
Provides steps to safely shut down the operating system and power off the computer.
Outlines essential safety guidelines for preventing hardware damage and personal injury.
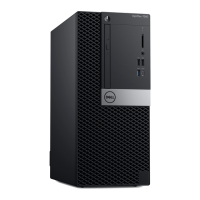
Details the physical layout and components of the Mini Tower computer model.
Step-by-step instructions for safely removing the computer's outer casing.
Visual guide to major internal components and their locations within the computer.
Explains the function and location of the optional chassis intrusion detection switch.
Identifies and labels key components and connectors on the system motherboard.
Details the supported Intel processors, cache specifications, and features.
Specifies memory type, connectors, supported modules, minimum/maximum capacity.
Lists chipset, data bus width, DMA channels, interrupt levels, BIOS chip, and NIC details.
Provides instructions for installing expansion cards into PCI and PCI Express slots.
Steps for installing an eSATA connector without using a riser card.
Outlines rules for connecting SATA devices, including hard drives and optical drives.
Detailed steps for safely removing the CPU and its associated heat sink assembly.
Instructions for detaching the Input/Output panel from the computer's front or rear.
Step-by-step guide for removing and replacing the internal power supply unit.
Instructions for connecting and mounting the internal computer speaker.
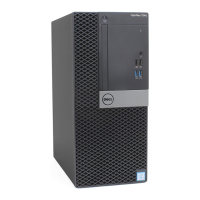
Describes the front view and key features of the Desktop computer model.
Illustrates and identifies the connectors and ports on the rear of the Desktop computer.
Details the function of each connector found on the computer's back panel.
Provides step-by-step instructions for removing the external case cover.
Shows the internal layout and placement of major components within the Desktop computer.
Explains the function and location of the optional chassis intrusion detection switch.
Steps for safely detaching the heat sink assembly from the processor.
Identifies and labels the various components and connectors on the system motherboard.
Guide for installing a PCI expansion card into the motherboard slot.
Instructions for installing a PS/2 serial port adapter for additional connectivity.
Steps for installing an eSATA connector without using a riser card.
Outlines rules for connecting SATA devices, including hard drives and optical drives.
Detailed steps for safely removing the CPU and its associated heat sink assembly.
Instructions for detaching the Input/Output panel from the computer.
Step-by-step guide for removing and replacing the internal power supply unit.
Instructions for connecting and mounting the internal computer speaker.
Describes the front view and key features of the Small Form Factor computer model.
Provides step-by-step instructions for removing the external case cover.
Shows the internal layout and placement of major components.
Explains the function and location of the optional chassis intrusion detection switch.
Details the supported Intel processors, cache specifications, and features.
Specifies memory type, connectors, supported modules, and capacity.
Lists chipset, bus width, DMA channels, BIOS chip, and NIC details.
Details integrated graphics and PCI Express slot capabilities for video output.
Guide for installing a PCI expansion card into the motherboard slot.
Instructions for installing a PS/2 serial port adapter.
Guide for installing an eSATA connector, supporting hot-plugging.
Rules for connecting SATA devices, including hard drives and optical drives.
Steps for safely removing the CPU and its heat sink assembly for USFF computers.
Instructions for connecting and mounting the internal computer speaker for USFF.
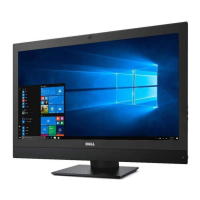
Describes the front view and key features of the USFF computer model.
Provides step-by-step instructions for removing the external case cover.
Shows the internal layout and placement of major components.
Explains the function and location of the optional chassis intrusion switch.
Identifies and labels components on the USFF system motherboard.
Details supported Intel processors, cache specifications, and features for USFF models.
Specifies memory type, connectors, supported modules, and capacity for USFF systems.
Lists chipset, bus width, DMA channels, BIOS chip, and NIC details for USFF computers.
Details integrated graphics and dual-monitor support for USFF models.
Rules for connecting SATA devices, including hard drives and optical drives.
Steps for safely removing the CPU and its heat sink assembly for USFF computers.
Instructions for connecting and mounting the internal computer speaker for USFF.
Manages BIOS settings to enable or disable various hardware connectors and media devices.
Introduces DASH initiative and management profiles for enhanced system management.
Details the Desktop and mobile Architecture for System Hardware management standard.
Detects chassis opening and alerts the user; configurable in system setup.
Describes methods for physically securing the computer using locks and cables.
Steps to enable the hardware-based security feature for encryption and key management.
Optional software to help locate a lost or stolen computer.
Information on using smart cards and fingerprint readers for enhanced security.
Explains how to assign, change, or delete a system password via system setup.
Step-by-step guide to setting a new system password through system setup.
Guide to setting an administrator password, which can also serve as an alternate system password.
Explains the purpose and uses of the system setup utility for hardware configuration.
Instructions on how to access the BIOS setup program during computer startup.
Lists and describes the various configuration options available within system setup.
System setup option to enable or disable the floppy drive.
System setup options for identifying and enabling/disabling SATA drives.
System setup option to enable/disable drives connected via eSATA.
Configures SATA controller mode (RAID, AHCI, ATA) for drives.
Determines if integrated drive errors are reported during startup.
System setup option to enable or disable the integrated network interface controller.
System setup option to enable or disable the onboard audio controller.
System setup option to enable/disable the upper rear USB ports.
System setup option to enable/disable the lower rear USB ports.
System setup option to enable/disable the front USB ports.
System setup option to enable/disable all PCI and PCI Express slots.
Configures the operating mode for the internal parallel port.
Configures the operation and designation of the primary serial port.
Configures the secondary serial port, available with a PS/2 adapter.
Specifies which video controller (onboard or card) is set as primary.
Option to enable or disable Intel Hyperthreading technology for enhanced performance.
Option to enable or disable the second CPU core for improved multitasking.
Enables or disables Intel Virtualization technology for virtual machine support.
Allows VMM to use hardware capabilities for Direct IO, improving performance.
Enables Intel Trusted Execution Technology for enhanced security.
Enables Intel Embedded Information Technology for virtual appliance support.
Locks or unlocks the Virtual Appliance ACPI Configuration Interface.
Enables Intel SpeedStep for processor power and frequency management.
Limits the maximum CPUID function value to prevent OS installation issues.
Adjusts hard drive acoustics for quiet or performance modes.
Allows modification of system setup settings after entering the administrator password.
Displays status and allows assignment/verification of the system password.
Displays status and allows assignment/verification of hard drive passwords.
Controls interaction between system and admin passwords for security.
Manages chassis intrusion detection settings and alerts.
Enables or disables the Trusted Platform Module security device.
Activates or deactivates the TPM security device.
Enables or disables Execute Disable memory protection technology.
Enables/disables the BIOS interface for the Computrace service.
Sets the computer to automatically turn on at a scheduled time.
Specifies the time for automatic computer startup.
Disables remote wake-up events from Hibernate/Off states.
Allows computer power-up via network interface or modem.
Configures the computer's suspend mode (S1 or S3) for power saving.
Displays the unique service tag for identifying the computer.
Option to disable SERR messages, potentially required by some graphics cards.
Restores system setup options to their original factory defaults.
Allows viewing and clearing of system event logs.
Reduces startup time by bypassing some compatibility checks during POST.
Defines the order in which the computer attempts to boot from various devices.
Instructions for booting the computer from a USB memory key.
Illustrates jumper settings for PSWD and RTCRST on system boards.
Describes how to use jumpers to clear system and administrator passwords.
Steps to reset BIOS settings by manipulating jumpers on the system board.
Explains how Windows power management features conserve electricity.
Details Windows XP power saving modes like Standby and Hibernate.
Conserves power by turning off display and hard drive after a timeout.
Conserves power by saving system data to hard drive and turning off computer.
How to adjust power settings using Windows Power Options Properties.
Overview of RAID configurations supported by Dell computers.
Explains RAID 0 (data striping) for high data-access rates.
Methods for configuring RAID volumes using Intel utilities.
Steps to enable RAID functionality in system setup.
Detailed steps to create a RAID 0 (striped) volume using Intel RAID Option ROM utility.
Detailed steps to create a RAID 1 (mirrored) volume using Intel RAID Option ROM utility.
Initial step in the recovery process after a RAID 1 drive failure.
Instructions for safely removing and replacing the CMOS coin-cell battery.
Comprehensive guide to removing the motherboard across various form factors.
Explains characteristics and installation guidelines for DDR2 memory modules.
Step-by-step guide for installing memory modules into DIMM connectors.
Instructions for safely removing memory modules from their connectors.
Steps for replacing the computer cover on common form factor models.
Steps for replacing the computer cover specifically for the USFF model.
Guidelines to ensure proper airflow and prevent overheating when placing the computer in an enclosure.
Safety precautions and methods for cleaning the computer, keyboard, and monitor.
Procedures for cleaning non-optical and optical mice to resolve cursor issues.
Tips for cleaning CDs and DVDs to resolve playback issues like skipping.
Information on using OS wizards to transfer files and settings between computers.
Details the Files and Settings Transfer Wizard for migrating data in Windows XP.
Instructions for using Windows Vista's Easy Transfer wizard to move files and settings.
Steps for physically connecting a network cable to the computer's network adapter.
Wizard-based setup for configuring network connections in Windows XP.
Steps for configuring network settings within Windows Vista's Network and Sharing Center.
Addresses issues related to battery replacement and potential hazards.
Guides on checking expansion card seating and connections for proper function.
Verifies proper seating and connection of expansion cards and their cables.
Procedure to test the graphics card by isolating it and running diagnostics.
Method for testing individual expansion cards by reinstalling them one by one.
Steps to test the drive's functionality by inserting different media.
Refers to cleaning procedures for drives and discs.
Verifies that drive cables are properly connected.
Recommends using the hardware troubleshooter for OS-related issues.
Suggests running Dell Diagnostics for hardware issue diagnosis.
How to adjust volume settings in Windows for audio output.
Verifies speaker and subwoofer connections and functionality.
Troubleshooting tips for issues encountered when writing data to optical media.
Recommends disabling power saving modes before writing to discs.
Instructions to run the Check Disk utility for hard drive error scanning.
Adjusts Outlook Express security settings to allow email attachments.
Verifies the physical telephone line connection for modem operation.
Utilizes the Modem Helper tool for diagnosing modem communication issues.
Specifies invalid characters that cannot be used in filenames.
Addresses missing DLL files, suggesting program reinstallation.
Error indicating the drive cannot be read or is not ready, possibly requiring disk insertion.
Verifies the keyboard cable connection and integrity.
Procedure to test keyboard functionality with a known working unit.
Recommends using the hardware troubleshooter for keyboard issues.
Troubleshooting steps when the computer fails to power on or initiate.
Guidance on handling situations where the computer becomes unresponsive.
Steps to terminate unresponsive programs via Task Manager.
Consults software documentation for troubleshooting installation issues.
Configures programs to run in an environment similar to older Windows versions.
Procedure to restart the computer after encountering a blue screen error.
General advice for resolving software issues by checking compatibility and documentation.
Addresses low memory errors by closing programs or adding more RAM.
Covers reseating modules, checking compatibility, and running diagnostics for memory issues.
Verifies the mouse cable connection and integrity.
Steps to restart the computer to resolve mouse issues.
Procedure to test mouse functionality with a known working unit.
Adjusts mouse settings in Windows to resolve cursor problems.
Ensures the network cable is securely inserted into the computer and jack.
Verifies network communication status via link integrity lights.
Reconnects to the network after restarting the computer.
Verifies network configuration with administrator or IT support.
Recommends using the hardware troubleshooter for network issues.
Comprehensive guide to diagnosing power-related issues based on computer lights.
Addresses issues where the computer is unresponsive despite a green power light.
Indicates the computer is in standby mode; how to resume normal operation.
Troubleshooting steps for when the computer is turned off or not receiving power.
Indicates a potential device malfunction or incorrect installation, requiring component checks.
Suggests steps to identify and eliminate electrical interference affecting performance.
Instructions for performing a self-test on the power supply unit to diagnose issues.
Advises consulting printer documentation for setup and troubleshooting.
Verifies that the printer is powered on.
Ensures printer cables are securely connected.
Verifies the functionality of the electrical outlet.
Checks if Windows correctly detects and recognizes the installed printer.
Advises consulting scanner documentation for setup and troubleshooting.
Ensures the scanner is unlocked before use.
Verifies that scanner cables are securely connected.
Checks if Windows detects and recognizes the scanner.
Troubleshooting steps when there is no audio output from the speakers.
Verifies that speaker cables are correctly connected.
Verifies the headphone cable connection to the computer.
Adjusts volume settings in Windows for audio output.
Explains that headphone connection disables speaker output.
Verifies the functionality of the electrical outlet.
Suggests turning off nearby devices to check for interference.
Recommends running speaker diagnostics for audio issues.
Reinstalling the sound driver to resolve audio problems.
Recommends using the hardware troubleshooter for audio issues.
Troubleshooting steps when the monitor displays no image.
Advice for improving screen readability, such as checking connections and settings.
Verifies the monitor cable connection, including adapters and extension cables.
Ensures the graphics card power cable is properly attached.
Adjusts monitor settings for optimal display quality.
Explains the meaning of different states indicated by the computer's power button light.
Describes the states indicated by the power light (solid green, blinking green).
Describes various light patterns and their corresponding problem descriptions and suggested resolutions.
Lists beep codes, their causes, and potential solutions for memory or other hardware issues.
Table detailing system messages, their possible causes, and corrective actions.
Guidance on when to run Dell Diagnostics for troubleshooting computer problems.
Instructions for initiating diagnostics from a partition on the computer's hard drive.
Steps to start diagnostics using the provided CD media.
Describes the available testing options (Express, Extended, Custom, Symptom Tree) within the diagnostics.
Explains the role of device drivers in controlling hardware and enabling software interaction.
How to identify and troubleshoot driver-related problems for computer devices.
Guide on reinstalling drivers and utilities, emphasizing approved sources.
Method to revert to a previous driver version if a new one causes issues.
Using the Hardware Troubleshooter to resolve OS setup or configuration incompatibilities.
Returns the computer to an earlier state without affecting data files.
Procedure to reverse the effects of the most recent System Restore operation.
Steps to ensure System Restore is active, primarily for Windows XP.
Restores the computer to its original factory state using PC Restore utility.
Restores the computer to factory state using Dell Factory Image Restore in Vista.
Steps for reinstalling the Windows OS using provided media, including driver reinstallation.
Guides on how to get technical support and troubleshooting assistance from Dell.
Accessing Dell's online support resources via the support.dell.com website.
Service for checking the status of Dell product orders.
Dell's support service for answering hardware questions and providing diagnostics.
Information on obtaining additional products or placing orders from Dell.
Procedures for returning items for warranty repair or credit, including RMA process.
Tips to prepare before contacting Dell support, such as having service codes ready.
Field to record the user's name for the checklist.
Field to record the date for the checklist.
Field to record the computer's unique Service Tag for support identification.
Field to record specific error codes or diagnostic output found during troubleshooting.
Space to document the issue and steps taken to resolve it.
Provides contact methods and procedures for obtaining technical support from Dell.
Information regarding Dell's manufacturing practices and hardware product warranty.
Compliance information for Class B digital devices regarding radio frequency energy and interference.
| Chipset | Intel Q35 Express |
|---|---|
| Memory | Up to 8GB DDR2 SDRAM |
| Optical Drive | DVD-ROM, DVD+/-RW |
| Audio | Integrated High Definition Audio |
| Form Factor | Mini Tower, Desktop, Small Form Factor, Ultra Small Form Factor |
| Processor Options | Intel Core 2 Duo |
| Storage | SATA HDD, up to 1TB |
| Graphics | Integrated Intel Graphics Media Accelerator 3100 |
| Network | Integrated Gigabit Ethernet |
| Expansion Slots | PCI, PCIe x1, PCIe x16 |
| Ports | USB 2.0, VGA, serial, parallel, PS/2, audio in/out |
| Operating System | Windows Vista, Windows XP |