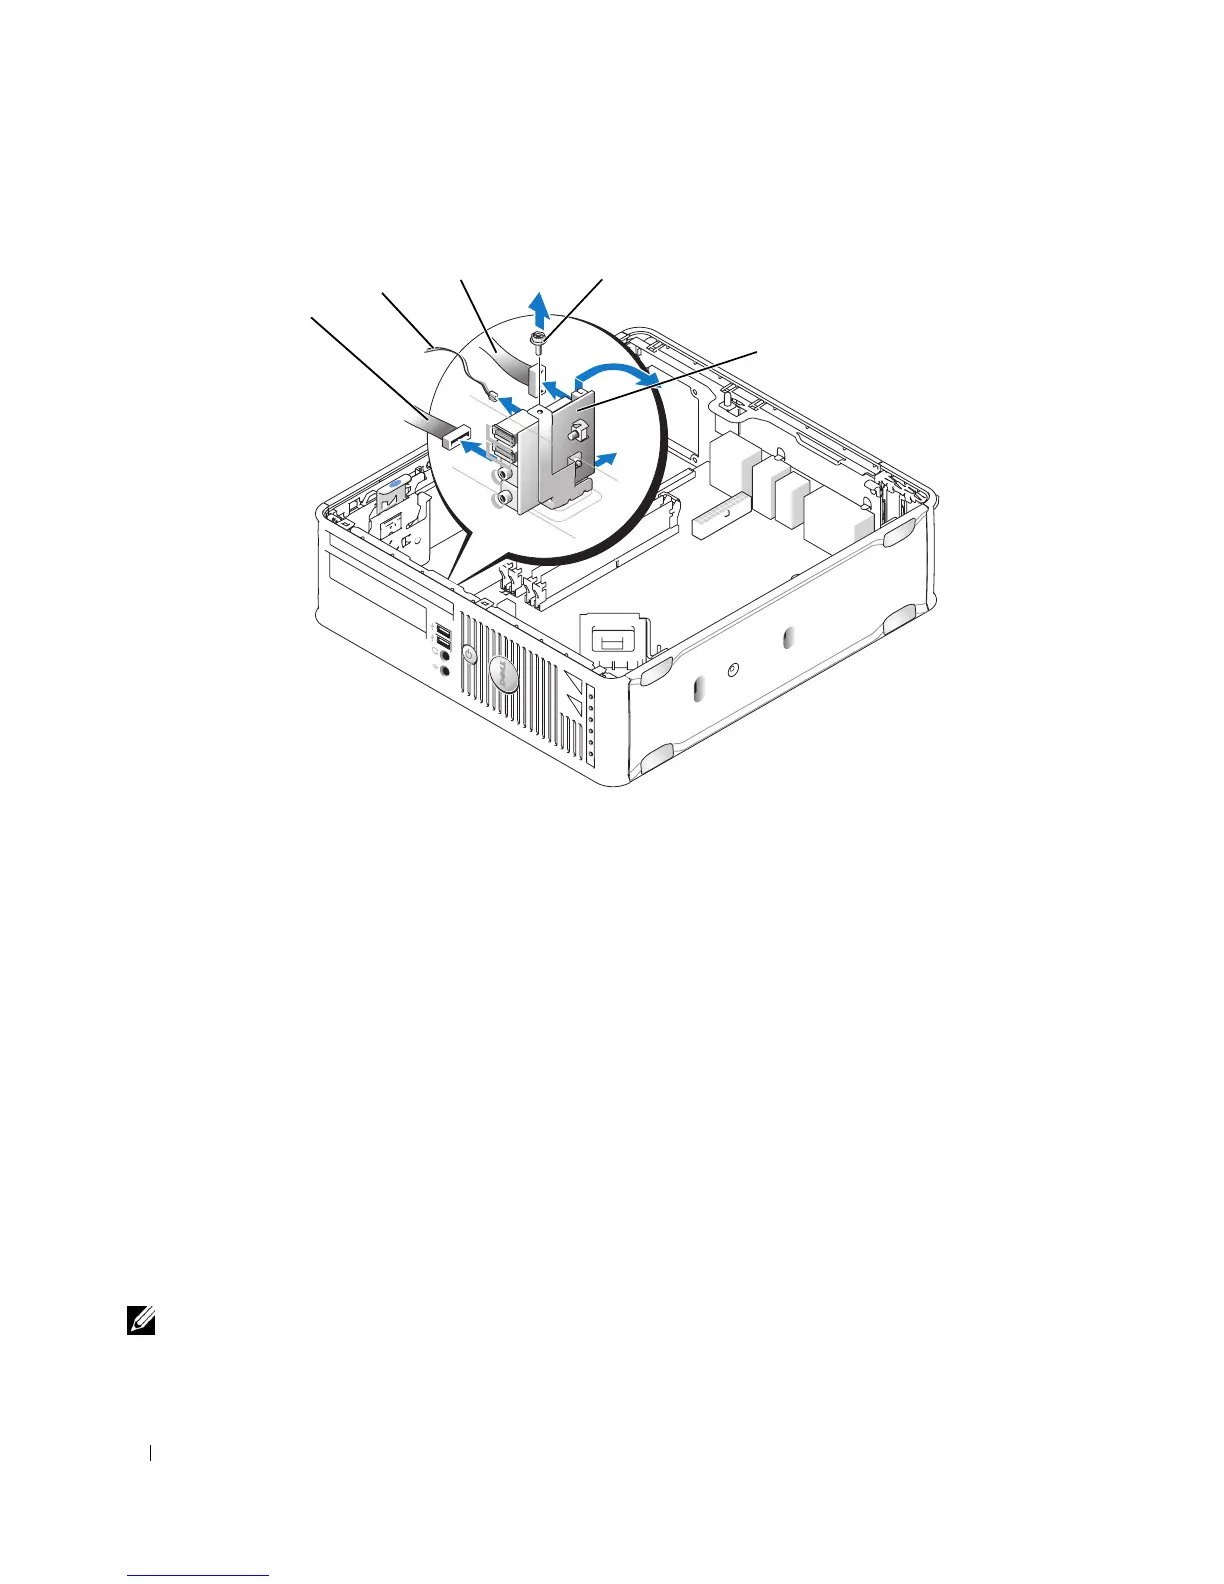
218 I/O Panel
9
Remove cables from the system board.
10
From inside the computer cover, remove the mounting screw that secures the I/O panel to the
computer.
11
Ease the I/O panel back and forth to release its circular tabs from the two holes in the chassis that
secure it.
12
Remove the I/O panel from the computer.
Replacing the I/O Panel
To replace the I/O panel, follow the removal procedures in the reverse order.
NOTE: Use the guides on the I/O panel bracket to help position the I/O panel in place and use the notch on the I/O
panel bracket to help seat the card.
1 LED board
2 air temperature sensor
3 I/O cable connector
4 mounting screw
5 I/O panel
3
1
4
5
2