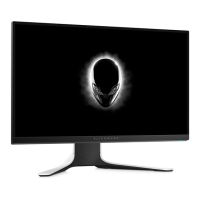
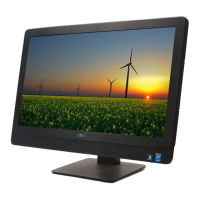
This document outlines the disassembly procedures for the Dell AW2521HB monitor, providing detailed steps for technicians to access and remove various internal components. The manual also includes essential product material information and a list of required tools for disassembly.
Function Description:
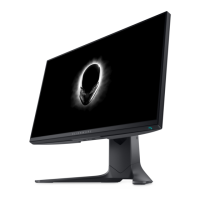
The Dell AW2521HB is a monitor designed for various computing tasks. The document focuses on its serviceability, detailing how to systematically take apart the device for repair, component replacement, or recycling. The disassembly process is structured to ensure that components requiring selective treatment, as per EU Council Directive 75/442/EEC, can be properly separated.
Important Technical Specifications (Derived from Disassembly Steps):
The monitor incorporates several key electronic and mechanical components, each with specific connection types and fastening methods:
- Rear Cover: Secured by 4 screws (torque: 8-10 kgf). Disassembly order is crucial: Left Side -> Top Side -> Right Side -> Bottom Side.
- Stand: Features a release button for detachment.
- Cables: Includes USB FFC (Flexible Flat Cable), Audio FFC, LED Driver BD wire, CTRL FFC cable, Backlight Wire, EDP cable, and Fan Cable. These cables connect various boards and modules.
- Printed Circuit Boards (PCBs):
- I/F BD (Interface Board): Central to connections, receiving USB FFC, Audio FFC, Backlight Wire, CTRL+LENS BD FFC, Light Sensor BD FFC, EDP cable, and Fan Cable. It also connects to Docking BD and SPS BD.
- USB BD (USB Board): Connects via USB FFC and Audio FFC. Secured by 2 screws (torque: 4.5±0.5 kgf).
- LED Driver BD: Connects to LED BD wire and is secured by 1 screw (torque: 4.5±0.5 kgf).
- CTRL BD (Control Board) and CTRL+KEY BD (Control + Key Board): Connected by FFC cables and secured by 6 screws (torque: 2.0±0.5 kgf).
- CTRL+LENS BD (Control + Lens Board) / Power CTRL BD: Connects to I/F BD via FFC cable (FFC 8P P1 765MM LENS) and is secured by 2 screws (torque: 2±0.5kgf).
- Light Sensor BD: Connects to I/F BD via FFC cable.
- Docking BD: Secured by 1 screw (torque: 8.5±1.0kgf) and connects to I/F BD via a wire (WIRE 5P/5P 1571#28 100MM).
- SPS BD: Connects to I/F BD via a wire (WIRE 8P/8P 1571#24 80MM).
- G-SYNC+Heatsink Module: Secured by 4 screws (torque: 4.0±0.5 kgf).
- Capacitors: Electrolyte capacitors (height > 25mm, diameter > 25mm) are present and require careful removal.
- Mechanical Structures:
- I/O Cover: Slides off.
- Middle Frame: Secured by 16 MF screws (torque: 4.5±0.5 kgf).
- Main SHD (Main Shield): Secured by 4 screws (torque: 4.0±0.5 kgf).
- Power Button Module: Secured by 2 screws (torque: 1.1±0.1kgf).
- Adhesive Elements: Tapes (e.g., from CTRL FFC cable, LED BD wire, acetate tape, tensile tape, adhesive tape from backlight wire connector) and conductive foam/cloth are used for securing and shielding components.
- Labels: "MYLAR HEAD LOGO" and "MYLAR PWR-LENS" are present.
Usage Features (Implied by Disassembly):
The monitor is designed with a modular approach, allowing for the replacement of specific components. The presence of various FFCs and wires suggests a complex internal architecture that facilitates data transfer, power delivery, and control signals between different modules. The cable management slot on the stand riser indicates an effort to keep external cables organized. The use of screws with specified torque values highlights the importance of precise assembly and disassembly to maintain structural integrity and component functionality.
Maintenance Features:
The document primarily serves as a guide for maintenance and repair, detailing how to access and remove virtually every component. Key maintenance-related features include:
- Systematic Disassembly: The step-by-step instructions ensure that technicians can methodically take apart the monitor without causing damage.
- Component Identification: Clear labeling of components (e.g., USB FFC, Audio FFC, I/F BD, CTRL BD) aids in accurate identification during repair.
- Fastener Specifications: Torque values for screws are provided, which is crucial for reassembly to prevent overtightening or undertightening, ensuring proper function and longevity.
- Adhesive Removal Instructions: Guidance on tearing off tapes and removing adhesive elements is included, which is important for accessing underlying components.
- Special Component Handling: Specific instructions for removing electrolyte capacitors, including cutting glue and using a soldering iron and absorber, emphasize the need for specialized tools and techniques for certain components. This is particularly important for safety and environmental compliance.
- Environmental Compliance: The "Product material information" section highlights components that require separate disposal or recovery according to WEEE directives, such as printed circuit boards, electrolyte capacitors, and external electric cables. This ensures environmentally responsible maintenance and end-of-life processing.
- Tool Requirements: A comprehensive list of required tools (screwdriver, scraper bar, penknife, soldering iron, and absorber) ensures that technicians are adequately equipped for the disassembly tasks.
In summary, the Dell AW2521HB is a monitor whose design facilitates detailed internal access for maintenance and repair, with a strong emphasis on systematic procedures, component identification, and adherence to environmental regulations for material handling.