Removing and Installing Parts 85
1
Slide the tab on the left side of the drive-panel insert under the center drive-panel tab.
2
Rotate the drive-panel insert into place and snap the drive-panel insert tab over the corresponding tab
on the drive panel.
Replacing the Drive Panel
1
Follow the procedures in "Before You Begin" on page 59.
2
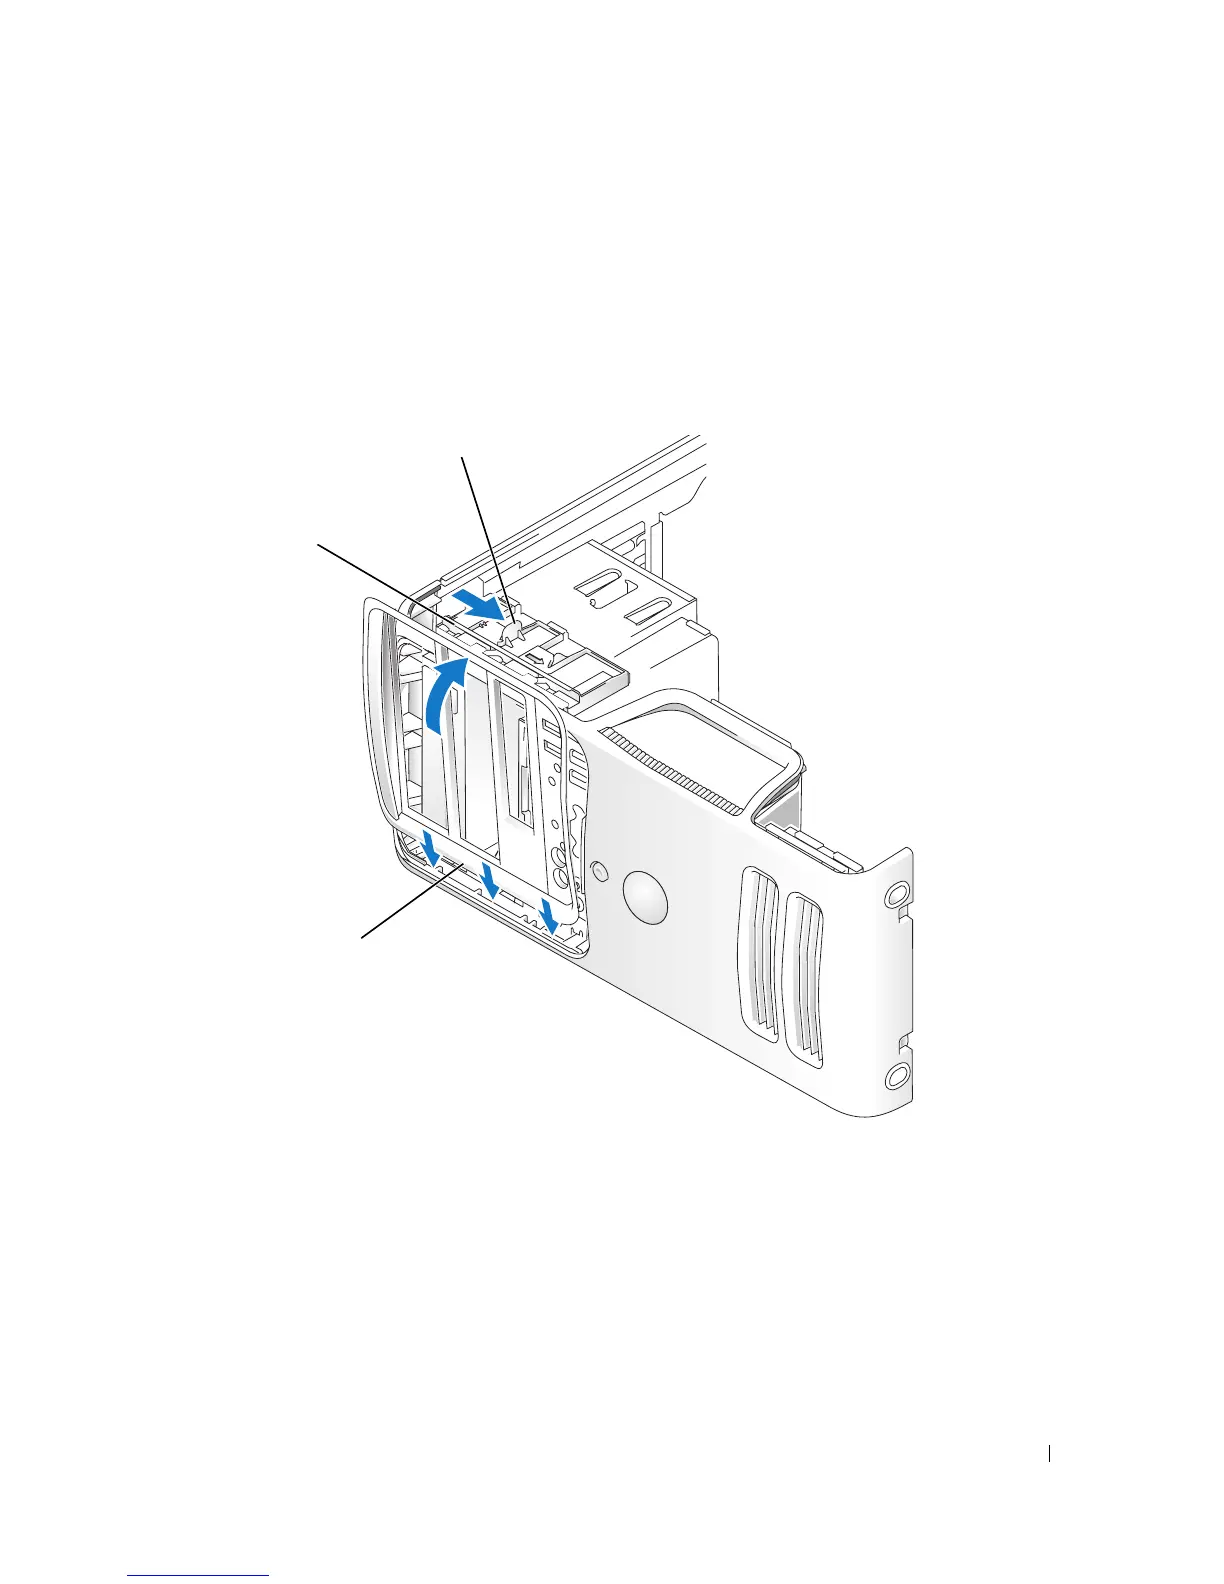
Align the drive panel tabs with the side-door hinges.
3
Rotate the drive panel toward the computer until it snaps into place on the front panel.
1 sliding plate lever 2 sliding plate 3 drive panel
3
2
1