EasyManua.ls Logo

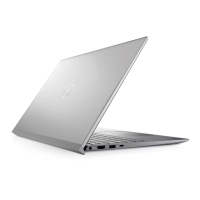
Dell Inspiron 15 5518 User Manual

Dell Inspiron 15 5518
79 pages
To Next Page IconTo Next Page
Page #1 background imageLoading...
Page #1 background image
Inspiron 15 5518
Service Manual
Regulatory Model: P106F
Regulatory Type: P106F001
September 2021
Rev. A01

Table of Contents

Questions and Answers:

Dell Inspiron 15 5518 Specifications

General IconGeneral
Display15.6-inch FHD (1920 x 1080) Anti-glare LED Backlight Non-Touch Narrow Border WVA Display
Battery4-Cell Battery, 54WHr (Integrated)
Weight1.63 kg (3.59 lbs)
Processor11th Generation Intel Core i5-11300H
RAM8GB DDR4 3200MHz
Storage256GB M.2 PCIe NVMe SSD
GraphicsIntel Iris Xe Graphics
Operating SystemWindows 10 Home
Ports1 x HDMI 1.4
WirelessIntel Wi-Fi 6 AX201 2x2 (Gig+) + Bluetooth 5.1

Summary

Chapter 1: Working inside your computer

Electrostatic discharge—ESD protection

Methods and precautions to prevent damage from static electricity to components.

Chapter 2: Removing and installing components

Battery - Precautions

Critical safety warnings and handling procedures for lithium-ion batteries.

Memory module - Removal

Step-by-step guide to remove RAM modules from their slots.

Memory module - Installation

Step-by-step guide to insert new RAM modules into their slots.

M.2 Slot 1 - Removing 2230 SSD

Steps to remove a 2230-sized M.2 SSD from the primary slot.

M.2 Slot 1 - Installing 2230 SSD

Steps to install a 2230-sized M.2 SSD into the primary slot.

M.2 Slot 1 - Removing 2280 SSD

Steps to remove a 2280-sized M.2 SSD from the primary slot.

M.2 Slot 1 - Installing 2280 SSD

Steps to install a 2280-sized M.2 SSD into the primary slot.

M.2 Slot 2 - Removing 2230 SSD

Steps to remove a 2230-sized M.2 SSD from the secondary slot.

M.2 Slot 2 - Installing 2230 SSD

Steps to install a 2230-sized M.2 SSD into the secondary slot.

Wireless card - Removal

Steps to disconnect antenna cables and remove the wireless card.

Wireless card - Installation

Steps to connect antenna cables and install the wireless card.

Fan - Removal

Steps to disconnect fan cable and remove the fan from the laptop.

Fan - Installation

Steps to mount the fan and connect its cable to the system board.

Heat sink - Removal

Steps to loosen screws and lift the heat sink off the system board.

Heat sink - Installation

Steps to align and secure the heat sink onto the system board.

Touchpad - Removal

Steps to disconnect cables, remove bracket, and lift the touchpad.

Touchpad - Installation

Steps to align, secure, and connect the touchpad assembly.

Display assembly - Removal

Steps to disconnect cables and detach the display from the base.

Display assembly - Installation

Steps to align and connect the display assembly to the base.

Power button - Removal

Steps to remove the screw and lift the power button assembly.

Power button - Installation

Steps to align and secure the power button assembly.

System board - Removal

Steps to disconnect all cables and remove screws securing the system board.

System board - Installation

Steps to connect cables and secure the system board to the palm-rest assembly.

Power-adapter port - Removal

Steps to disconnect cable and lift the power port assembly.

Power-adapter port - Installation

Steps to place and connect the power port assembly.

Palm-rest and keyboard assembly - Removal

Detailed steps to remove all components before lifting the palm-rest assembly.

Chapter 4: System setup

Chapter 5: Troubleshooting

Related product manuals