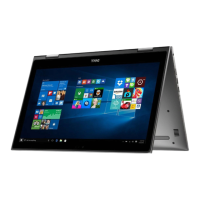
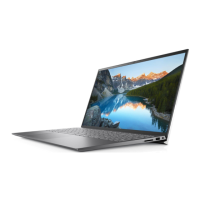
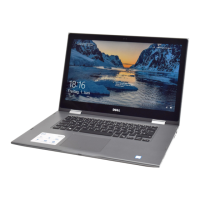
This document provides setup and specifications for the Dell Inspiron 15 5000 2-in-1 computer, also identified by Regulatory Model P58F and Regulatory Type P58F001. It includes important notes, cautions, and warnings to ensure proper use and prevent damage or injury.
Setting Up Your Computer
To begin using your computer, first connect the power adapter and then press the power button. Once powered on, you will need to complete the operating system setup.
For Windows users, the setup process involves connecting to a network. The system will display available Wi-Fi networks, allowing you to select one to proceed. After establishing a network connection, you will be prompted to sign in to your Microsoft account or create a new one. If you are using Ubuntu, simply follow the on-screen instructions to finalize the setup.
After the initial setup, it's recommended to locate and utilize Dell applications. These include "Register your computer" for product registration, "Dell Help & Support" for assistance and resources, and "SupportAssist" for checking and updating your computer.
Creating a USB Recovery Drive for Windows
Dell strongly advises creating a recovery drive to help troubleshoot and resolve potential Windows issues. This requires an empty USB flash drive with a minimum capacity of 16 GB. The steps may vary slightly depending on your Windows version, so it's advisable to refer to the Microsoft support site for the latest instructions.
To create the drive:
- Connect the USB flash drive to your computer.
- In Windows search, type "Recovery" and select "Create a recovery drive" from the results.
- Confirm by clicking "Yes" in the User Account Control window.
- In the Recovery Drive window, select "Back up system files to the recovery drive" and click "Next."
- Choose your USB flash drive and click "Next."
- A warning will appear, indicating that all data on the USB flash drive will be deleted. Click "Create."
- This process may take several minutes to complete.
- Once finished, click "Finish."
Reinstalling Windows Using a USB Recovery Drive
Reinstalling Windows will format your hard drive and delete all data. Therefore, it is crucial to back up your data before starting this process. Additionally, ensure your computer has at least 2 GB of memory and more than 32 GB of storage space.
To reinstall Windows:
- Connect the USB recovery drive to your computer.
- Restart your computer.
- Press F12 when the Dell logo appears to access the boot menu. A "Preparing one-time boot menu" message will be displayed.
- Once the boot menu loads, select the USB recovery device under "UEFI BOOT."
- The system will reboot and prompt you to "Choose the keyboard layout." Select your preferred layout.
- In the "Choose an option" screen, click "Troubleshoot."
- Click "Recover from a drive."
- You will have two options:
- "Just remove my files" for a quick format.
- "Fully clean the drive" for a complete format.
- Click "Recover" to initiate the recovery process. This will take several minutes, and your computer will restart during this time.
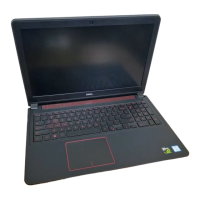
Views of the Computer
Front View:
The front of the computer features a power and battery-status light/hard-drive activity light. This light indicates either the battery charge status or hard-drive activity. You can toggle its function by pressing Fn+H.
- Hard-drive activity light: Illuminates when the computer is reading from or writing to the hard drive.
- Power and battery-status light: Shows the power and battery charge status.
- Solid white: Power adapter is connected, and the battery is more than 5% charged.
- Amber: Computer is running on battery, and the battery is less than 5% charged.
- Off: Power adapter is connected, and the battery is fully charged; or the computer is running on battery with more than 5% charge; or the computer is in sleep state, hibernation, or turned off.
Left View:
The left side of the computer includes several ports:
- Power-adapter port: Connects the power adapter to supply power to the computer.
- HDMI 1.4b port: Connects to a TV or other HDMI-in enabled device, providing video and audio output.
- USB 3.1 Gen 1 port with PowerShare: Connects peripherals like storage devices and printers, offering data transfer speeds up to 5 Gbps. PowerShare allows you to charge USB devices even when the computer is off.
- NOTE: If the computer is off or in hibernate state, the power adapter must be connected to charge devices via PowerShare. This feature needs to be enabled in the BIOS setup program.
- NOTE: Some USB devices may not charge when the computer is off or in sleep state; in such cases, turn on the computer to charge them.
- USB 3.1 Gen 1 port: Connects peripherals such as storage devices and printers, with data transfer speeds up to 5 Gbps.
- Headset port: Connects headphones or a headset (combining headphone and microphone functions).
Right View:
The right side of the computer features:
- Power button:
- Press to turn on the computer if it's off, in sleep state, or hibernate state.
- Press to put the computer into sleep state if it's on.
- Press and hold for 4 seconds to force a shut-down.
- NOTE: The power-button behavior can be customized in Power Options. Refer to Me and My Dell at www.dell.com/support/manuals for more information.
- Volume-control button: Increases or decreases the volume.
- SD-card slot: Reads from and writes to SD cards.
- USB 2.0 port: Connects peripherals such as storage devices and printers, with data transfer speeds up to 480 Mbps.
- Security-cable slot (for Noble locks): Connects a security cable to prevent unauthorized movement of the computer.
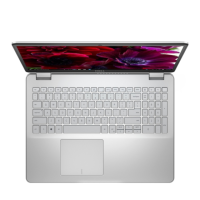
Base View:
The base of the computer includes:
- Left speaker: Provides audio output.
- Service Tag label: A unique alphanumeric identifier used by Dell service technicians to identify hardware components and access warranty information.
- Right speaker: Provides audio output.
Display View:
The display area includes:
- Left microphone: Provides digital sound input for audio recording and voice calls.
- Infrared emitter (optional): Emits infrared light, enabling the infrared camera to sense depth and track motion.
- Infrared camera (optional): A depth-sensing camera feature that enhances security when paired with Windows Hello face authentication.
- Camera: Enables video chat, photo capture, and video recording.
- Camera-status light: Turns on when the camera is in use.
- Right microphone: Provides digital sound input for audio recording and voice calls.
Keyboard Shortcuts
The keyboard offers various shortcuts, though characters may differ based on language configuration. The shortcut keys themselves remain consistent.
- Fn+Esc: Toggles the primary behavior of function keys (F1-F12) between multimedia key mode and function key mode.
- NOTE: You can define the primary behavior of shortcut keys by pressing Fn+Esc or by changing "Function Key Behavior" in System Setup.
- Fn+H: Toggles between power and battery-status light and hard-drive activity light. This feature is only supported on computers shipped with a hard drive.
Dell provides several self-help resources:
- Dell Help & Support app: For general assistance.
- Get started app: For initial guidance.
- Online help: For operating system support (www.dell.com/support/windows, www.dell.com/support/linux).
- Troubleshooting information, user manuals, setup instructions, product specifications, technical help blogs, drivers, and software updates: Available at www.dell.com/support.
- Dell knowledge base articles:
- Go to www.dell.com/support.
- Type your subject or keyword in the "Search" box at the top-right corner.
- Click "Search" to find related articles.
- Me and My Dell: For product-specific information, including product specifications, operating system details, setup and usage, data backup, troubleshooting, factory/system restore, and BIOS information. Access it at www.dell.com/support/manuals.
- To locate relevant "Me and My Dell" content, identify your product by selecting "Detect Product," locating it through the "View Products" drop-down menu, or entering the Service Tag number or Product ID in the search bar.
For sales, technical support, or customer service, visit www.dell.com/contactdell.
- NOTE: Availability of services may vary by country and product.
- NOTE: If you lack an active internet connection, contact information can be found on your purchase invoice, packing slip, bill, or Dell product catalog.