Back to Contents Page
Base Assembly
Dell™Latitude™E6500ServiceManual
Removing the Bottom of the Base Assembly
Replacing the Bottom of the Base Assembly
Removing the Base Assembly
Replacing the Base Assembly
Before working inside your computer, read the safety information that shipped with your computer. For additional safety best practices information, see the
Regulatory Compliance Homepage at: www.dell.com/regulatory_compliance.
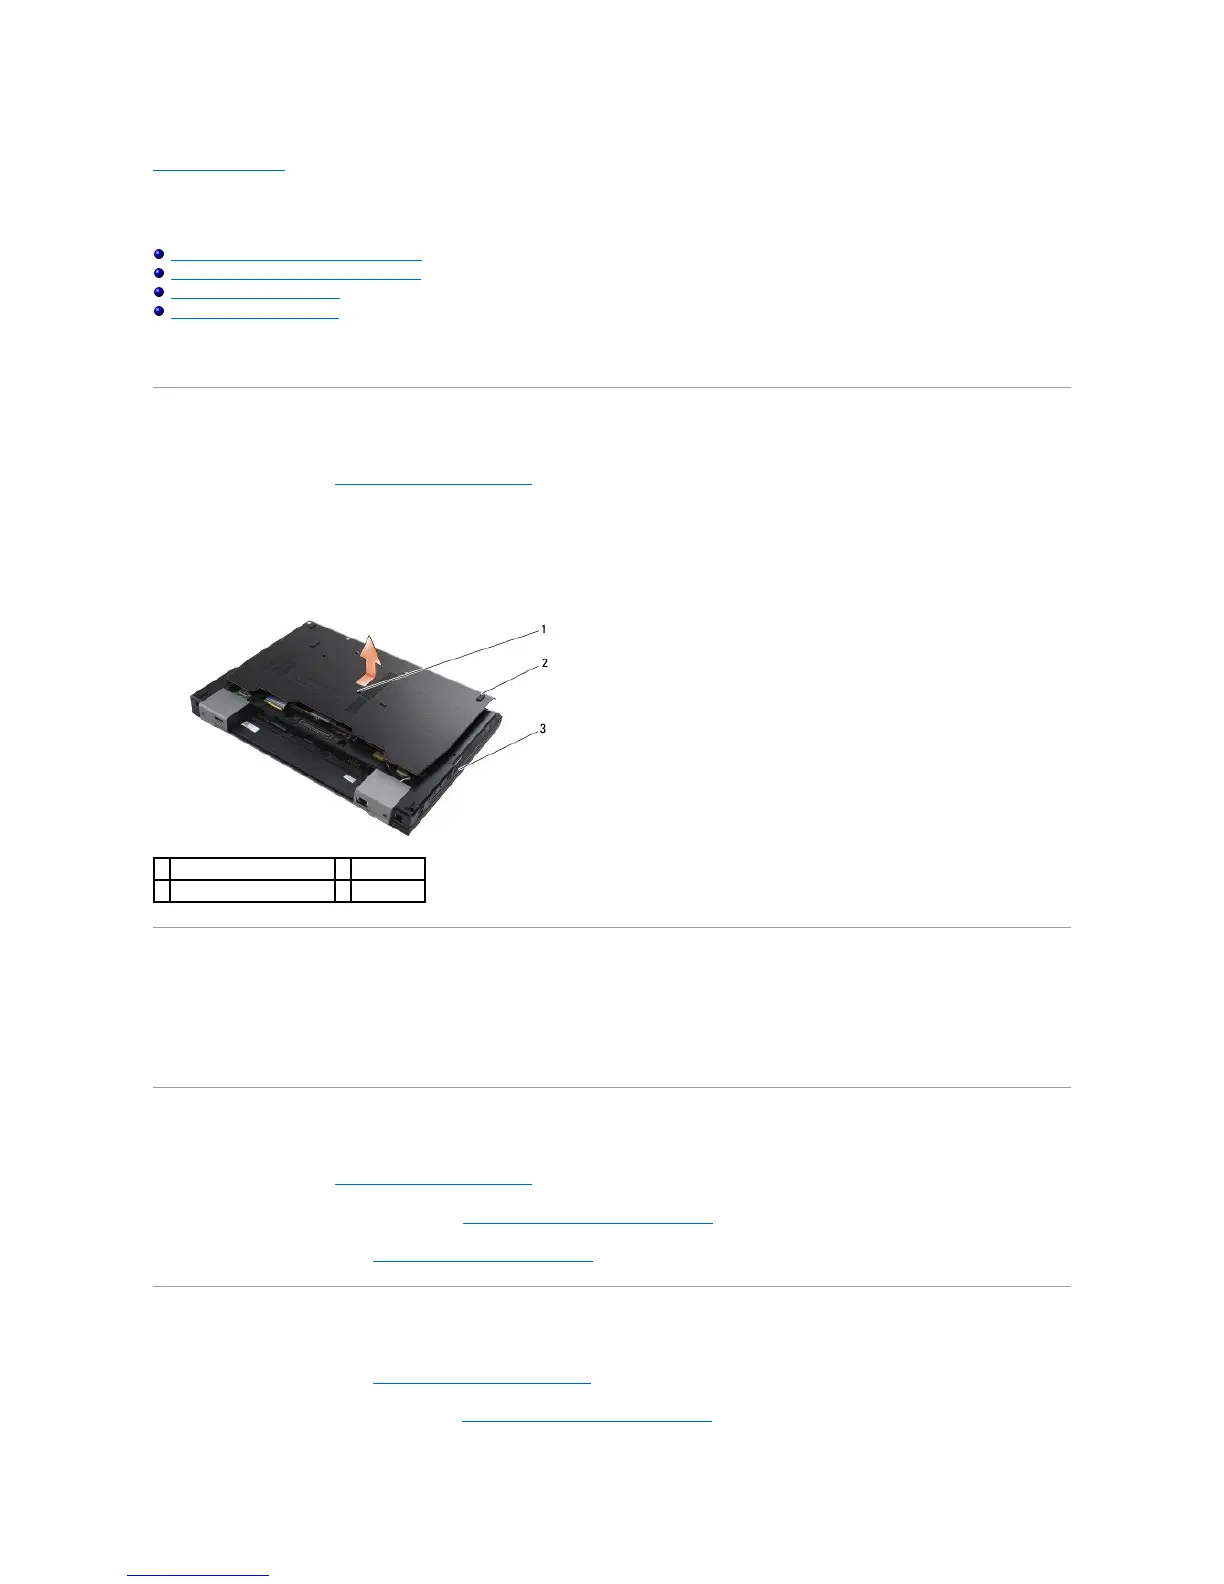
Removing the Bottom of the Base Assembly
1. Follow the procedures in Before Working on Your Computer.
2. Close the display and turn the computer over.
3. Loosen the M2.5 x 5-mm capture screw.
4. Using the rubber feet for leverage, slide the bottom of the base assembly away from computer, then lift to remove it.
Replacing the Bottom of the Base Assembly
1. Slide the bottom of the base assembly into place.
2. Replace the M2.5 x 5-mm captive screw.
Removing the Base Assembly
1. Follow the procedures in Before Working on Your Computer.
2. Remove the bottom of the base assembly (see Removing the Bottom of the Base Assembly).
3. Remove the system board (see Removing the System Board Assembly).
Replacing the Base Assembly
1. Replace the system board (see Replacing the System Board Assembly).
2. Replace the bottom of the base assembly (see Replacing the Bottom of the Base Assembly).