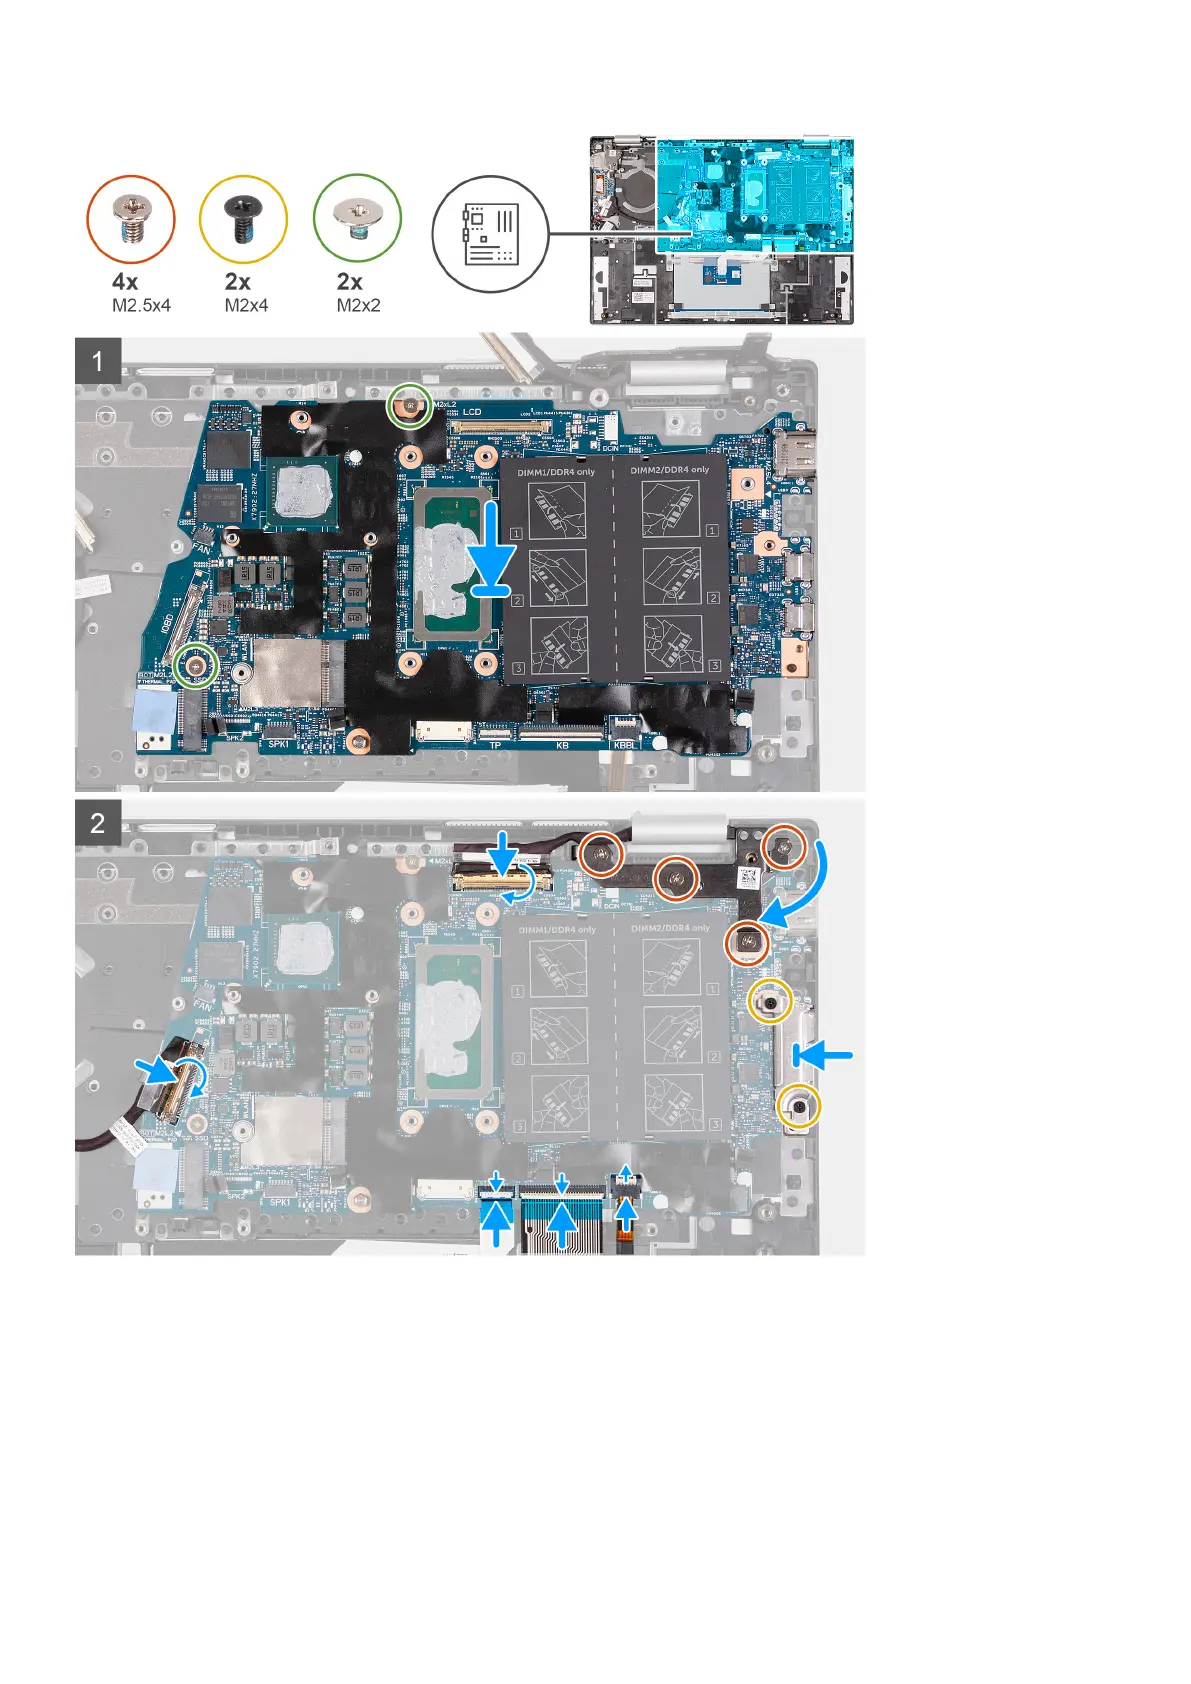
Steps
1. Align and place the system board on the palm-rest and keyboard assembly.
2. Replace the two screws (M2x2) that secure the system board to the palm-rest and keyboard assembly.
3. Connect the display cable to the connector on the system board and close the latch to secure the cable.
4. Connect the keyboard-backlight cable into the connector on the system board and close the latch to secure the cable.
5. Connect the keyboard cable to the connector on the system board and close the latch to secure the cable.
6. Connect the touchpad cable to the connector on the system board and close the latch to secure the cable.
7. Connect the I/O-board cable to the connector on the system board and close the latch to secure the cable.
Removing and installing components
53