Back to Contents Page
Setting Up the Monitor
Dell™U2711FlatPanelMonitorUser's Guide
Connecting the Monitor
Organizing Your Cables
Attaching the Soundbar (optional)
Connecting Your Monitor
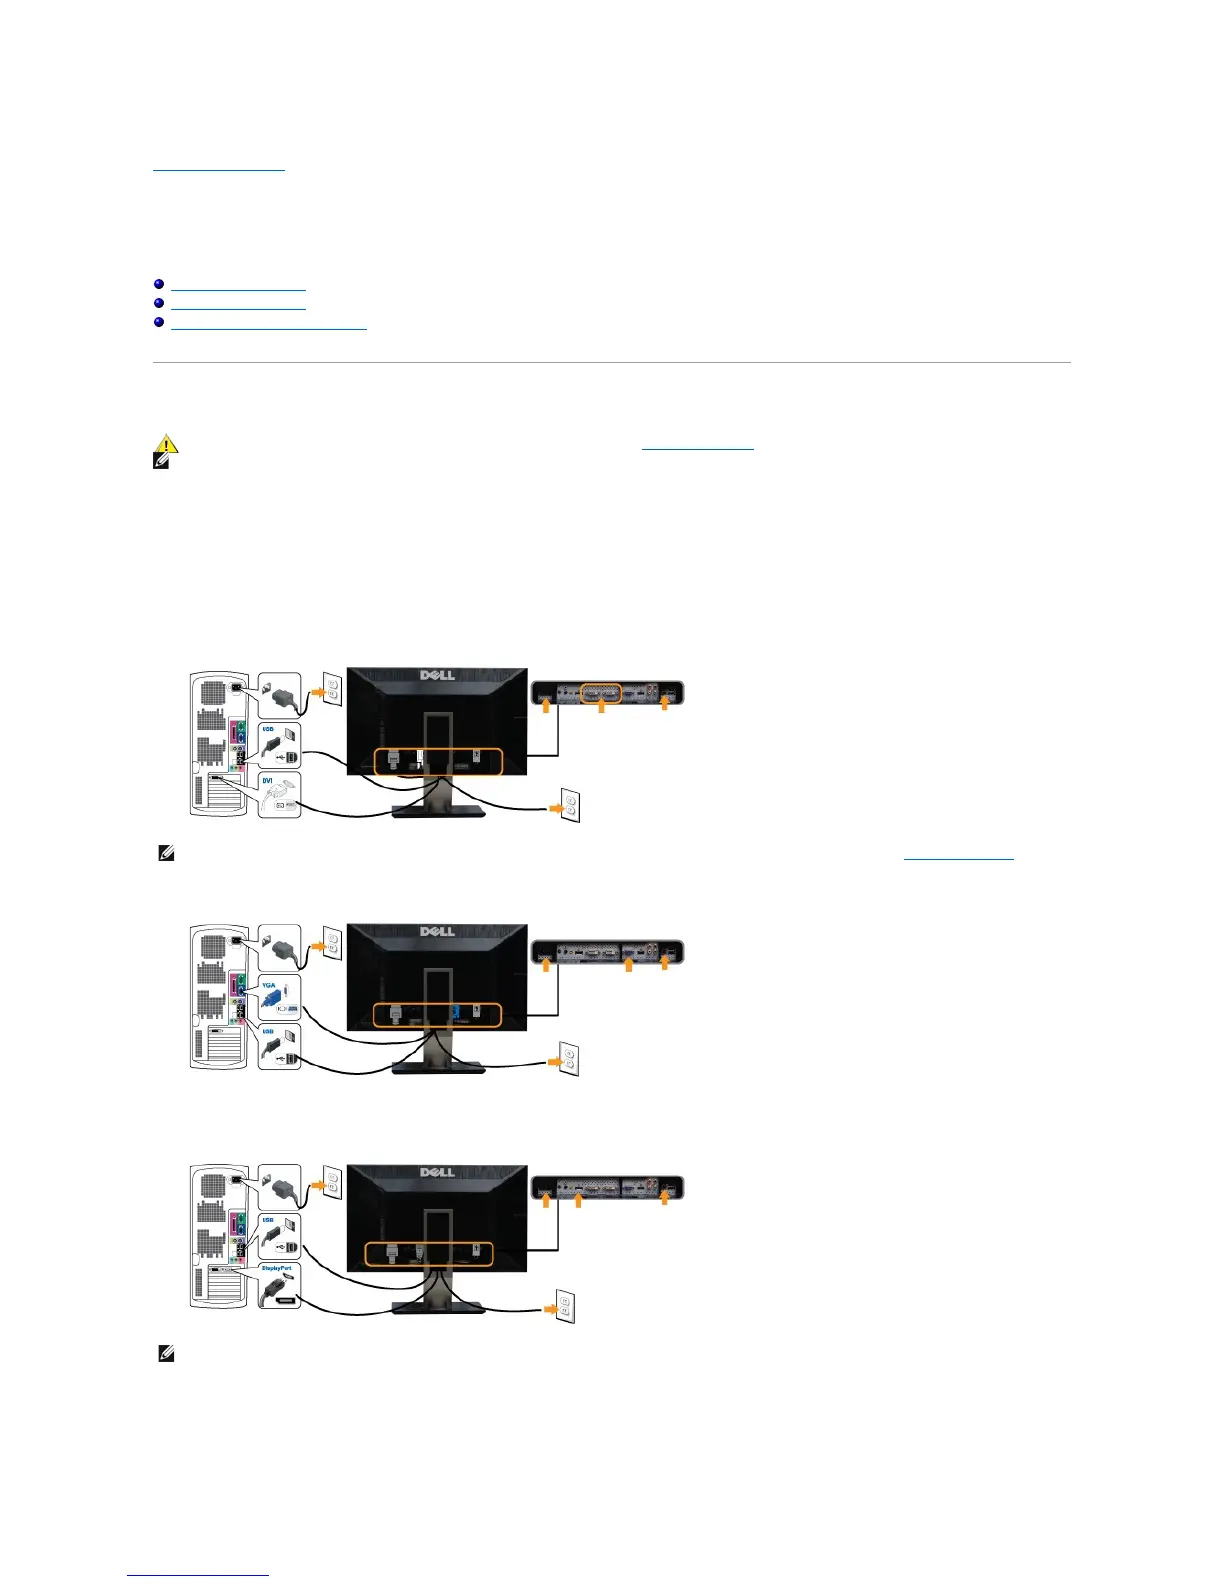
To connect your monitor to the computer perform the following steps/instructions:
l Turnoffyourcomputeranddisconnectthepowercable.
l Connect the USB uplink cable.
l Connect either the white (digital DVI-D) display connector cable, the blue (analog VGA) display connector cable, or the black DisplayPort cable to the
correspondingvideoportonthebackofyourcomputer.Donotuseall the cables on the same computer. Use all the cables only when they are
connectedtodifferentcomputerswithappropriatevideosystems.
Connecting the White DVI Cable and the USB uplink cable
Connecting the Blue VGA Cable and the USB uplink cable
Connecting the Black DisplayPort Cable and the USB uplink cable
After you have completed connecting the DVI/VGA/DisplayPort cable, follow the procedure below to complete setting up your monitor:
l Plugthepowercablesforyourcomputerandmonitorintoanearbyoutlet.
l Turn on the monitor and the computer.