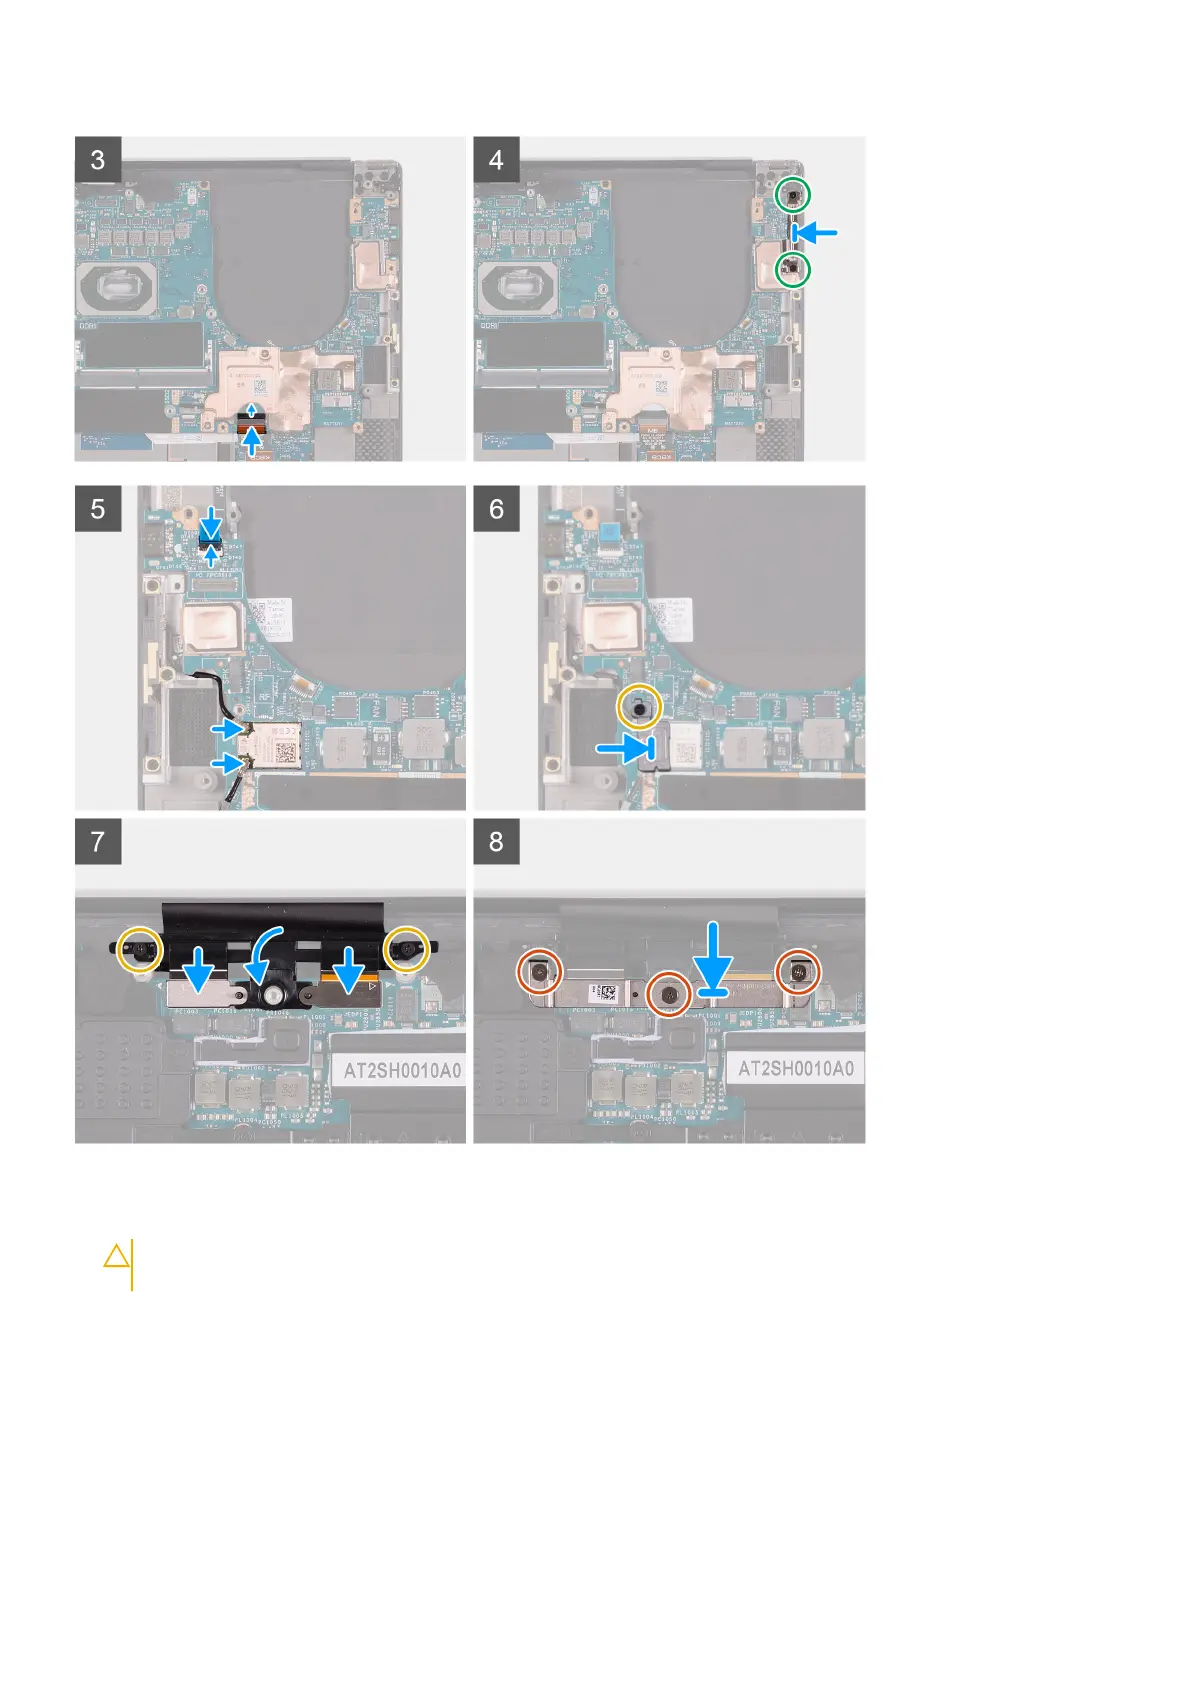
Steps
1. Hold the system board firmly at the top and bottom portions of the system board.
CAUTION:
DO NOT hold the system board at the sides on the left and right as it will damage the system
board.
2. Place the system board on the palm-rest and keyboard assembly.
3. Align the screw holes on the system board with the screw holes on the palm-rest and keyboard assembly.
4. Replace the two screws (M2x4) that secure the system board to the palm-rest and keyboard assembly.
5. Connect the keyboard-control board cable to the system board and close the latch to secure the cable.
6. Align the screw holes on the Type-C bracket with the screw holes on the palm-rest and keyboard assembly.
7. Replace the two screws (M2x4) that secure the Type-C bracket to the palm-rest and keyboard assembly.
8. Connect the fingerprint reader-board cable to the system board and close the latch to secure the cable.
9. Connect the right speaker cable to the system board.
Removing and installing components
45
 Loading...