Adding and Replacing Parts 153
3
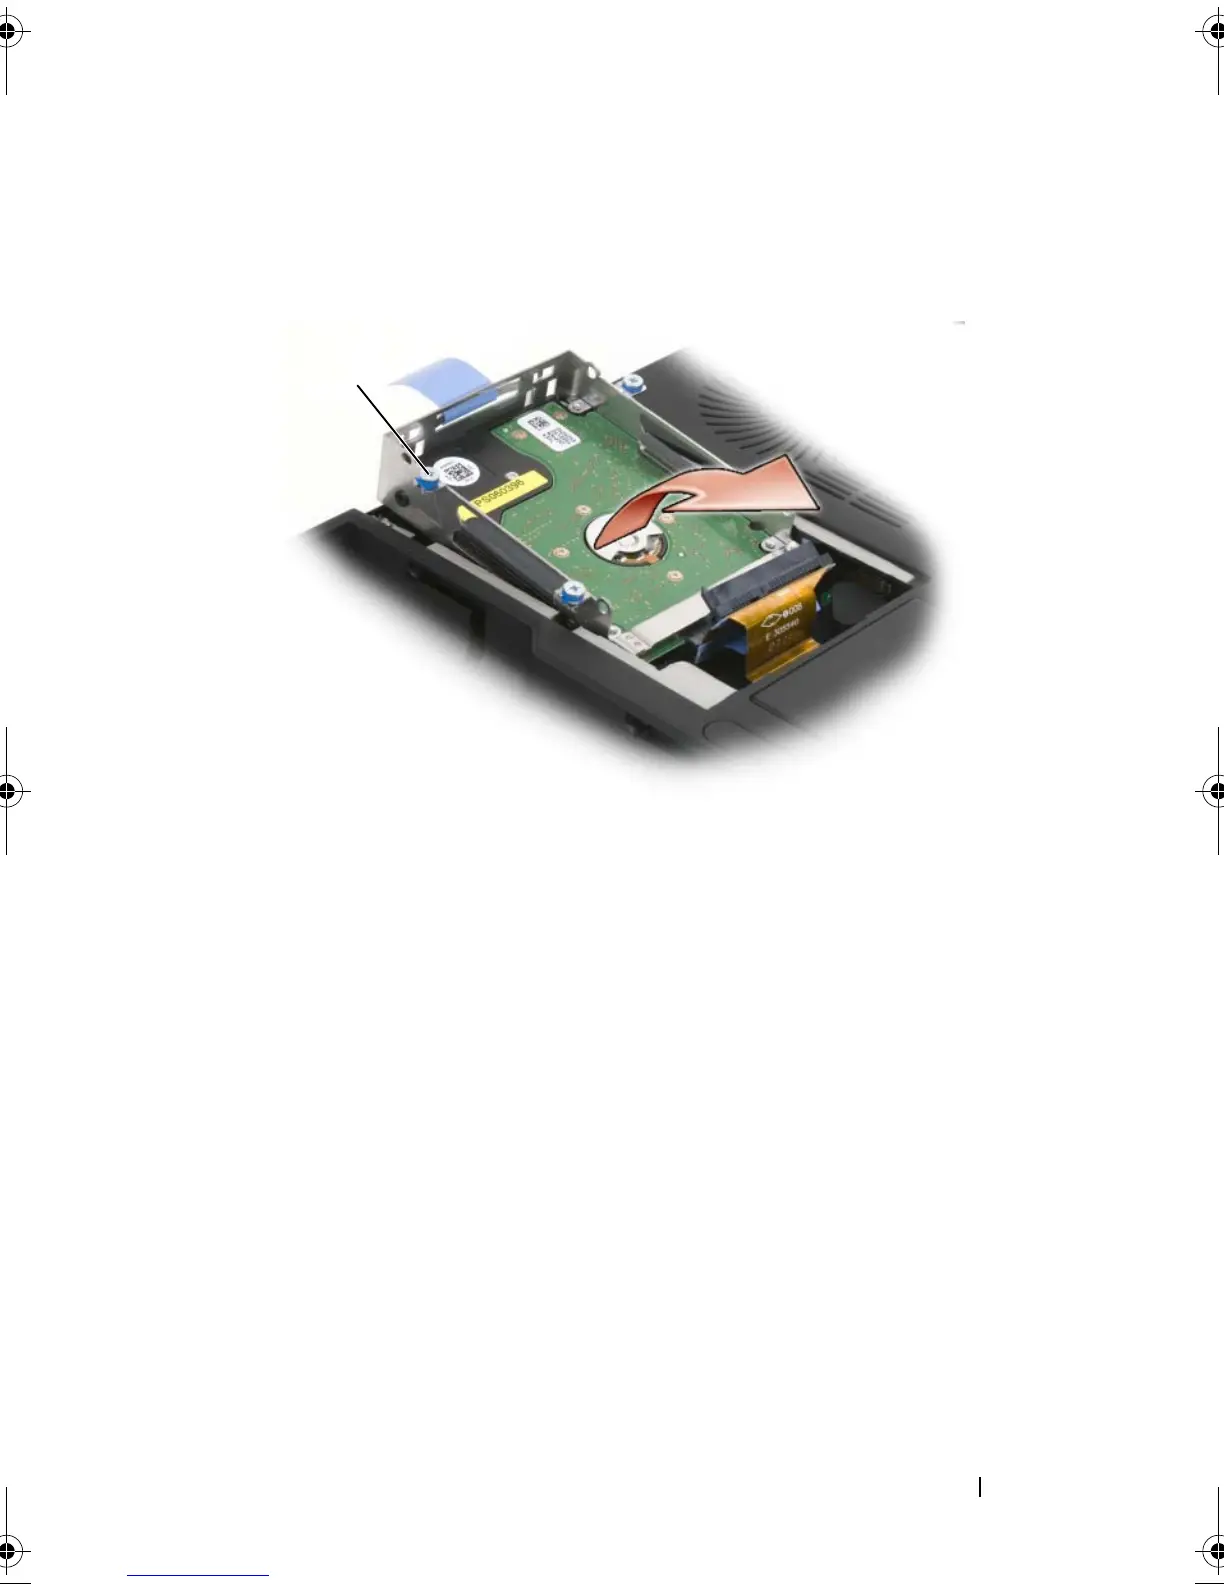
Loosen the four captive screws on the hard drive cage and then lift the
pull-tab to flip the cage towards the center of the computer so that the
SATA cables and connectors are accessible.
4
Carefully remove the SATA cables from the hard drive or drives that are
installed in the cage.
1 captive screws (4)
1
book.book Page 153 Monday, April 14, 2008 4:23 PM