Adding and Replacing Parts 161
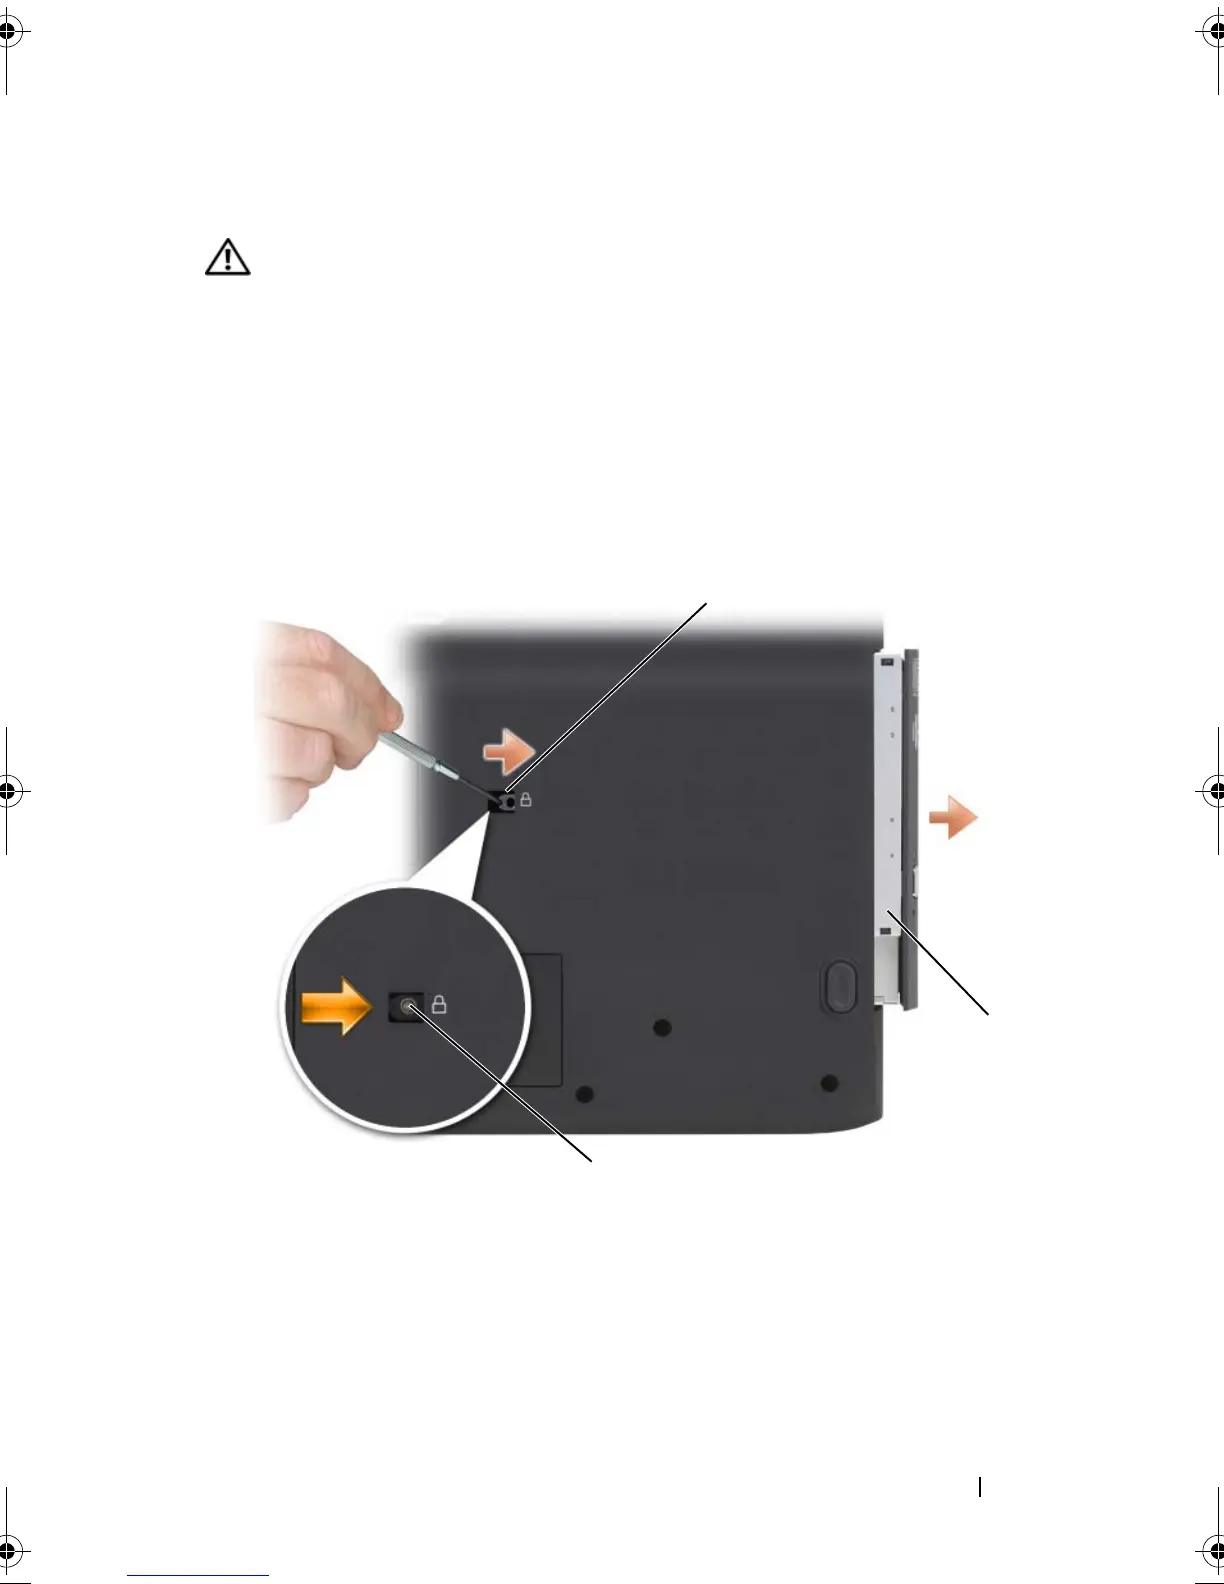
Optical Drive
CAUTION: Before you begin any of the procedures in this section, follow the
safety instructions in the Product Information Guide.
1
Follow the procedures in "Before You Begin" on page 149.
2
Save and close any open files, exit any open programs, and shut down the
computer.
3
Remove the optical-drive locking screw.
4
Insert a scribe into the notch and push it to the side to release the drive
from the bay.
5
Slide the drive out of the bay.
To reinstall the optical drive, slide the drive into the drive bay and snap it into
place. Then replace the optical-drive security screw.
1 optical drive 2 locking screw
3 notch
1
2
3
book.book Page 161 Monday, April 14, 2008 4:23 PM