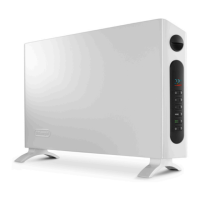
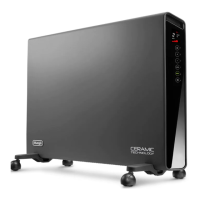
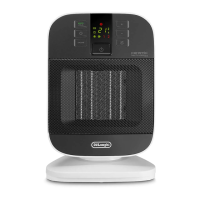
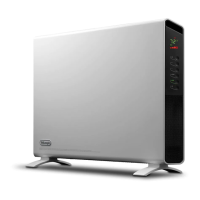
This document describes the HSX Series Convector heater, a De'Longhi appliance designed for heating rooms. It can be used as a free-standing unit or wall-mounted.
Function Description
The HSX Series Convector is a heating appliance that operates by convection, providing warmth to a room. Some models are also equipped with a fan for more rapid and uniform heating. The heater features a thermostat for temperature control, a power selector to choose between different heating levels (Min, Med, Max), and a timer for scheduled operation. An anti-tilt safety device is included to ensure safe operation.
Important Technical Specifications
- Power Supply and Consumption: Refer to the appliance rating plate for specific details.
- Minimum Clearances:
- Free-standing: 500mm above, 200mm to the sides, 75mm from the front.
- Wall-mounted: 900mm (min) above, 300mm (min) to the sides, 400mm (min) from the bottom, 600mm (min) from the top.
- Room Size: Not recommended for rooms with a surface area of less than 4 m².
- Safety Features:
- Overheat protection: The appliance is fitted with a safety device that turns it off in case of accidental overheating.
- Anti-tilt safety device: Activates if the appliance is not standing upright on a flat surface.
- Freezing protection: Maintains a room temperature of approximately 5°C with minimum energy consumption when the thermostat is set to the snowflake symbol.
Usage Features
Installation:
The appliance can be used free-standing or wall-mounted.
- Free-standing: Feet assembly involves inserting two hooks into slots, rotating the foot until engaged, inserting two pins into their respective holes, and fixing with supplied screws (F) 3.5x13 PH.
- Wall-mounted: Requires a kit including metal brackets (G, H), screws (I) 3.5x9.5 PH, screws (J) 4.5x25 PH, and plastic wall plugs (K) 6x30. Installation involves marking drilling spots, drilling holes, inserting wall plugs, fixing brackets (G) with screws (J), hanging the appliance, marking lower fixing points, drilling lower holes, inserting wall plugs, and securing the bottom with remaining screws (J). Minimum distances from walls must be respected (Figure 5). The device must not be placed directly under a power socket, and the plug and power socket must be easily accessible after installation.
Operation:
- Switching On: Insert the plug into the socket and switch on at the socket. The warning lamp (A) lights up.
- Power Selection (C):
- Min: Minimum power.
- Med: Medium power.
- Max: Maximum power.
- Max with Fan (X): For models with a fan, this setting provides rapid and uniform heating.
- Thermostat Adjustment (B): Turn the thermostat knob clockwise to higher settings to increase temperature. Once the desired room temperature is reached, turn the knob slowly anticlockwise until a click is heard and the warning lamp (A) goes out. The thermostat will automatically maintain the temperature.
- Freezing Protection: Set the thermostat knob (B) to the snowflake symbol and select a power level. The appliance will maintain a temperature of about 5°C.
- Timer (E) (for models with 24-hour timer):
- The timer is always active and synchronized with local time when connected to power.
- To operate without the timer, position the timer slider (D) to OFF.
- To operate at set times, position the timer slider (D) to ON (Figure 1).
- Setting the Timer: Check the current time and turn the numbered programmer disk until the corresponding number aligns with the pointer. Push the teeth outwards for the periods you want the appliance to operate (each tooth represents 30 minutes). The appliance will then function automatically each day at the set times, provided it remains connected to the power supply.
- To modify settings, return teeth to the initial position and reset.
- Switching Off: Turn the power selector to "0" and the thermostat to the snowflake symbol, then disconnect from the power socket.
Important Usage Notes:
- Never cover the appliance during operation to avoid overheating.
- Do not use an extension lead as it may overheat.
- Never lay the power cable on top of the appliance when it is hot.
- Do not rest anything on the appliance.
- Keep textiles, curtains, or any other flammable material a minimum distance of 1 m from the air outlet.
- Never place the appliance on long pile rugs or carpets to avoid obstructing the air intake grille on the bottom.
- Avoid positioning the appliance in a draught as strong air currents can reduce efficiency.
- Use the heater on a horizontal and stable surface, in a vertical position only.
- Do not use if the appliance has been dropped, fallen over, or shows visible signs of damage.
- During the first use, operate on maximum for at least 15 minutes to eliminate the "new" smell; a little smoke may be given off, which is normal.
- Ensure the plug and socket are easily accessible.
- The appliance is fitted with a safety device for overheating; to reset, unplug, remove the cause of overheating, then plug in again.
- The appliance is not intended for use by persons (including children) with reduced physical, sensory or mental capabilities, or lack of experience and knowledge, unless supervised. Children should be supervised to ensure they do not play with the appliance.
- Do not use this heater in small rooms when occupied by persons not capable of leaving the room on their own, unless constant supervision is provided.
- The appliance must not be placed directly under a fixed socket.
- To avoid risks associated with accidental resetting of the safety system, this appliance must not be powered through an external timer.
- Do not obstruct the air intake and outlet area.
- The plug on the appliance heats up during use, which is normal. Ensure the power socket is in good condition.
Maintenance Features
- Before Maintenance: Disconnect the appliance from the power supply and wait for it to cool down completely.
- Cleaning: Remove dust with a soft, dry cloth. Do not use abrasive powders or solvents. For concentrated dirt, use a vacuum cleaner.
- Storage: Ensure the appliance is completely cool and unplugged before putting it away. Do not store in dusty atmospheres.
Troubleshooting
- Appliance doesn't work:
- Cause: Plug not inserted properly or socket switch is off. Solution: Insert plug, switch on.
- Cause: Obstruction. Solution: Remove obstruction, disconnect, let cool. If problem persists, contact customer experience.
- Cause: Power selector in "0" position. Solution: Move power selector to MIN, MED, MAX, or MAX with fan.
- Cause: Thermostat set too low. Solution: Turn thermostat knob clockwise to higher settings until heater restarts.
- Cause: Timer setting. Solution: Ensure timer is correctly set to local time and check teeth positions.
- Cause: Anti-tilt safety device activated. Solution: Ensure appliance is standing upright on a flat surface. If problem persists, contact customer service.