EasyManua.ls Logo

DeLonghi Magnifica XS ECAM22110B - User Manual

DeLonghi Magnifica XS ECAM22110B
14 pages
Print Icon
To Next Page IconTo Next Page
Loading...
6
CONTENTS
IMPORTANT SAFEGUARDS ........................................7
SAVE THESE INSTRUCTIONS �������������������������������������������������������7
SHORT CORD INSTRUCTIONS .....................................7
INTRODUCTION .......................................................8
Symbols used in these instructions ������������������������������������������� 8
Letters in brackets ���������������������������������������������������������������������8
Troubleshooting and repairs �����������������������������������������������������8
DESCRIPTION �����������������������������������������������������������������������������8
Description of the appliance �����������������������������������������������������8
Description of the control panel ������������������������������������������������ 8
Description of the accessories ���������������������������������������������������8
Description of lights ������������������������������������������������������������������ 9
PRELIMINARY CHECKS .............................................9
Checking the appliance ������������������������������������������������������������� 9
Installing the appliance ������������������������������������������������������������ 9
Connecting the appliance ��������������������������������������������������������� 9
Using the appliance for the rst time ���������������������������������������� 9
TURNING THE APPLIANCE ON .................................10
TURNING THE APPLIANCE OFF ...............................10
AUTOOFF ..............................................................10
ENERGY SAVING ..................................................... 10
WATER SOFTENER FILTER .......................................11
Installing the lter ������������������������������������������������������������������ 11
Removing and replacing the lter ������������������������������������������11
MAKING COFFEE ....................................................11
Selecting the coee taste ��������������������������������������������������������11
Selecting the quantity of coee in the cup ����������������������������� 11
Adjusting the coee mill ��������������������������������������������������������� 12
Setting the temperature ��������������������������������������������������������� 12
Tips for a hotter coee ������������������������������������������������������������ 12
Making coee using coee beans ������������������������������������������� 12
Making coee using pre-ground coee ���������������������������������� 13
MAKING CAPUCCINO .............................................13
Cleaning the cappuccino maker after use �������������������������������� 13
HEATING WATER ....................................................13
CLEANING .............................................................14
Cleaning the coee maker ������������������������������������������������������14
Cleaning the drip tray and condensate tray ����������������������������� 14
Cleaning the inside of the coee maker ���������������������������������� 14
Cleaning the water tank ����������������������������������������������������������14
Cleaning the coee spouts ������������������������������������������������������ 14
Cleaning the pre-ground coee funnel ����������������������������������� 14
Cleaning the infuser ����������������������������������������������������������������14
DESCALE ...............................................................15
SETTING WATER HARDNESS ....................................16
Measuring water hardness ������������������������������������������������������16
Set water hardness �����������������������������������������������������������������16
TECHNICAL SPECIFICATION .....................................16
EXPLANATION OF LIGHTS .......................................17
TROUBLESHOOTING ...............................................18
LIMITED WARRANTY ..............................................19
Question and Answer IconNeed help?

Do you have a question about the DeLonghi Magnifica XS ECAM22110B and is the answer not in the manual?

Summary

Important Safeguards

Save These Instructions

Instructions for safekeeping.

Short Cord Instructions

Introduction

Symbols Used in These Instructions

Explains warning symbols for safety and operation.

Letters in Brackets

Clarifies references to appliance parts in text.

Troubleshooting and Repairs

Guidance on initial problem-solving and contacting support.

Description

Description of the Appliance

Detailed breakdown of appliance components and their functions.

Description of the Control Panel

Explanation of control panel buttons, lights, and indicators.

Description of the Accessories

Lists and describes the included accessories.

Preliminary Checks

Checking the Appliance

Steps to verify appliance completeness and condition after unboxing.

Installing the Appliance

Safety guidelines and placement advice for setting up the appliance.

Connecting the Appliance

Instructions for properly connecting the appliance to a power source.

Using the Appliance for the First Time

Initial setup steps and recommendations for first operation.

Turning the Appliance On

Turning the Appliance Off

Auto-Off

Energy Saving

Water Softener Filter

Installing the Filter

Step-by-step guide to installing the water softener filter.

Removing and Replacing the Filter

Instructions for filter maintenance and replacement.

Making Coffee

Selecting the Coffee Taste

How to adjust coffee strength using the taste selection dial.

Selecting the Quantity of Coffee in the Cup

Method for programming custom coffee volume per cup.

Adjusting the Coffee Mill

Setting the Temperature

Tips for a Hotter Coffee

Making Coffee Using Coffee Beans

Making Coffee Using Pre-ground Coffee

Making Cappuccino

Cleaning the Cappuccino Maker After Use

Procedure for cleaning the cappuccino maker to prevent blockages.

Heating Water

Cleaning

Cleaning the Coffee Maker

General advice on cleaning the appliance and its components.

Cleaning the Coffee Grounds Container

Instructions for emptying and cleaning the grounds container.

Cleaning the Drip Tray and Condensate Tray

How to empty and clean the drip and condensate trays.

Cleaning the Inside of the Coffee Maker

Procedure for cleaning the internal parts of the appliance.

Cleaning the Water Tank

Routine cleaning of the water tank.

Cleaning the Coffee Spouts

How to clean the coffee spouts and clear blockages.

Cleaning the Pre-ground Coffee Funnel

Checking and cleaning the pre-ground coffee funnel.

Cleaning the Infuser

Instructions for cleaning and maintaining the infuser unit.

Descale

Infuser Support

Details on infuser support and lever adjustment.

Setting Water Hardness

Measuring Water Hardness

Steps to measure water hardness using the test paper.

Set Water Hardness

Procedure to program the appliance with the measured water hardness.

Technical Specification

Explanation of Lights

Troubleshooting

Limited Warranty

Overview

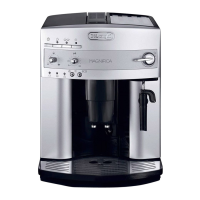
This document describes the ECAM 22.110 automatic coffee and cappuccino maker, a versatile appliance designed for domestic use. It provides comprehensive instructions for operation, maintenance, and troubleshooting, ensuring a safe and enjoyable user experience.

Function Description

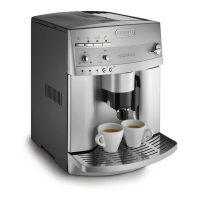
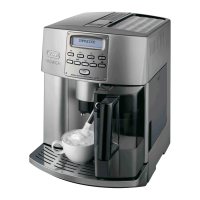
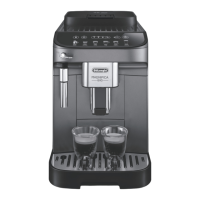
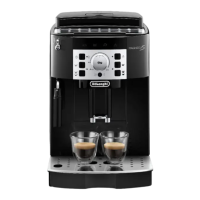
The ECAM 22.110 is an automatic coffee machine capable of preparing espresso, long coffee, and cappuccinos using either coffee beans or pre-ground coffee. It features a built-in coffee mill with adjustable grinding settings, allowing users to customize the coffee taste and strength. The appliance also includes a cappuccino maker for frothing milk, and a hot water function for other beverages.

Usage Features

Initial Setup and First Use: Before initial use, users must read all instructions carefully. The appliance requires checking for completeness and damage after unpacking. Installation involves placing it on a worktop, ensuring adequate space for heat dissipation, and avoiding proximity to water sources. The power cord should be arranged to prevent damage. The machine operates on a polarized alternating current line plug, and users are advised to ensure proper electrical connection. For the first use, the water tank must be filled, a container placed under the cappuccino maker, and the main switch turned on. The appliance performs an automatic preheat and rinse cycle, indicated by a flashing light. After turning the steam dial to the "I" position and allowing water to flow, the machine is ready for normal use. It's noted that the first 4-5 cups of coffee or cappuccinos may not yield satisfactory results as the machine calibrates.

Turning On/Off and Auto-Off: The appliance is turned on by pressing a dedicated button, initiating an automatic preheat and rinse cycle. During rinsing, hot water flows from the coffee spouts, which users should avoid contact with. The machine is ready when the preheat light turns off and coffee button lights come on. To turn off, the same button is pressed, and another rinse cycle is performed. For extended periods of inactivity, the main switch should also be set to the "0" position. An important warning advises against turning off the main switch before the appliance has completed its shutdown sequence via the button, to prevent damage. The machine has an auto-off feature, defaulting to 2 hours of inactivity, which can be adjusted to 15 or 30 minutes, or 1, 2, or 3 hours via a specific button sequence.

Energy Saving Mode: The appliance includes an "Energy Saving" mode to reduce power consumption, compliant with European regulations. This mode is active when a green ECO light is on. It can be enabled or disabled through a button sequence, with a steady ECO light indicating activation and a flashing light indicating deactivation. A brief delay may occur in coffee delivery when exiting energy-saving mode as the appliance reheats.

Water Softener Filter: Certain models are equipped with a water softener filter, which is recommended for purchase if not included. The filter should be stored in a cool, dry place and used immediately after opening. It must be removed before descaling. Installation involves rinsing the filter, setting a calendar disk to indicate replacement time (approximately two months or three weeks if unused), filling the water tank, inserting the filter, and then running hot water through the cappuccino maker until the flow is regular. If a single hot water delivery is insufficient, the installation process should be repeated. The filter should be removed and replaced after two months or three weeks of inactivity.

Making Coffee:

  • Selecting Coffee Taste: Users can adjust the coffee taste from extra mild (MIN) to extra strong (MAX) by turning the coffee taste selection dial. Clockwise rotation increases the quantity of coffee beans ground, enhancing strength. Initial use may require trial and error to find the preferred setting. Over-tightening the dial towards MAX can slow coffee delivery.
  • Selecting Coffee Quantity: The appliance has default settings for espresso and long coffee quantities (1.35 fl. oz. for espresso, 4 fl. oz. for long coffee). These quantities can be customized by pressing and holding the desired coffee button until delivery begins, then releasing and pressing again when the desired level is reached in the cup.
  • Adjusting the Coffee Mill: The coffee mill is factory-preset but can be adjusted if coffee is too thin, not creamy, or delivered too slowly. Adjustments should only be made while the coffee mill is in operation. Turning the grinding adjustment dial clockwise makes the coffee finer (for slower delivery or less creamy coffee), while turning it anticlockwise makes it coarser (for fuller-bodied, creamier coffee). Adjustments become evident after at least two cups.
  • Setting Temperature: The water temperature for coffee can be adjusted (LOW, MEDIUM, HIGH) through a specific button sequence when the machine is off but connected to power.
  • Tips for Hotter Coffee: To achieve hotter coffee, users can rinse the appliance by pressing the rinse button to heat internal circuits, warm cups with hot water, or set a hotter coffee temperature.
  • Using Coffee Beans: Users fill the beans container, place one or two cups under the adjustable coffee spouts (lowering them for creamier coffee), and press the button corresponding to the desired number of coffees. Preparation begins, and the selected button's light flashes. Delivery can be interrupted at any time, and additional coffee can be added within 3 seconds of delivery completion. Caramelized or candied beans should not be used as they can damage the mill.
  • Using Pre-ground Coffee: Only one cup of pre-ground coffee can be made at a time. Users must ensure the appliance is on, turn the coffee taste selection dial to the pre-ground coffee position, add one level measure of pre-ground coffee to the funnel, place a cup under the spouts, and press the 1-cup coffee button. Pre-ground coffee should never be added when the machine is off, nor should more than one level measure be used, to prevent damage or blockages.

Making Cappuccino: To make cappuccino, users first prepare coffee in a large cup. Then, they fill a container with about 3.4 oz/100 grams of milk (preferably skim or 2% milk at refrigerator temperature) for each cappuccino, noting that milk volume triples when frothed. The cappuccino maker is immersed in the milk, and after a few seconds, the steam dial is turned to the "I" position to deliver steam. The container is rotated with slow upward movements to create creamy froth. Steam delivery should not exceed 3 minutes. Once the desired froth is achieved, the steam dial is returned to "0." An important warning advises stopping steam delivery before removing the frothed milk container to avoid burns. The frothed milk is then added to the prepared coffee, and cocoa powder can be sprinkled if desired.

Heating Water: To heat water, a container is placed under the cappuccino maker, the steam dial is turned to "I" to begin delivery, and then returned to "0" to stop. Users are warned not to leave the machine unsupervised and to handle the hot water spout by its handle.

Maintenance Features

Cleaning: Regular cleaning of various parts is crucial for the appliance's longevity and performance. These parts include the coffee grounds container, drip tray, condensate tray, water tank, coffee spouts, pre-ground coffee funnel, the inside of the machine, and the infuser. Solvents, abrasive detergents, alcohol, and metal objects should not be used for cleaning. De'Longhi recommends its own descaler, made from natural and biodegradable substances. None of the components are dishwasher safe.

  • Coffee Grounds Container: When the corresponding light flashes, the grounds container must be emptied and cleaned. Failure to do so will prevent the appliance from being used. Cleaning involves removing the drip tray, emptying and thoroughly cleaning the grounds container, and checking/emptying the condensate tray. The grounds container must always be emptied when the drip tray is removed, even if it contains few grounds, to prevent clogging.
  • Drip Tray and Condensate Tray: The drip tray has a red level indicator; it must be emptied and cleaned before the indicator protrudes from the cup tray to prevent water overflow and potential damage. The process involves removing the drip tray and grounds container, emptying and washing them, checking/emptying the condensate tray, and then replacing them.
  • Inside of the Coffee Maker: The internal parts, accessible after removing the drip tray, should be checked monthly for coffee deposits and cleaned with a sponge. Residues can be removed with a vacuum cleaner. Before cleaning internal parts, the machine must be turned off and unplugged.
  • Water Tank: The water tank should be cleaned monthly with a damp cloth and mild washing-up liquid.
  • Coffee Spouts: The coffee spouts should be cleaned with a sponge or cloth, and the holes checked for blockages, using a toothpick if necessary.
  • Pre-ground Coffee Funnel: The pre-ground coffee funnel should be checked monthly for blockages and cleaned if necessary.
  • Infuser: The infuser must be cleaned at least once a month. This involves ensuring the machine is off, removing the water tank, opening the infuser door, and then pressing two red release buttons to pull out the infuser. The infuser should be soaked in water for about 5 minutes, rinsed under the tap, and cleaned without dish soap to avoid damage. Coffee residues from its support should also be cleaned. To reinsert, the infuser is slid onto the internal support and pushed until it clicks into place, ensuring the two red buttons snap out. If difficult to insert, two levers on the infuser can be pressed to adjust its size.

Descaling: The appliance must be descaled when the descaling light flashes. De'Longhi descaler is recommended, and sulphamic or acetic-based descalers should not be used as they invalidate the guarantee. The descaling procedure involves turning on the appliance, emptying the water tank and removing the softener filter, pouring descaler into the tank up to level A, adding water up to level B, and placing an empty container under the cappuccino maker. Once coffee lights are steady, the descaling process is initiated by pressing and holding a specific button for 5 seconds. The descaling light remains steady, and another light flashes, indicating to turn the steam dial to the "I" position. Descaler solution flows out of the cappuccino maker in a series of rinses and pauses. After about 30 minutes, when the water tank is empty and specific lights flash, the steam dial is turned to "0." The container is emptied, and the water tank is removed, rinsed, filled with clean water, and replaced. The appliance then performs a final rinse.

Setting Water Hardness: Descaling frequency depends on water hardness. The machine is factory-set for a hardness value of 4, but this can be reprogrammed based on local water supply hardness to reduce descaling frequency. Water hardness is measured using an indicator paper provided, which is immersed in water for one second, then shaken. After about a minute, red squares appear, indicating the hardness level (1 to 4). To set the water hardness, the appliance is turned off but connected to power, a button is pressed and held for 6 seconds until ECO and other lights come on, then a specific button is pressed to cycle through hardness levels, and finally, another button is pressed to confirm the selection. The machine is then reprogrammed with the new water hardness setting.

DeLonghi Magnifica XS ECAM22110B Specifications

General IconGeneral
ModelECAM22110B
ColorBlack
Weight9 kg
Water Tank Capacity1.8 L
Coffee Bean Container Capacity250 g
Pump Pressure15 bar
Power1450 W
Voltage220-240 V
Milk FrotherYes
ProgrammableYes
Removable Brew GroupYes
Adjustable Coffee StrengthYes
Adjustable Coffee TemperatureYes
Auto Shut-offYes
Cup WarmerYes
Dimensions23.8 x 43 x 34 cm
DisplayYes

Related product manuals