Do you have a question about the Delta 400-DST series and is the answer not in the manual?
Steps to resolve low flow, handle leaks, or spout leaks by cleaning parts or replacing the valve cartridge.
Secure faucet using gasket, tubes, and mounting nuts, applying sealant to uneven sink surfaces.
Install faucet by feeding tubes through sink hole and securing with mounting nuts, using sealant for uneven surfaces.
Secure faucet to sink using gasket, tubes, and mounting nuts, with sealant for uneven surfaces.
Connect 3/8" compression fittings, looping tubing if too long, and hand-tightening nuts plus one additional turn.
Ensure plastic sleeve is oriented correctly and slides down to engage the fitting top for a leak-free joint.
| Valve Type | Ceramic Disc |
|---|---|
| Brand | Delta |
| Category | Kitchen & Bath Fixtures |
| Series | 400-DST |
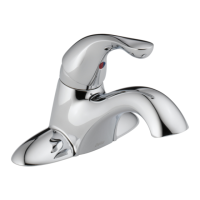
| Number of Handles | 1 |
| Handle Style | Lever |
| WaterSense Certified | Yes |
| ADA Compliant | Yes |
| Finish | Chrome |
| Flow Rate | 1.8 GPM |
| Mounting Type | Deck Mounted |