9
75106-PT Rev. A
Custom Fit Connections - Plastic Sleeve Installation Instructions
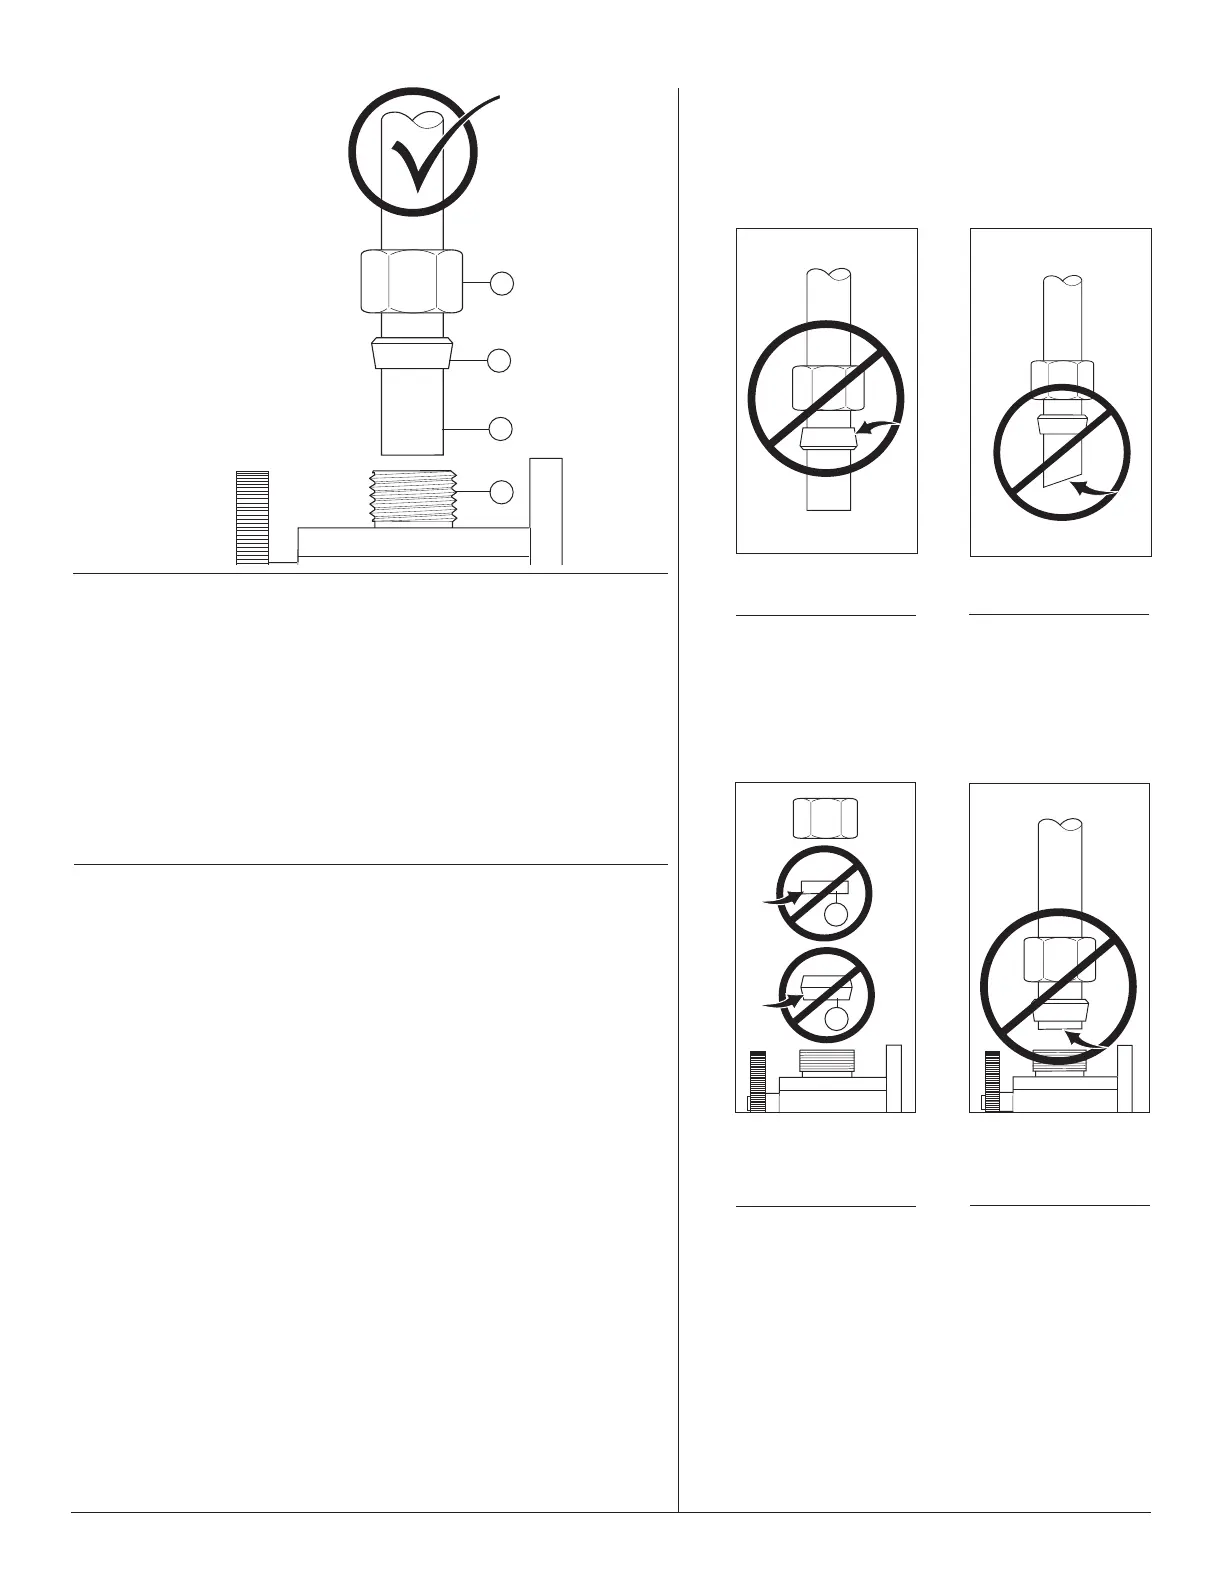
1. Identify desired length of tube (1). Leave 1" - 2" of extra length to allow for easier
installation and cut tube. Ensure cut is straight and burr free.
2. Slide nut (2) and plastic sleeve (3) onto cut tube. Ensure sleeve is oriented as shown.
3. Insert tube into outlet fitting (4). Tube should touch bottom of hole inside fitting.
4. Slide plastic sleeve down tube until it engages top of fitting. NOTICE: Failure to use
plastic sleeve in the correct orientation will result in disconnection and possible
water damage.
5. Slide nut over plastic sleeve. With wrench, tighten nut 2 turns past finger tight.
3
2
1
4
Ensure cut is straight.
Do not install sleeve
upside down.
Do not use RP51243 gasket
(1) supplied with PEX tubing
or brass ferrule (2) supplied
with valve stops.
Ensure tube is fully inserted
into stop before sliding sleeve
down to engage top of fitting.
Incorrect Installation
Instalação Incorreta
Correct Method
Método Correto
1
2
Não use a gaxeta
RP51243 (1) fornecida
com a tubulação PEX
nem virola de fixação de
bronze (2) fornecido com
as válvulas limitadoras.
Certifique-se que o
tubo foi completamente
inserido no limitador
antes de deslizar a
luva até engatar no
topo da conexão.
Conexões Sob Medida - Instruções de instalação da luva de
plástico
1. Identificar o comprimento desejado do tubo (1). Deixar 1 “- 2” de comprimento extra para
permitir uma instalação mais fácil; corte o tubo. Certifique-se que o corte está reto e sem
rebarbas.
2. Deslize a porca (2) e a luva plástica (3) no tubo cortado. Certifique-se que a luva foi
posicionada conforme indicado.
3. Introduza o tubo na conexão de saída (4). O tubo deve tocar o fundo do orifício dentro
do conector.
4. Deslize a luva de plástico para baixo do tubo até engatar no topo do conector.
AVISO: Falha em usar a luva plástica na posição correta resultará em corte de água
e possíveis danos.
5. Deslize a porca sobre a luva plástica. Usando a chave de fenda, aperte a porca 2 voltas
além do ajuste manual.
Certifique-se de que o
corte esteja reto.
Não instale a luva de cabeça
para baixo.
 Loading...