3 109561 Rev. C
E.
F.
Insert an adapter (9) and screw (8) into an end of the slide bar (2).
Use the included Allen wrench (7) to tighten the screw. Repeat
for the other end of the slide bar.
Inserte un adaptador (9) y un tornillo (8) en un extremo de la
barra corrediza (2). Utilice la llave Allen incluida (7) para apretar
el tornillo. Repita para el otro extremo de la barra corrediza.
Insérer un adaptateur (9) et la vis (8) dans une extrémité de la
barre coulissante (2). Utiliser la clé Allen incluse (7) pour serrer
la vis. Répéter l'opération pour l'autre extrémité de la barre
coulissante.
Once the adapters (9) and screws (8) are securely installed, screw
the decorative end caps (10) into the ends of the slide bar (2).
Una vez bien instalados los adaptadores (9) y tornillos (8), atornille las
tapas decorativas (10) en los extremos de la diapositiva de la barra (2).
Une fois que les adaptateurs (9) et les vis (8) sont solidement
installés, visser les embouts décoratifs (10) dans les extrémités de la
coulisse (2).
E
.
E
.
E
.
F
.
F
.
F
.
2
2
10
10
7
8
9
9
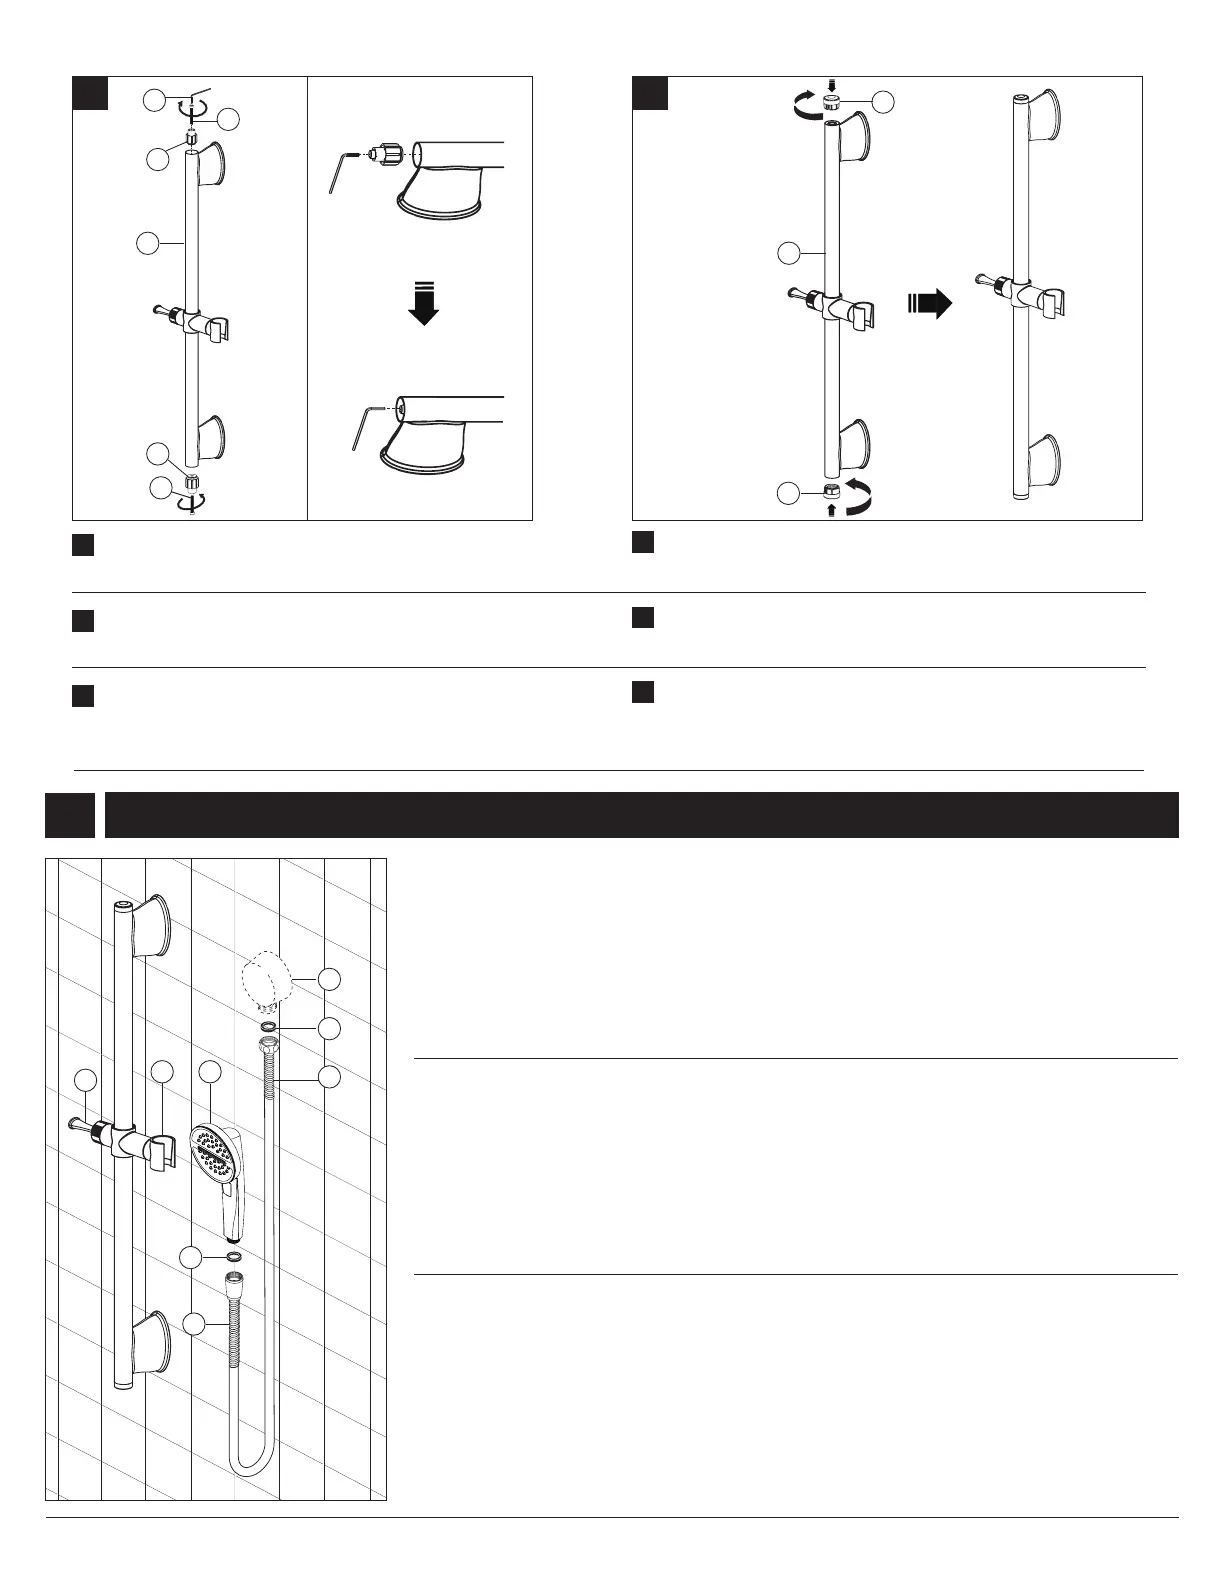
Hand Shower Installation 51386-
p
• Ensure gaskets (1) are inserted in both ends of the hose (2).
• Connect the hexagonal end of the hose to the supply elbow (3) not supplied.
• Connect the tapered end of the hose to the hand shower.
• Hand Tighten – do not use a wrench or pliers.
• Insert the hand shower (4) into the hand shower mount (5) on the slide bar.
• To slide the mount up or down, move the lever (6) of the mount up or down and slide the mount to the
desired height. To lock the mount at the desired height, move the lever (6) back to the center position.
NOTICE: Removal of or tampering with the ow restrictor may result in hand shower failure
and will void the warranty.
• Asegúrese de que las juntas (1) estén insertadas en ambos extremos de la manguera (2).
• Conecte el extremo hexagonal de la manguera al codo de suministro (3) no proporcionadas.
• Conecte el extremo cónico de la manguera a la regadera de mano.
• Apriete con la mano: no use una llave o alicates.
• Inserte la regadera de mano (4) en el soporte de la regadera de mano (5) en la barra deslizante.
• Para deslizar el soporte hacia arriba o hacia abajo, mueva la palanca (6) del soporte hacia arriba o hacia
abajo y deslice el soporte a la altura deseada. Para jar el soporte a la altura deseada, mueva la palanca (6)
de nuevo a la posición central.
AVISO: la eliminación o la manipulación del limitador de flujo puede provocar un fallo en el
cabezal de la regadera y anular la garantía.
• Assurez-vous que les joints (1) sont introduits dans les deux extrémités du tuyau souple (2).
• Raccordez l’extrémité hexagonale du tuyau souple au coude d’alimentation (3) non fournis.
• Raccordez l’extrémité conique du tuyau souple à la douche à main.
• Serrez les raccords à la main – N’utilisez pas de clé ni de pince.
• Introduisez la douche à main (4) dans le support de douche à main (5) sur la barre à glissière.
• Pour déplacer le support vers le haut ou vers le bas, relevez ou abaissez le levier (6) du support et faites
coulisser le support pour l’amener à la hauteur voulue. Pour bloquer le support à la hauteur voulue,
ramenez le levier (6) au centre.
AVIS : Le fait d’enlever ou de modifier le limiteur de débit peut entraîner un bris de la tête de
douche qui ne sera pas couvert par la garantie.
1
2
1
3
2
45
6
2.
8
 Loading...