61888 Rev. B
3
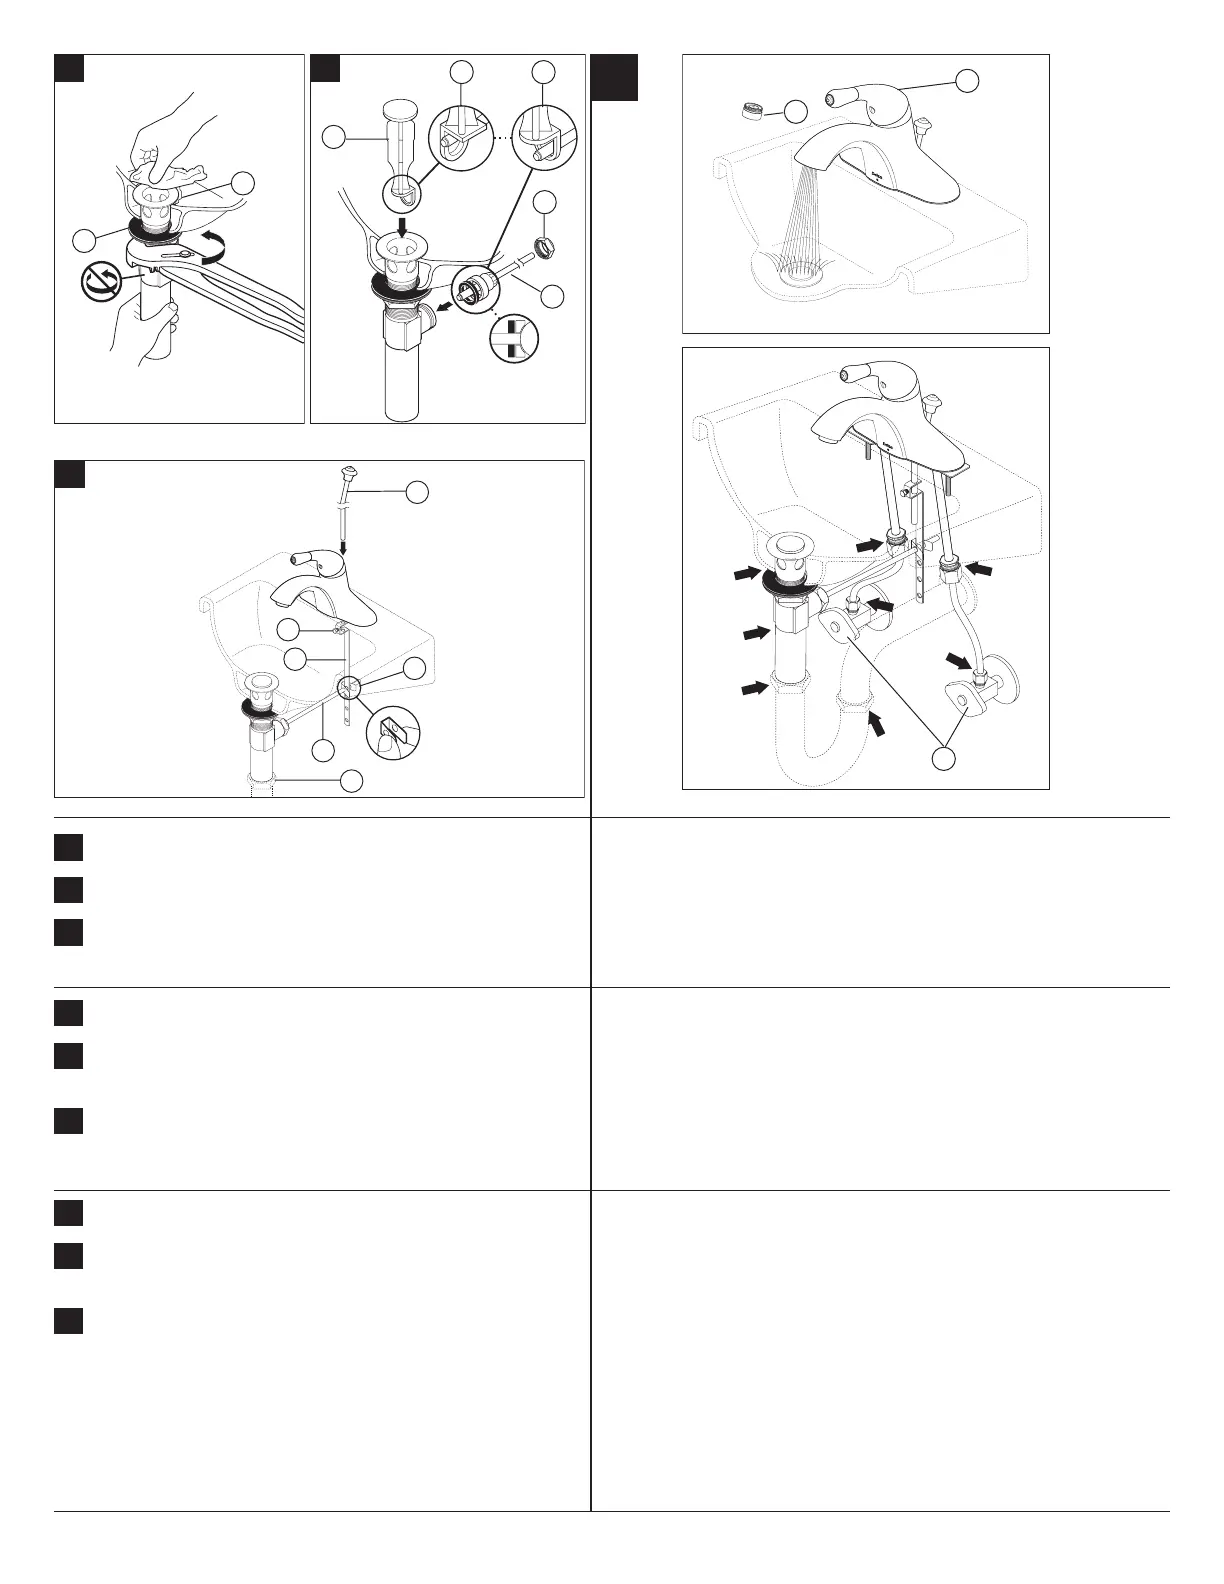
Tighten nut/washer/gasket (1), clean off excess silicone (2). DO NOT
TWIST.
F.
Remove aerator (1) and turn faucet handle (2) all the way on. Turn on hot and
cold water supplies (3) and flush water lines for one minute. Important: This
flushes away any debris that could cause damage to internal parts.
Check all connections at arrows for leaks. Re-tighten if necessary, but do not
overtighten.
Remove pivot nut (1). Install horizontal rod (2) and stopper (3) as
removable (4) or non-removable (5). Hand tighten pivot nut (1).
G.
Attach horizontal rod (1) to strap (2) using clip (3). Install lift rod (4),
tighten screw (5). Connect assembly to drain (6).
H.
3
1
2
1
3
4
5
2
1
5
3
4
2
6
Apriete la tuerca/arandela/empaque (1), limpie el exceso de silicón
(2). NO LO GIRE.
F.
Quite el aireador (1) y gire las manija de la llave (2) completamente a la
posición abierta. Abra los suministros de agua caliente y fría (3) y deje que
el agua corra por las líneas por un minuto. Importante: Esto limpia cualquier
escombro que pudiera causar daño a las partes internas.
Examine todas las conexiones donde señalan las flechas por si hay filtrciones
de agua. Apriete de nuevo si es necesario, pero no apriete demasiado.
Quite la tuerca del pivote (1). Instale la barra horizontal (2) y el tapón
(3) como desmontable (4) o fijo (5). Apriete a mano la tuerca del
pivote (1).
G.
Una la barra horizontal (1) a la barra chata (2) utilizando el gancho (3).
Instale la barra de alzar (4), apriete el tornillo (5). Conecte el ensamble
al desagüe (6).
H.
3
1
2
 Loading...