EasyManua.ls Logo

Delta Addison 2592 Series - User Manual

Delta Addison 2592 Series
6 pages
To Next Page IconTo Next Page
Loading...
SILICONE
T
E
F
L
O
N
Icons
TWO HANDLE LAVATORY
CENTERSET FAUCETS
LLAVES DE DOS MANIJAS
DE MONTURA DE CENTRO
PARA LAVAMANOS
ROBINETS À ENTRAXE
COURT À DEUX POIGNÉES
®
U
P
C
Model/Modelo/Modèle
2592 Series/Series/Seria
Addison™
Para instalación fácil de su llave Delta
usted necesitará:
•LEER TODAS las instrucciones completamente
antes de empezar.
•LEER TODOS los avisos, cuidados, e
información de mantenimiento.
•Comprarlasconexionescorrectasparael
suministro de agua.
For easy installation of your Delta
faucet you will need:
•ToREAD ALL the instructions completely
before beginning.
•ToREAD ALL warnings, care, and maintenance
information.
•Topurchasethecorrectwater supply hook-up.
SILICONE
T
E
F
L
O
N
Icons
Write purchased model number here.
Escriba aquí el número del modelo comprado.
Inscrivez le numéro de modèle ici.
You may need/Usted puede necesitar/
Articles dont vous pouvez avoir besoin:
SILICONE
T
E
F
L
O
N
Icons
SILICONE
T
E
F
L
O
N
Icons
Pour installer votre robinet Delta
facilement, vous devez:
•LIRE TOUTES les instructions avant de débuter;
•LIRE TOUS les avertissements ainsi que toutes
les instructions de nettoyage et d’entretien;
•Acheterlebonnécessairederaccordement.
SILICONE
SILICONE
®
ASME A112.18.1 / CSA B125.1
ASME A112.18.2 / CSA B125.2
ICC/ANSI A117.1
1
3/19/09 Rev. A
61298
61298
Question and Answer IconNeed help?

Do you have a question about the Delta Addison 2592 Series and is the answer not in the manual?

Delta Addison 2592 Series Specifications

General IconGeneral
FinishChrome
Number of Handles2
Mounting TypeDeck Mount
Handle StyleLever
Valve TypeCeramic Disc
ADA CompliantYes
WaterSense CertifiedYes
Lifetime Limited WarrantyYes
Product TypeBathroom Faucet
Flow Rate1.2 GPM
MaterialBrass

Summary

Two Handle Lavatory Center Set Faucets

Installation Steps

Position Faucet and Connect Water Lines

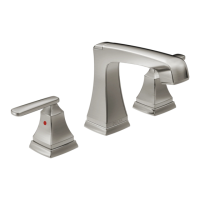
Install faucet on sink, hand tighten nuts, and connect water lines.

Handle Assembly and Securing

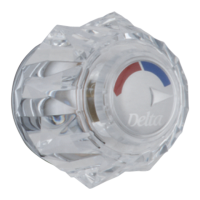
Ensure glide ring is pressed into handle, install handle, and secure with set screw.

Metal Pop-Up Assembly Installation

Pop-Up Assembly Preparation and Initial Steps

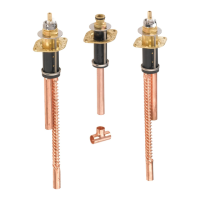
Steps A-C: Remove stopper, screw nut down, push washer/gasket, prepare tailpiece.

Pop-Up Assembly Final Steps and Drain Connection

Steps D-H: Apply silicone, insert body, connect rod to strap, connect to drain.

Final Installation Procedures

Aerator Flushing and Leak Checks

Flush water lines after removing aerator, then check all connections for leaks.

Maintenance and Troubleshooting Leaks

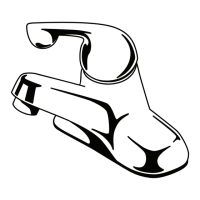
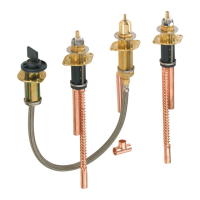
Address faucet leaks by replacing seats, springs, or stem unit assembly.

Product Care and Warranty

Cleaning and Care Instructions

Gentle cleaning with a damp cloth and soft towel for product maintenance.

Lifetime Faucet and Finish Warranty

Details warranty coverage, exclusions, and how to obtain replacement parts.

Related product manuals