Do you have a question about the Delta ASHLYN Series and is the answer not in the manual?
List of items you may need for faucet installation.
Read all instructions, warnings, care, and maintenance information before starting.
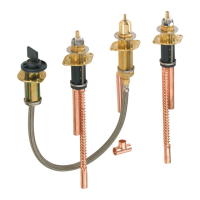
Place black valve anchors into outermost left and right sink holes.
Place grey spout anchor into the center sink hole.
Align anchors by placing lift rod into notches on anchor assemblies.
Lightly tighten screws, then firmly tighten them until secure.
Orient and feed hot valve assembly tubes through the anchor.
Use provided wrench to tighten anchor nuts securely.
Place handle bases over anchors, ensuring tabs fit into slots.
Place spout base over spout anchor, ensuring tabs fit into slots.
Feed spout tube through the anchor, aligning it to the center.
Align mounting shank and pin with the corresponding holes on the anchor.
Use hex wrench to tighten spout to sink, ensuring it contacts the base.
Insert tubing into connectors, bend if needed, and ensure straight cuts.
Addresses common problems like perpendicular cuts and tubing removal.
Connecting 3/8" compression fittings and ensuring a leak-free joint.
Using RP50952 sleeves and nuts for custom PEX tubing installations.
Solutions for issues like short tubing, lost parts, or incorrect fittings.
Detailed steps for correct installation of plastic sleeves onto PEX tubing.
Steps to remove and reattach the stopper, flange, and tailpiece.
Connect horizontal rod to strap and install lift rod into strap.
Adjust the handle stop position for correct rotation.
Steps for fixing low water flow, handle leaks, and spout leaks.
Tips for cleaning the faucet finish to prevent damage.
Warranty coverage for faucet parts and finishes against manufacturing defects.
Warranty for electronic parts and batteries, including duration and exclusions.
How to obtain replacement parts and required documentation for warranty claims.
| Brand | Delta |
|---|---|
| Handle Style | Lever |
| ADA Compliant | Yes |
| WaterSense Certified | Yes |
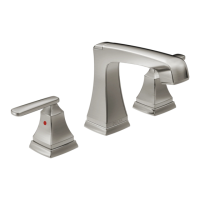
| Collection | Ashlyn |
| Category | Bathroom Fixtures |
| Finish | Chrome |
| Flow Rate | 1.2 GPM (Gallons Per Minute) |
| Product Type | Bathroom Faucet |
| Spout Reach | Varies by model |
| Spout Height | Varies by model |