B.
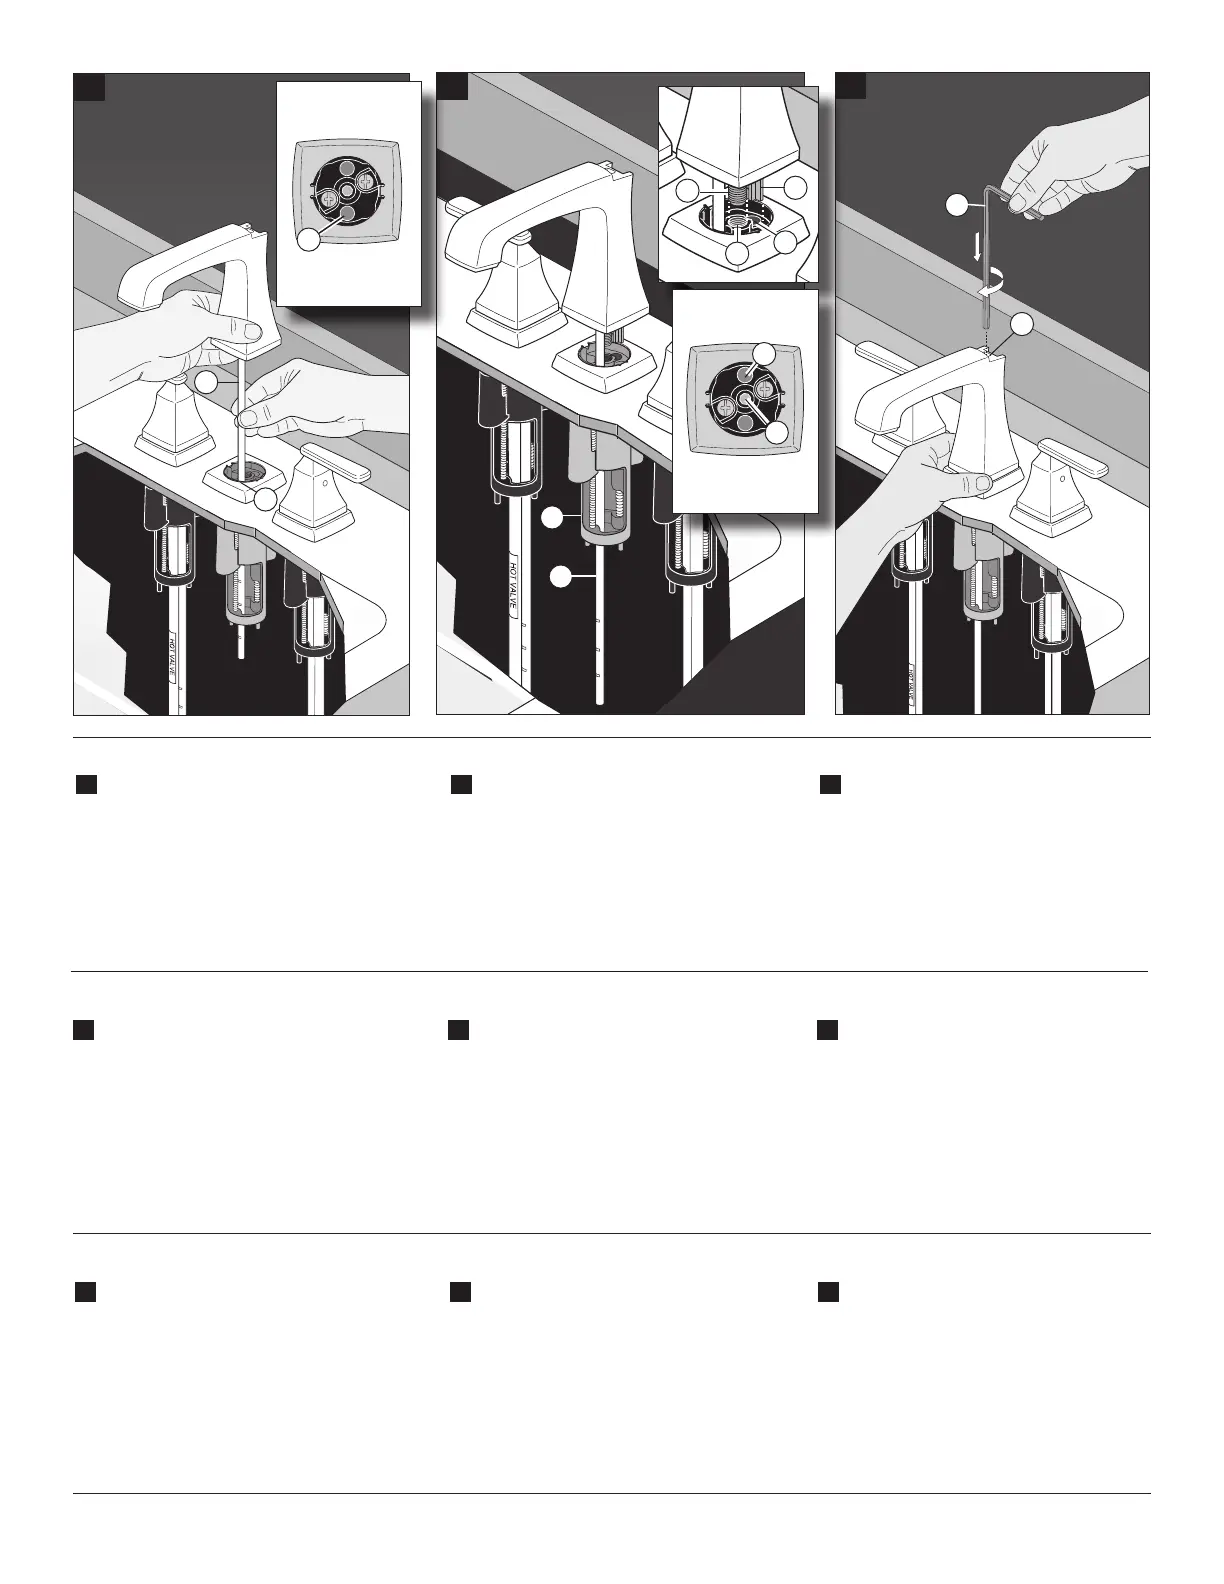
Feed spout tube (1) through indicated
hole (2) in the anchor, continuing through the
center of the anchor. Align spout to center of
the anchor. Note: Hole for spout tube is
near front of anchor. Do not insert through
center hole of anchor.
C.
Spout tube (1) should be inserted completely
through anchor assembly (2) as shown. Align
mounting shank (3) with center threaded
hole (4) and pin (5) with hole (6).
D.
Insert the large hex wrench (1) into lift rod
hole (2) in spout. Ensure wrench is fully
engaged inside hex hole of mounting shank.
While holding spout down, rotate hex wrench
(1) clockwise to tighten spout to sink. Fully
tighten until spout contacts base and resists
movement.
1
Front
Frente
Avant
2
1
2
B
.
C
.
D
.
77310 Rev. G
5
1
2
3
4
5
6
4
6
2
B.
Introduzca el tubo del surtidor (1) a través
del oricio indicado (2) en el ancla,
continuando a través del centro del ancla.
Alinee la boquilla hacia el centro del ancla.
Nota: El oricio para el tubo del surtidor
está cerca del frente del ancla. No lo
introduzca a través del agujero central del
ancla.
C.
El tubo del surtidor (1) se debe insertar
completamente a través del ensamble del
ancla (2) como se muestra. Alinee la espiga
de montaje (3) con el agujero roscado (4) y
el pasador (5) con el agujero (6).
D.
Inserte la llave hexagonal grande (1) en el
orificio de la barrita del desagüe (2) en el
surtidor. Asegúrese que la llave esté
completamente acoplada dentro del agujero
hexagonal de la espiga de montaje. Mientras
mantiene el surtidor hacia abajo, gire la llave
hexagonal (1) hacia la derecha para apretar
la espiga. Apriete por completo hasta que el
surtidor haga contacto con la base y ya no
se puede mover.
B.
Introduisez le tube du bec (1) dans le trou
indiqué (2) de l’ancrage et enfoncez-le
jusqu’au centre de l’ancrage. Orientez le bec
vers le centre de l’ancrage. Note : Le trou
pour le tube du bec se trouve près de
l’avant de l’ancrage. N’introduisez pas le
tube dans le trou au centre de l’ancrage.
C.
Le tube du bec (1) doit être introduit
complètement dans l’ancrage (2) comme le
montre la gure. Faites correspondre le
manchon (3) avec le trou leté au centre (4)
et l’axe (5) avec le trou (6).
D.
Introduisez la grosse clé hexagonale (1)
dans le trou de la tirette (2), dans le bec.
Assurez-vous que la clé est insérée à fond
dans le trou hexagonal du manchon. Tout en
maintenant le bec bien appuyé, tournez la
clé hexagonale (1) dans le sens horaire pour
fixer le bec sur l’évier. Serrez jusqu’à ce que
le bec entre en contact avec la base et que
la clé refuse de tourner.
Top View
Vista superior
Vue de dessus
Front
Frente
Avant
Top View
Vista superior
Vue de dessus
 Loading...