3
102360 Rev. D
21
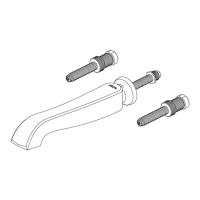
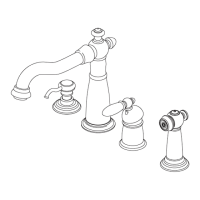
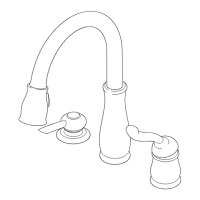
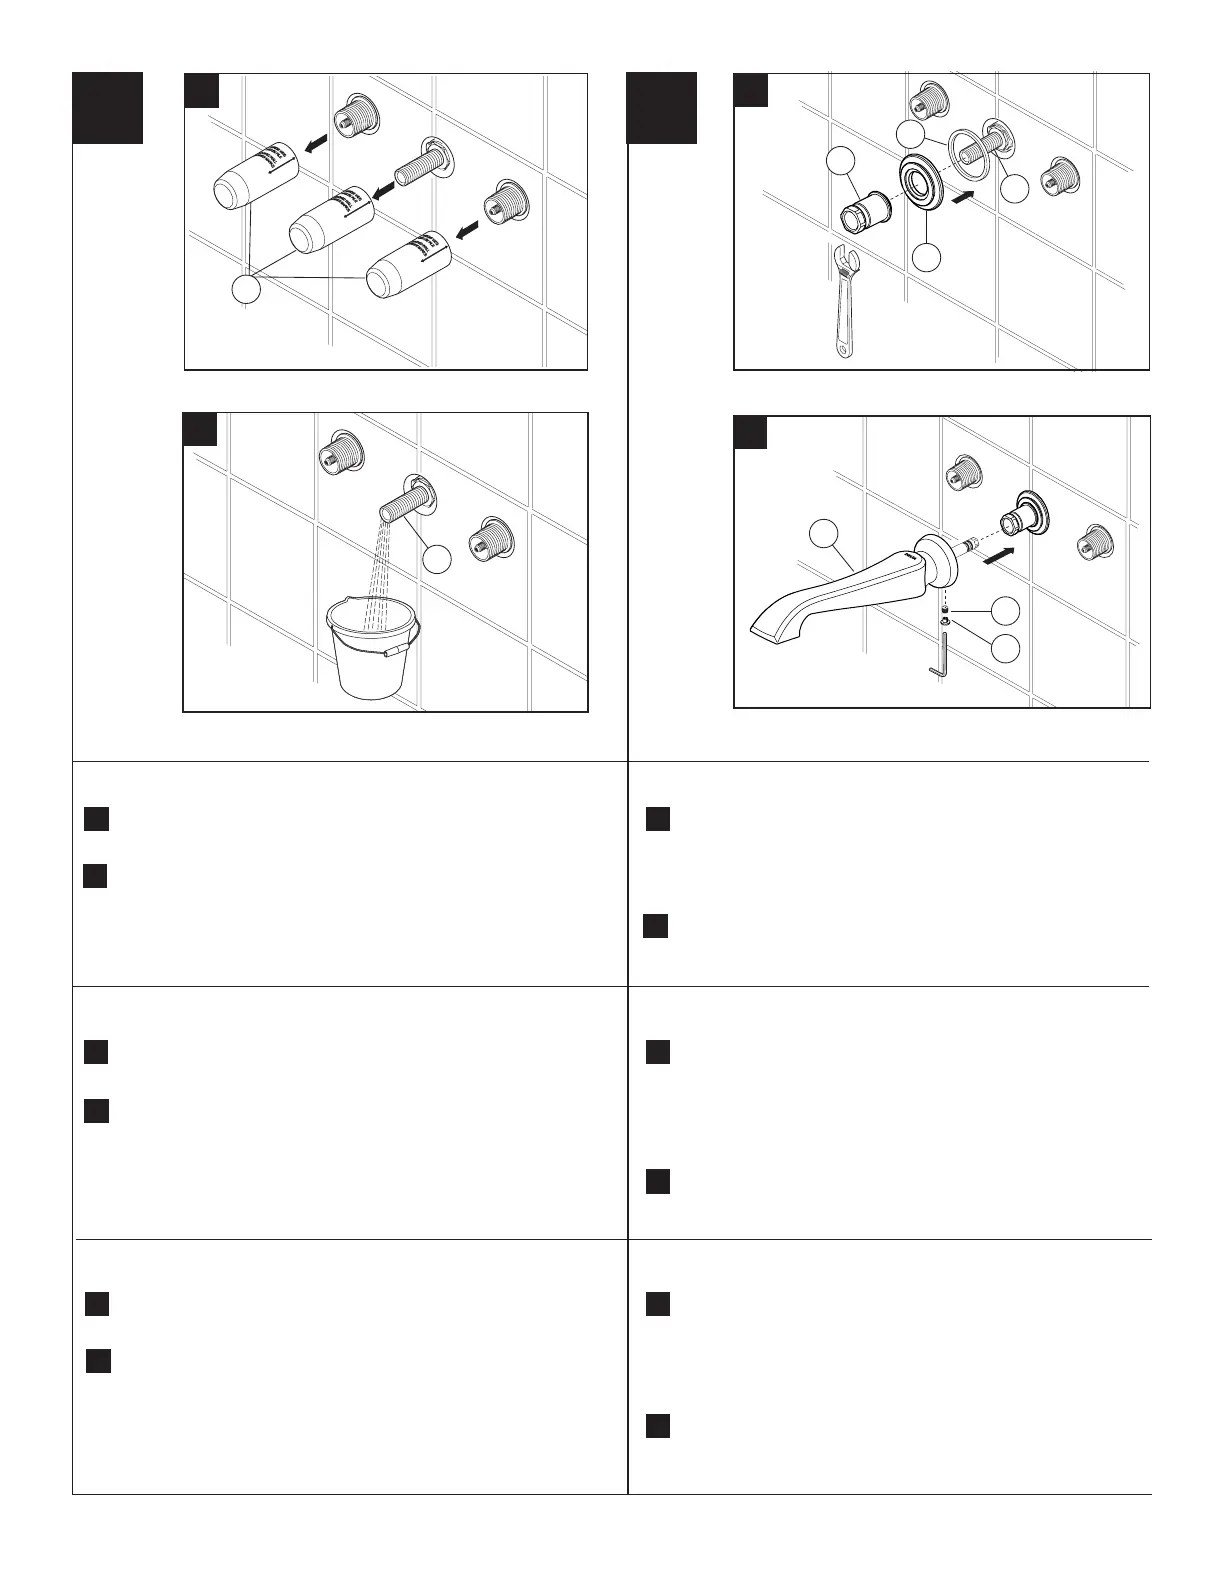
SPOUT FLANGE AND SPOUT INSTALLATION
FLUSH YOUR SYSTEM
INSTALACIÓN DEL ADAPTADOR DEL SURTIDOR
MONTAGE DE L’ADAPTATEUR DU BEC
A.
B.
A.
B.
A.
B.
B.
A.
A.
B.
A.
A.
A.
B.
B.
B.
Pull o plasterguards (1) and discard them.
Saque, halando, los protectores de yeso (1) y descártelos.
Retirez les protecteurs (1) et jetez-les.
Install spout ange (4) and gasket (3). Option: If mounting surface
is uneven, apply suitable sealant to the back surface of gasket,
according to the manufacturer’s instructions. Finished wall
thickness can vary from 1/8" to 1 1/8". Screw mounting nut (15) to the
spout shank (2) and tighten it with wrench.
Instale la brida del surtidor (4) y el empaque (3). Opción: si la
supercie de montaje está desnivelada, aplique sellador adecuado
a la superficie posterior del empaque, de acuerdo con las
instrucciones del fabricante. El grosor de la pared terminada puede
variar de 1/8" a 1 1/8". Atornille la tuerca de montaje (15) en la espiga
del surtidor (2) y apriétela con una llave inglesa.
Installez la collerette du bec (4) et le joint (3). Facultatif : si la surface
de montage est inégale, appliquez un agent d'étanchéité adéquat
à l'endos du joint conformément aux instructions du fabricant.
L'épaisseur du mur fini peut être comprise entre 1/8 po et 1 1/8 po.
Vissez l'écrou de montage (15) sur le manchon du bec (2) et serrez-le
avec une clé.
Install spout (5) and secure with set screw (6), then insert the button (7)
to screw hole.
Instale el surtidor (5) y asegúrelo con el tornillo de ajuste (6), luego
inserte el botón (7) en el agujero para el tornillo.
Installez le bec (5) et xez-le avec la vis de calage (6), puis introduisez
le bouton (7) dans le trou pour la vis.
6
7
1
4
Turn on the water supplies to the valve body. Position a bucket in front
of spout shank (2). Using pliers, slowly open the hot and cold valve, and
allow the water to ow from the spout shank (2), for at least one minute.
Close valves. Important:This ushes away any debris that could cause
damage to internal parts or disrupt water ow from your faucet.
Con unos alicates, abra los suministros de agua a la válvula. Coloque un
cubo enfrente de la espiga del caño
(2)
. Lentamente abra la válvula de
agua caliente y la fría, y permita que el agua uya de la espiga del caño
(2), por lo menos por un minuto. Cierre las válvulas.
Importante: Esto
limpia cualquier escombro que pudiera causar daño a las partes
internas o interrumpir el ujo del agua de su llave de agua ó grifo.
Avec une pince, ouvrez les robinets d’arrivée d’eau au corps du
mélangeur. Placez un seau devant le manchon du bec (2). Ouvrez
lentement les soupapes d’eau chaude et d’eau froide et laissez l’eau
couler du manchon du bec (2) pendant au moins une minute. Fermez
les soupapes. Important: cette opération vise à évacuer les corps
étrangers qui pourraient abîmer les éléments internes de votre
robinet et nuire à son bon fonctionnement.
HAGA FLUIR EL AGUA POR SU SISTEMA
RINCEZ L’INSTALLATION
2
5
2
3
15
 Loading...