12 13
2
6
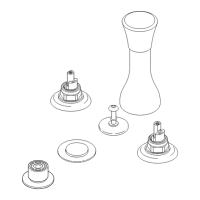
T2
R2
Q2
S2
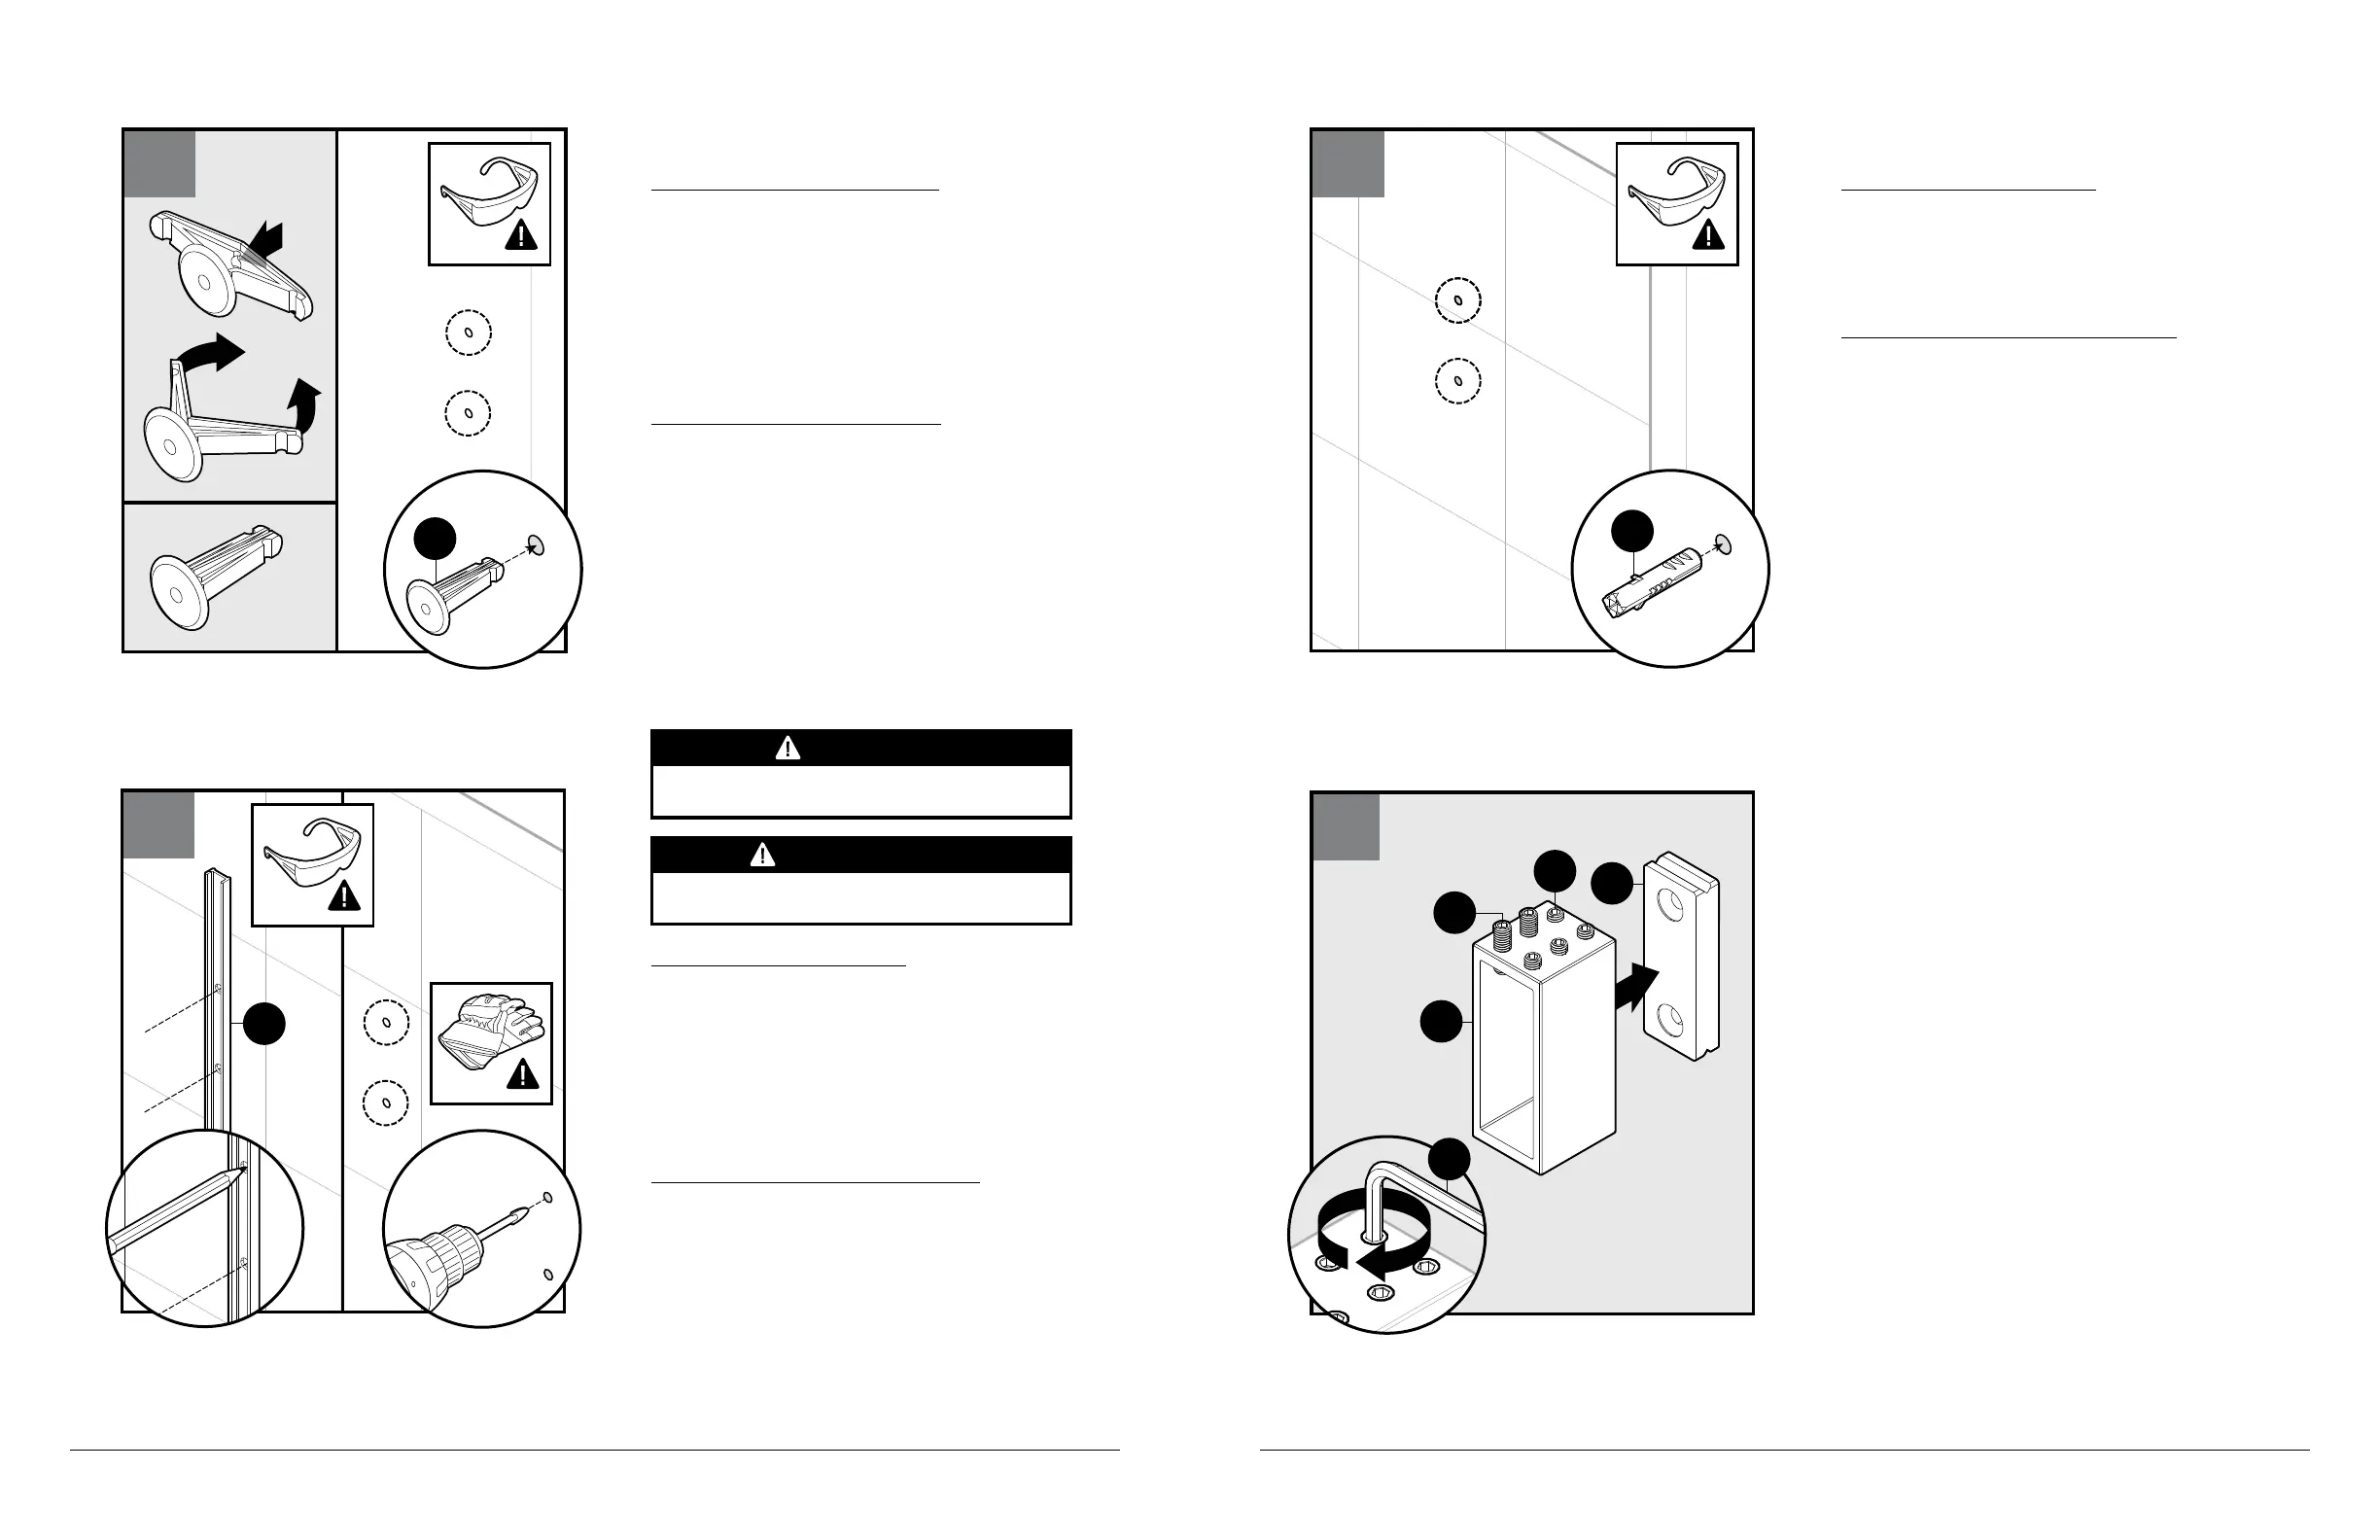
T1
Using supplied 2.5 mm hex wrench (T1), loosen all hex
screws (
Q2, R2
) to remove collar wall bracket (
S2
) from
collar (
T2
).
Utilizando la llave hexagonal de 2.5 mm incluida (T1),
afloje los tornillos hexagonales (Q2, R2) para retirar el
soporte de pared de collarín (S2) del collarín (T2).
5b
P1
x2
For Tile Enclosures Only
Insert tile anchors (P1) in each hole location. The tile
anchors (P1) should fit securely into the holes.
NOTE: Tile anchors (P1) MUST be used as an added
support.
Repeat steps 5a-5b for other end of enclosure.
Solo para recintos de baldosas:
Inserte los anclajes para baldosas (P1) en la ubicación de
cada orificio. Los anclajes para baldosas (P1) deben encajar
firmemente dentro de los orificios.
NOTA: Los anclajes para baldosas (P1) se DEBEN utilizar
como soporte adicional.
Repita los pasos 5a-5b para el otro extremo del recinto.
5a
1/4"1/4"
S1
For Tile Enclosures Only
Using a marking tool, mark the holes in the wall bracket
template (S1).
Remove
wall bracket template (S1)
.
Drill a 1/4" hole at each location using a tile bit.
For Shower: Bottom hole is 67-3/16" (170.6 cm) from the
sill. Top hole is 68-11/16" (174.5 cm) from the sill.
For Tub: Bottom hole is 55-3/16" (140.2 cm) from the sill.
Top hole is 56-3/4" (144.2 cm) from the sill.
Solo para recintos de baldosas:
Utilizando una herramienta de marcado, marque los orificios
de la plantilla de soporte de pared (S1).
Retire la plantilla de soporte de pared (S1).
Perfore un orificio de 1/4" en cada ubicación usando la
broca para baldosas.
Para la ducha: El orificio del extremo inferior está a 67-3/16"
(170.6 cm) del bordillo. El orificio del extremo superior está a
68-3/4" (174.6 cm) del bordillo.
Para la tina: El orificio del extremo inferior está a 55-3/16"
(140.2 cm) del bordillo. El orificio del extremo superior está a
56-3/4" (144.2 cm) del bordillo.
1
2
4c
3
Q1
x2
For Acrylic Enclosures Only
Push in the center of the acrylic wall anchors (Q1) and
squeeze clips together. Insert acrylic wall anchors (Q1) into
holes.
If needed, a rubber mallet can be used to insert acrylic
anchors (Q1).
If needed, use drill to slightly enlarge the opening of the hole.
NOTE: Acrylic wall anchors (Q1) MUST be used as an added
support.
Repeat steps 4a-4c for other end of enclosure.
Solo para recintos acrílicos:
Empuje el centro de los anclajes acrílicos de pared (Q1) y
apriete las abrazaderas juntas. Inserte los anclajes acrílicos
de pared (Q1) en los orificios.
De ser necesario, puede utilizar un martillo de goma para
insertar los anclajes acrílicos (Q1).
De ser necesario, utilice la broca para ampliar un poco la
abertura del orificio.
NOTA: Los anclajes de acrílico para pared (Q1) se DEBEN
utilizar como soporte adicional.
Repita los pasos 4a-4c para el otro extremo del recinto.
CAUTION
To avoid risk of injury or product damage, make sure that
you drill into studs.
PRECAUCIÓN
Para evitar el riesgo de lesiones o daños al producto,
asegúrese de perforar en los montantes.
CAUTION
Wear safety glasses and cut resistant gloves with non-slip
grip when drilling or cutting to avoid risk of injury.
PRECAUCIÓN
Use gafas protectoras y guantes anticorte y antideslizantes
al taladrar o cortar para evitar el riesgo de lesiones.
Use cut-resistant gloves with appropriate grip to avoid
risk of injury from sharp edges or corners.
Use guantes resistentes a los cortes con el agarre
apropiado para evitar el riesgo de lesiones por los bordes
y esquinas afiladas.
 Loading...