16 17
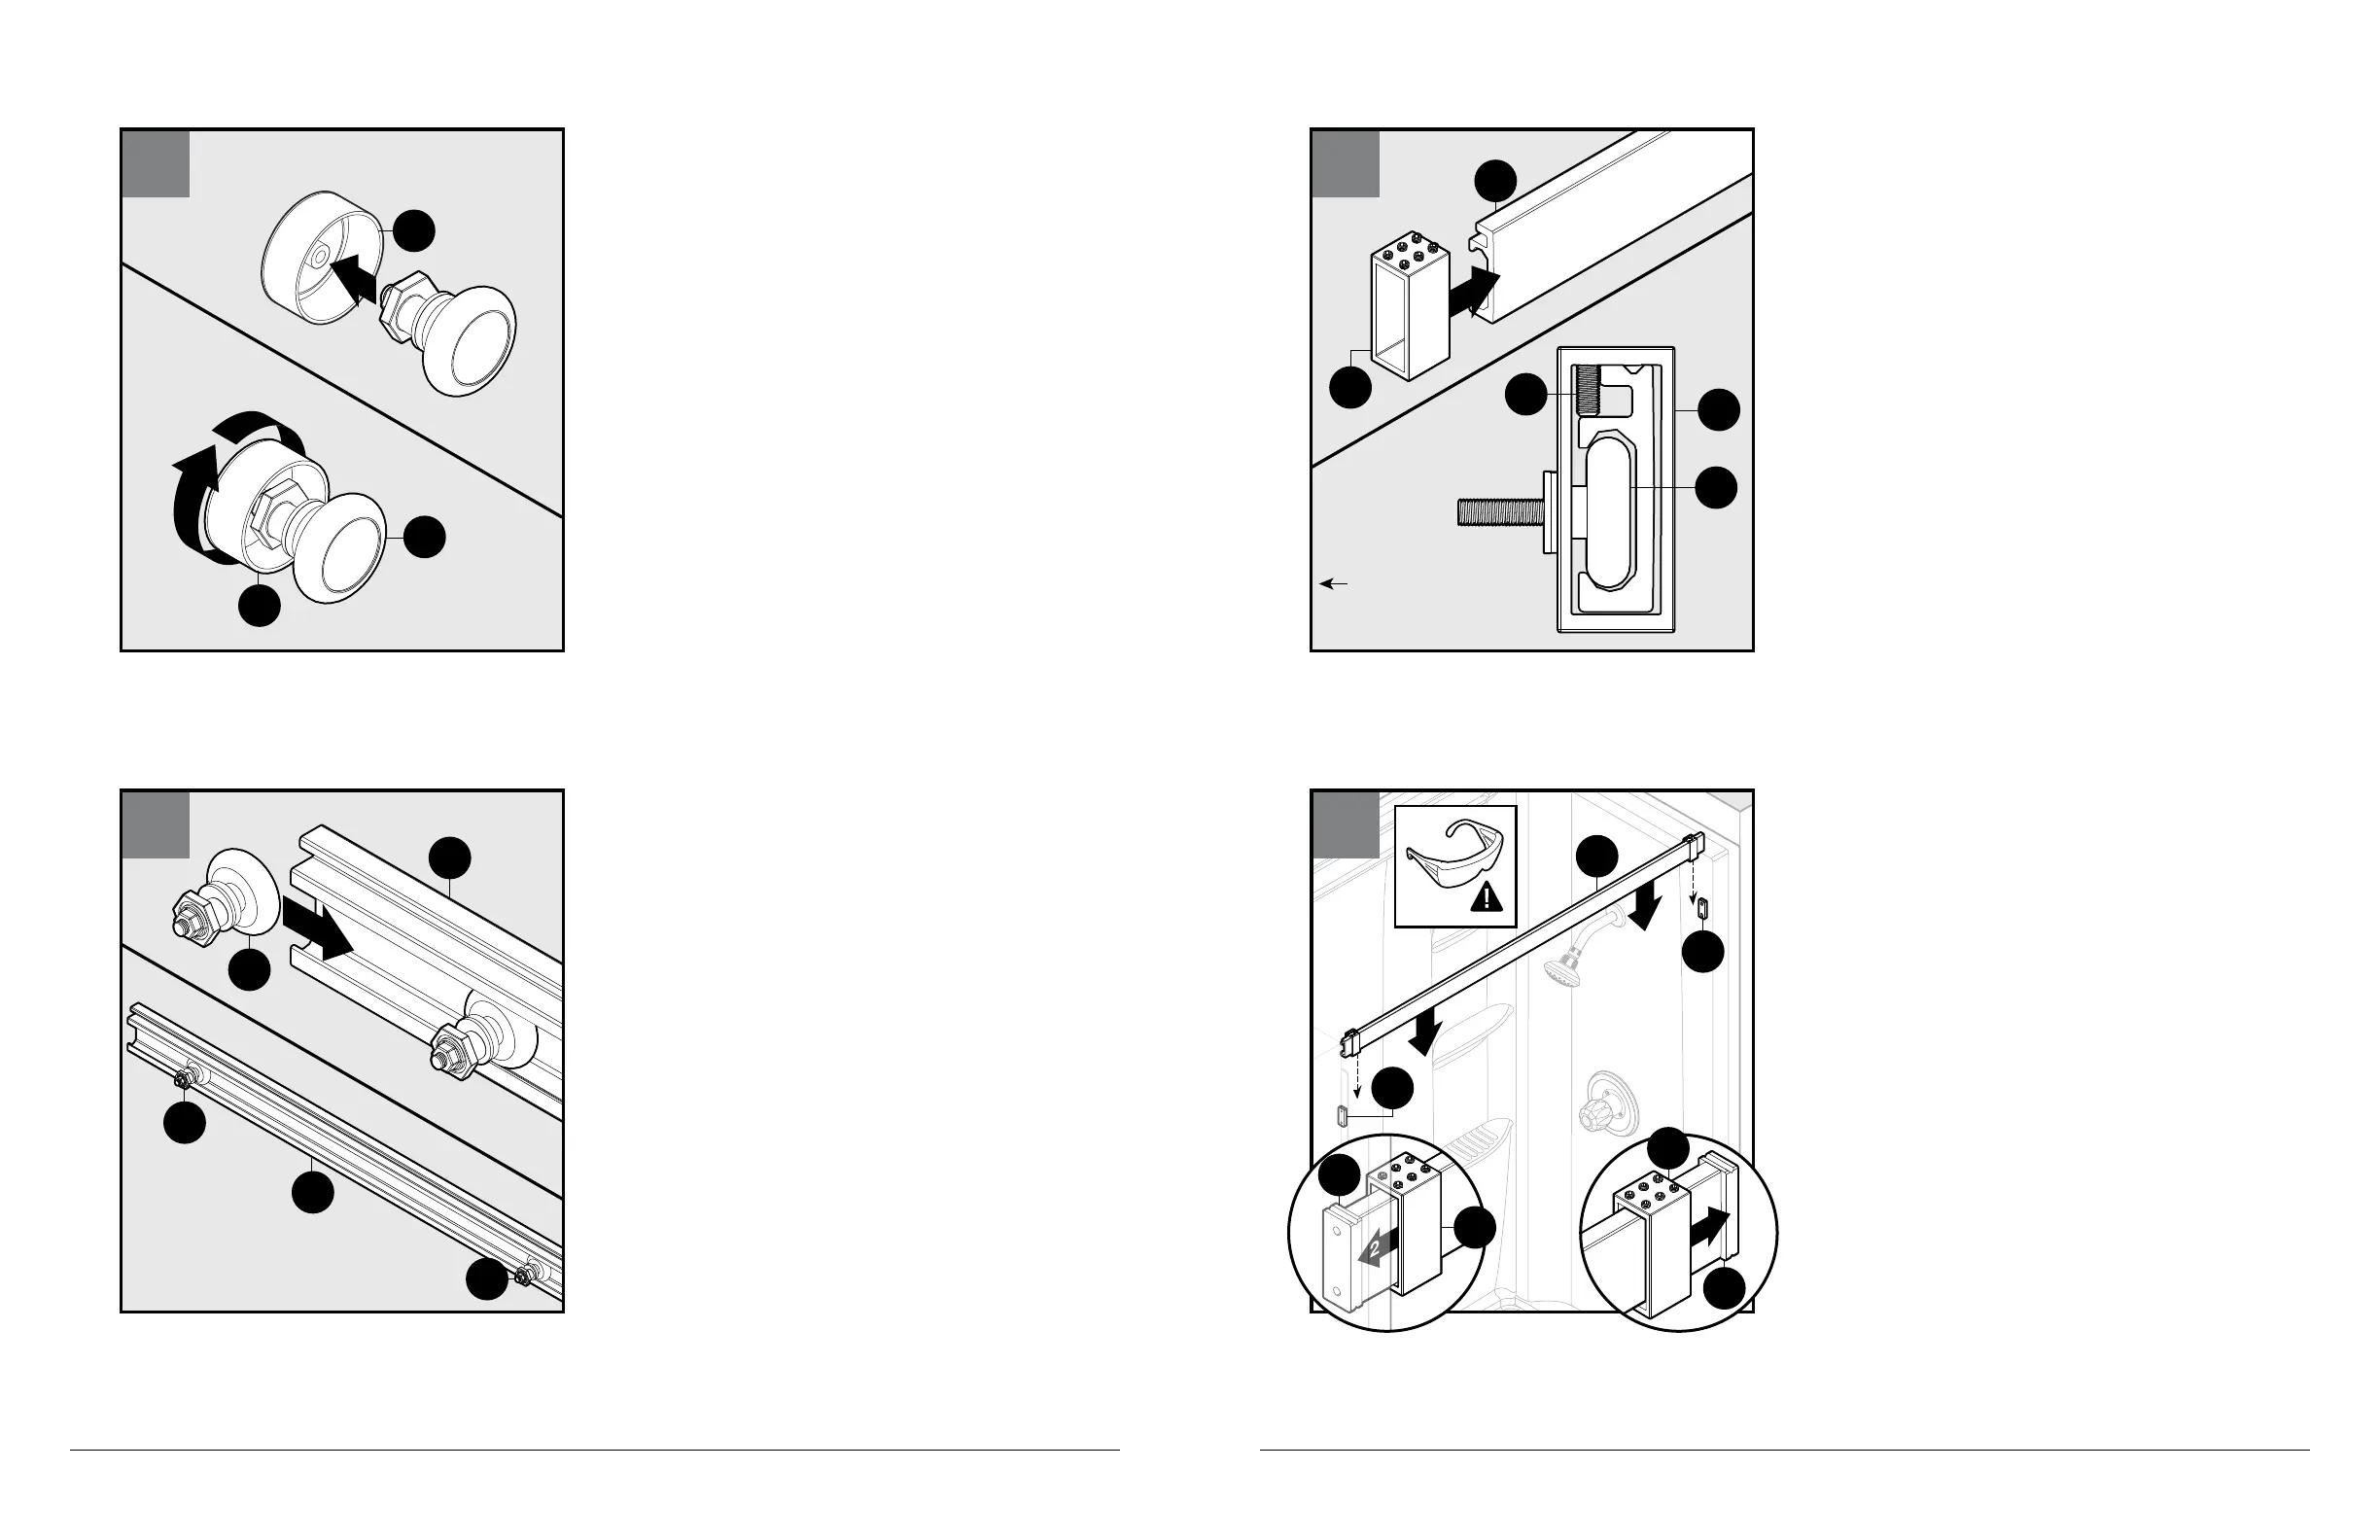
Place top track (A1) into position between collar wall
brackets (S2).
Slide collars (T2) over collar wall brackets (S2) until they
are flush against side walls.
Coloque el carril superior (A1) en posición entre los
soportes de pared del collarín (S2).
Deslice los collarines (T2) sobre los soportes de pared
del collarín (S2) hasta que queden a ras con las paredes
laterales.
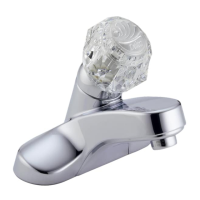
Slide collars (T2) onto each end of top track (A
1).
Ensure that the M5 x 16 set screws (R2) (the longer set
screws), are facing toward the inside of the enclosure
engaging the recessed portion of the top track (A1).
Deslice los collarines (T2) a cada extremo del carril
superior (A1).
Asegúrese de que los tornillos de ajuste M5 x 16 (los
tornillos de ajuste más largos [R2]) estén dirigidos
hacia el interior de la cabina e introducidos en la parte
cóncava del carril superior (A
1).
Insert BOTH inside roller assemblies (
Y1
) into INNER
CHANNEL of top track (
A1
).
Inserte AMBOS conjuntos de rodillo interno (Y1) en el
CANAL INTERNO del carril superior (A1).
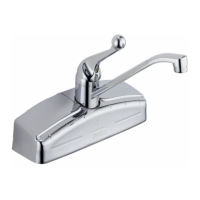
Remove BOTH decorative covers
(P2) from EACH inside
roller assemblies (
Y1)
.
Retire AMBAS cubiertas decorativas (P2) de CADA
conjunto de rodillo interno (Y1).
1
1
14
2
A1
S2
S2
S2
T2
T2
S2
13
A1
A1
T2
T2
Inside Enclosure/
Interior de la cabina
R2
12
A1
A1
Y1
Y1
Y1
2
1
11
P2
P2
Y1
CAUTION
To avoid risk of injury or product damage, make sure that
you drill into studs.
PRECAUCIÓN