EasyManua.ls Logo

Delta Grenville Series - User Manual

Delta Grenville Series
9 pages
Print Icon
To Next Page IconTo Next Page
Loading...
212291, Rev. B
Please leave this instruction sheet with the installed faucet.
S.V.P., laissez cette che d’instructions avec la robinetterie nouvellement installée.
Deje esta hoja de instrucciones con la llave instalada.
SINGLE HANDLE PULL-DOWN
KITCHEN FAUCET
ROBINET DE CUISINE À UNE
MANETTE ET BEC RABAISSABLE
LLAVE PARA FREGADERO DE
COCINA DE UNA MANIJA
Models/Modèles/Modelos
988LF
Series/Seria/Series
Grenville™
Write purchased model number here.
Inscrivez le numéro de modèle ici.
Escriba aquí el número del modelo comprado.
You may need / Articles dont vous pouvez avoir besoin / Usted puede necesitar:
1.25” (32mm)
For easy installation of your Delta
faucet you will need:
To READ ALL the instructions completely before
beginning.
To READ ALL warnings, care and maintenance
information.
To purchase the correct water supply hook-up.
Para instalación fácil de su llave
Delta usted necesitará:
LEER TODAS las instrucciones completamente
antes de empezar.
LEER TODOS los avisos, cuidados, e información
de mantenimiento.
Comprar las conexiones correctas para el
suministro de agua.
Pour installer votre robinet Delta
facilement, vous devez:
LIRE TOUTES les instructions avant de débuter.
LIRE TOUS les avertissements ainsi que toutes les
instructions de nettoyage et d’entretien.
Acheter le bon nécessaire de raccordement.
S
i
l
i
co
n
e
/
S
i
li
c
o
n
a
Question and Answer IconNeed help?

Do you have a question about the Delta Grenville Series and is the answer not in the manual?

Overview

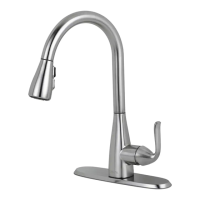
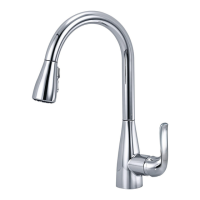
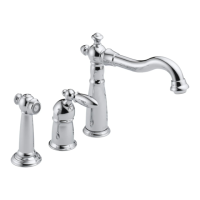
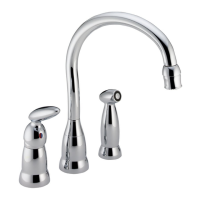
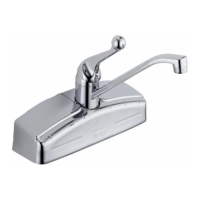
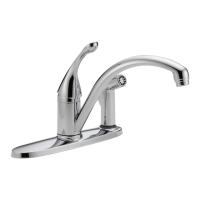
This document provides installation, usage, and maintenance instructions for the Delta Single Handle Pull-Down Kitchen Faucet, models 988LF, from the Grenville™ Series.

Function Description:

The Delta 988LF is a single-handle pull-down kitchen faucet designed for ease of use and installation. It features a pull-down spray head that allows for flexible water delivery, making tasks like rinsing dishes or filling pots more convenient. The single-handle design provides simple control over both water temperature and flow. The faucet is designed to be installed on a kitchen sink, with options for either a single-hole installation or a three-hole installation using an optional escutcheon/baseplate. The pull-down spray head includes a mechanism for smooth retraction and secure docking when not in use.

Important Technical Specifications:

  • Model: 988LF
  • Series: Grenville™
  • Water Flow Rate: 1.8 GPM (6.8 L/min)
  • Water Line Connections: 3/8" compression fittings for hot and cold water supply.
  • Mounting Hole Size: Requires a 1.25" (32mm) diameter mounting hole.
  • Weight Placement: The instruction specifies attaching a weight to the hose assembly at least 14" (356mm) from the hose fitting to ensure proper spray hose return.
  • Cartridge: Uses RP83883 Cartridge Assembly.
  • O-Ring: RP82181 O-Ring.
  • Mounting Nut Assembly: RP81005.
  • Optional Escutcheon/Baseplate: RP83880 is available for three-hole installations.

Usage Features:

  • Pull-Down Spray Head: The faucet is equipped with a pull-down spray head (RP83879) for extended reach and versatility.
  • Single Handle Control: A single handle (RP93158) allows for easy adjustment of water temperature and flow.
  • Hose Weight: A weight (RP83884) is installed on the spray hose to ensure smooth retraction and secure docking of the spray head.
  • Flush System: Before initial use, the system must be flushed to remove any debris. This involves removing the spray head, turning the faucet to the full on mixed position, and flushing hot and cold water lines for one minute. This prevents damage to internal parts.
  • Water Supply: The faucet connects to standard hot and cold water supplies using 3/8" compression fittings.

Maintenance Features:

  • Cleaning: The document emphasizes the importance of regular cleaning with a damp cloth and mild liquid soap to maintain the finish. Harsh abrasives or polish should not be used.
  • Leak Prevention: Instructions include ensuring all fittings and end connections are free of debris and properly tightened. Over-tightening connections should be avoided.
  • Troubleshooting Leaks:
    • Leaks from under handle: Requires turning off water supplies, removing the handle and bonnet nut, and replacing the stem unit (RP83881 and RP83883).
    • Leaks from spout outlet: Requires turning off water supplies, removing the handle and bonnet nut, and replacing the stem unit.
    • Leaks from spray hose connections: Involves checking and securing the connector (RP83666) from the faucet outlet to the hose assembly. If the leak persists, the connector may need to be replaced.
  • Cartridge Replacement: The cartridge assembly (RP83883) is a key component for water flow and temperature control and can be replaced if issues arise.
  • O-Ring Replacement: The O-ring (RP82181) is a seal that may need replacement if leaks occur.
  • Warranty: Delta Faucet Company offers a limited lifetime warranty on parts and finishes (excluding electronic parts and batteries) for the original consumer purchaser. For commercial purchasers, the warranty is 10 years for multi-family residential applications and 5 years for other commercial uses. Electronic parts are covered for 5 years for consumers and 1 year for commercial users. Batteries are not covered. The warranty covers defects in material and workmanship under normal installation, use, and service. Labor charges for repair, replacement, installation, or removal are not covered. Damage due to reasonable wear, outdoor use, misuse, freezing, abuse, neglect, or improper installation/maintenance is not covered. Genuine Delta® replacement parts are recommended.

Installation Steps:

  1. Faucet Installation: Remove the old faucet, set the new faucet into place, secure it with washers and the mounting bracket, tighten the mounting nut, and lock the bracket into position.
  2. Escutcheon Installation (Optional): If using the escutcheon, insert threaded bolts through the baseplate, connect to the escutcheon, set into place, secure with washers and hand-tighten nuts, then tighten with a wrench. Silicone sealant is recommended for a better seal.
  3. Connecting Spray Hose: Connect the spray hose to the faucet outlet, ensuring a secure connection. Pull the hose down to ensure proper movement.
  4. Water Line Connections: Ensure fittings are free of debris. Connect the 3/8" compression fittings from the faucet hoses to the hot and cold water supply valve connections. Hand tighten, then tighten one additional turn with a wrench. Avoid over-tightening. Do not use pipe dope or other sealants on water line connections.
  5. Flush System/Check for Leaks: Pull out the hose assembly, remove the spray head, and hold the hose end into the sink. Turn the faucet handle to the full on mixed position. Turn on hot and cold water supplies and flush for one minute. Reinstall the spray head. This flushes debris that could damage internal parts.
  6. Weight Install: Attach the hose weight at least 14" (356mm) from the hose fitting to ensure proper spray hose return. Ensure the supply hoses do not interfere with the spray hose assembly and move freely through the hub. Check all connections for leaks.

Delta Grenville Series Specifications

General IconGeneral
BrandDelta
ModelGrenville Series
CategoryPlumbing Product
LanguageEnglish

Related product manuals