1. Prepare for installation
Remove 2 + 2 screws from the ends and remove the lid.
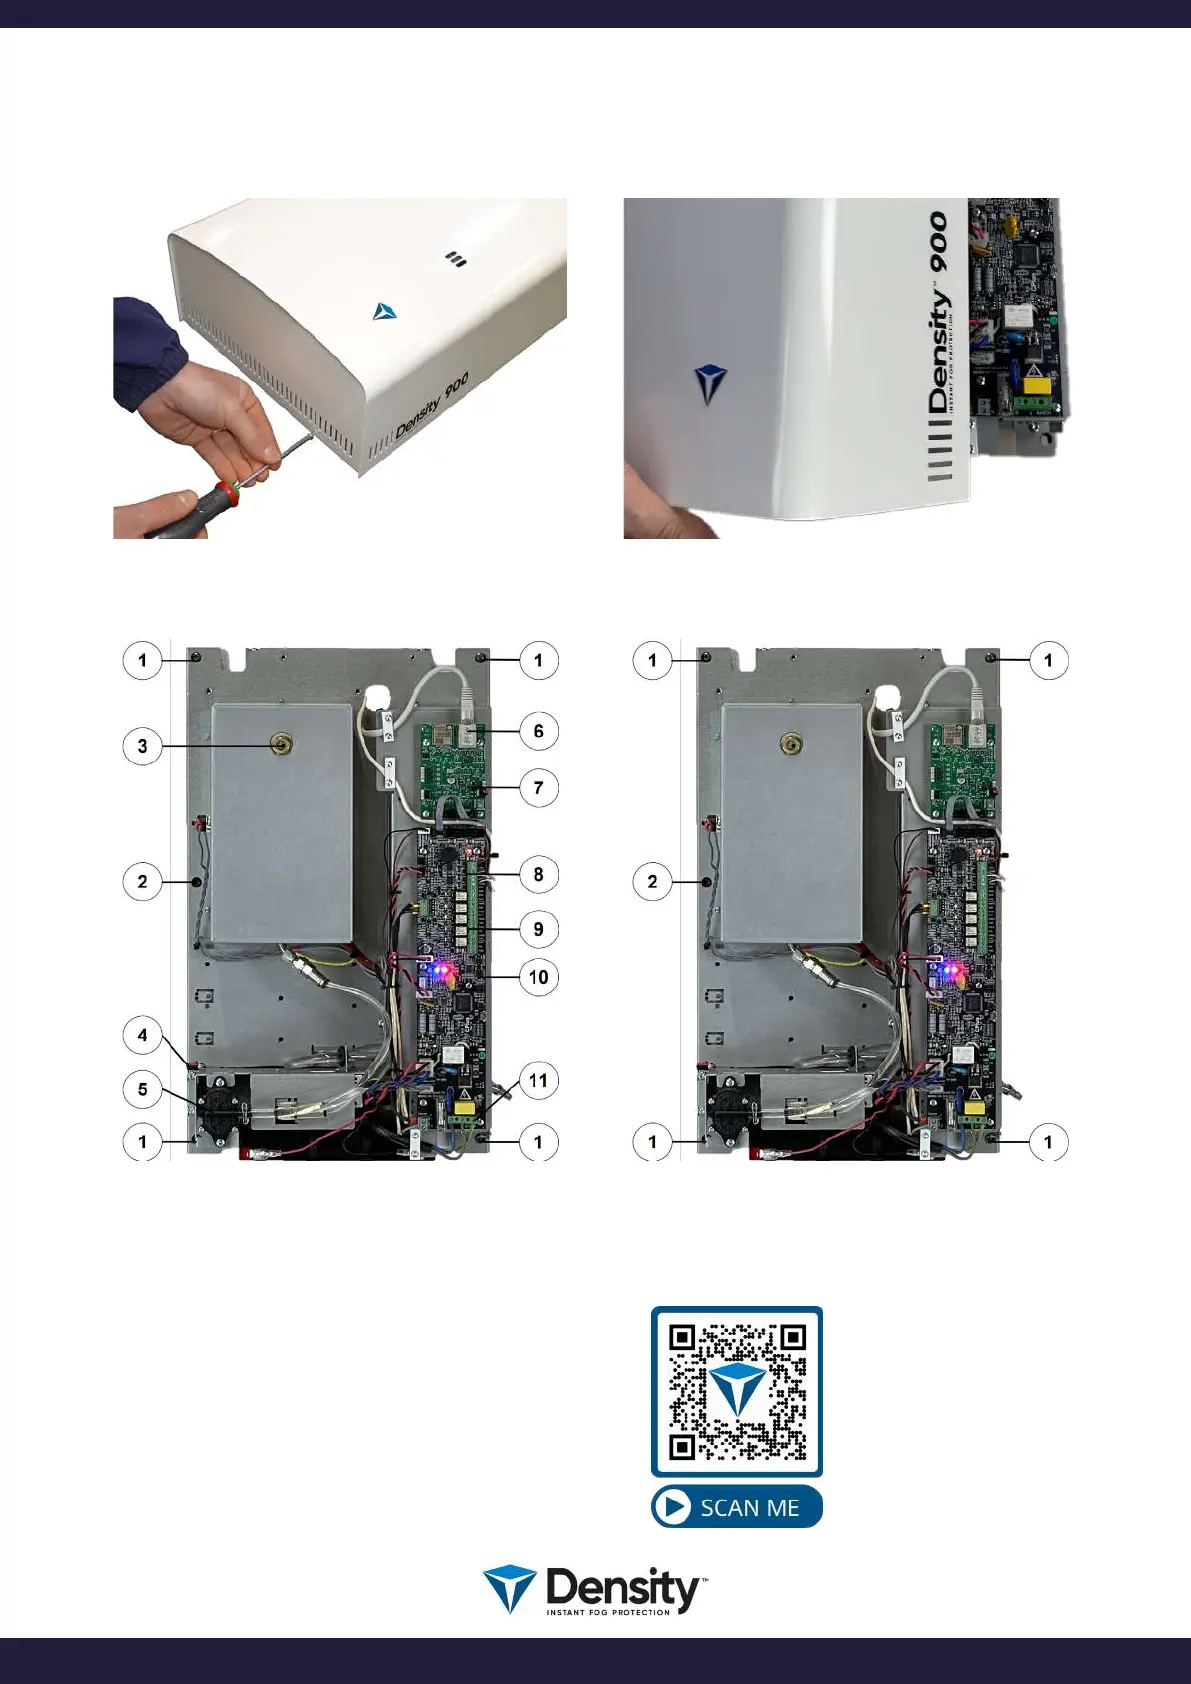
Identication of main components.
Watch a video
showing how to open
the Density fog
generator.
Holes for installation.
1. Holes for mounting.
2. Hole for the security
1. Holes for mounting.
2. Hole for the security screw.
3. Adjustable nozzle.
4. Tamper switch.
5. Fluid pump.
6. IP/LAN connection.
7. IP/LAN card.
8. Connection for control.
9. Connection for relay output.
10. Reset button.
11. Main power connection.
page 3/20
www.densityglobal.com | help@densityglobal.com
Version 1.1.4