- Resolu on:12M(4032x3024)/10M(3648x2736)/8M(3264x2448)/5M(2592x1944)/3M(2048x1536) /2M/1.3M/VGA
- Sequence: On /Off.
- Metering: Center-weighted/Average/Spot
- Sharpness: Strong/Normal/So
- White balance: Auto/Daylight/Cloudy/Tungsten/Fluorescent
- Exposure: -2.0/- 5/3/-4/3/-1.0/-2/3/-1/3/+0.0 /+1/3/+2/3/+1.0/+4/3/+5/3/+2.0
- Quick Review: Off/2s/5s.
- Date stamp: Off/Date/(Date/Time)
Playback Mode
1. Browse files
A
er the device powers ON and enters the VIDEO mode, press the mode key tw
ice to enter the PLAYBACK mode, press the
UP/DOWN key to browse the video files or Photo files.
In the playback m ode, press the UP/DOWN key to choose the photo or video to be previewed; the icon
appearing on the
le
upper corner indicates video files while
as im age files. Press the OK key to play the video.
2. Delete
In playback mode, press the Menu bu
on to have the Delete/Protect/Slide Show op ons appearing. Choose Delete and press
the OK key to enter submenu ‘Delete the current’ or ‘Delete all files ’ on the memory card.
[Note] The important video files that have been locked by G-sensor or Emergent key can’t be deleted.
3. Protect
In playback mode, press the Menu bu
on to have the Delete/Protect/Slide Sh ow op ons appearing. Choose Protect and press
the OK key to display Lo
ck the current, Unlock the current, Lock all and Unlock all. The locked file cannot be deleted (except
forma
ng). Note: The G-Sensor locked file may be deleted via menu unlockin g.
Connec
on to PC via USB Cable
1. USB Backup Mode (MSDC)
You can upload your videos and pictures to your compu ter by using the provided mini-USB cable. Make the connec
on while
DVR is powered off and the display will show 2 op
ons: MSDC / PC-CAM. MSDC = upload to computer, Highlight the MSDC by
using the UP/DOWN keys and press REC/OK key to enter your choice. Your c
omputer shou ld now unload all photos and videos.
[NOTE] To watch recorded videos, please transfer videos from memory card to the computer.
2. PC-CAM
Connect the device to computer while DVR is powered off and the display will show 2 op
ons: MSDC / PC-CAM. PC-CAM = use
the DVR as a web camera. Highlight the PC-CAM by using the UP/DOWN keys and press REC/OK key to enter your choice. You
are now able to video chat with f riends on Skype or Me ssenger.
Reset
Improper opera
on or incorrect memory card can cause DVR to freeze. Please press the RESET hole on
the bo
om side of DVR
to power OFF the DVR. Power O N DVR manually and DVR will a utoma
cally restore the factory default se ngs.
Technical Specifica
ons
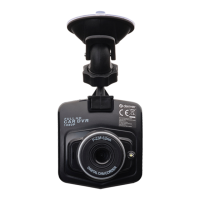
Screen size 1.5” TFT-LCD
Lens 92° A+ class glass lens
OSD language
Multi languages
Video resolu
on
Default
Video format AVI (M JPEG)
Photo size 12M/10M/8M/5M/3M/2M/1.3M/VGA
-ENG 04-
1920x1080@25fps/ 1280x720@30fps
 Loading...