www.desatech.com
121512-01C 5
Off/
Apagado/
Arrêt
Lo/Bajo/
Bas
Med/
Medio/
Moyen
Hi/Alto/
Haut
Figure 3 - Regulator Position
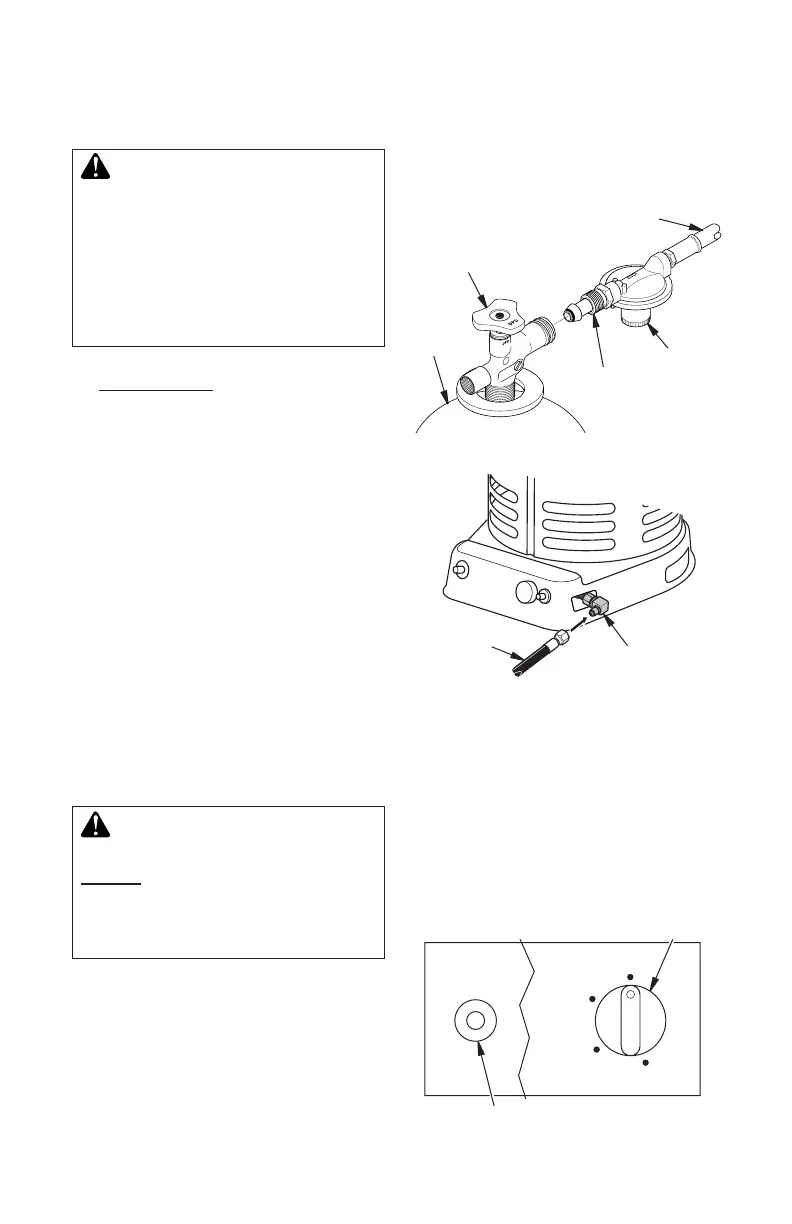
Propane
Tank
Propane Supply
Valve
Regulator
Hose
POL
Fitting
INSTALLATION
Continued
Figure 4 - Hose and Valve Inlet
(200,000 Btu/Hr Model Shown)
Hose
Valve Inlet
OPERATION
CONNECTING TO GAS SUPPLY
WARNING: Test all gas piping
and connections for leaks after
installation or servicing. Never
use an open ame to check for
a leak. Apply a mixture of liquid
soap and water to all joints.
Bubbles forming show a leak.
Correct all leaks at once.
1. Provide propane supply system (see
Propane Supply, page 4).
2. Connect fuel gas tting on hose/regulator
assembly to propane tank(s). Turn fuel
gas tting counterclockwise into threads
on tank. Tighten rmly using a wrench.
IMPORTANT: Tighten regulator with vent
pointing down. Pointing vent down pro-
tects regulator from weather damage.
3. Connect hose to the valve inlet. Tighten
rmly using a wrench. You must use the
regulator supplied with heater even if
propane tank has one.
4. Open propane supply valve on propane
tank(s) slowly. Note: If not opened slowly,
excess-ow check valve on propane tank
may stop gas ow. If this happens, you may
hear a click inside the regulator assembly,
this is the check valve closing. To reset the
excess ow check valve, close propane
supply valve and open again slowly.
5. Check all connections for leaks. Apply
mixture of liquid soap and water to gas
joints. Bubbles forming show a leak that
must be corrected.
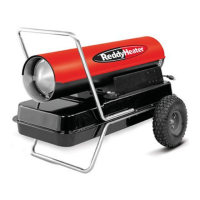
Figure 5 - Control Knob and Piezo Ignitor
Piezo Ignitor Button
Control Knob
WARNING: Review and un-
derstand the warnings in the
Safety section, page 2. They are
needed to safely operate this
heater. Follow all local codes
when using this heater.
80,000 BTU/HR HEATER
TO START HEATER
1. Follow all installation, ventilation and
safety information.
2. Locate heater on stable and level surface.
Make sure strong drafts do not blow on
heater.
3. Make sure unit is turned off by slightly
pressing and turning control knob fully
clockwise to OFF.