www.desatech.com
119303-01E
17
INSTALLATION
Continued
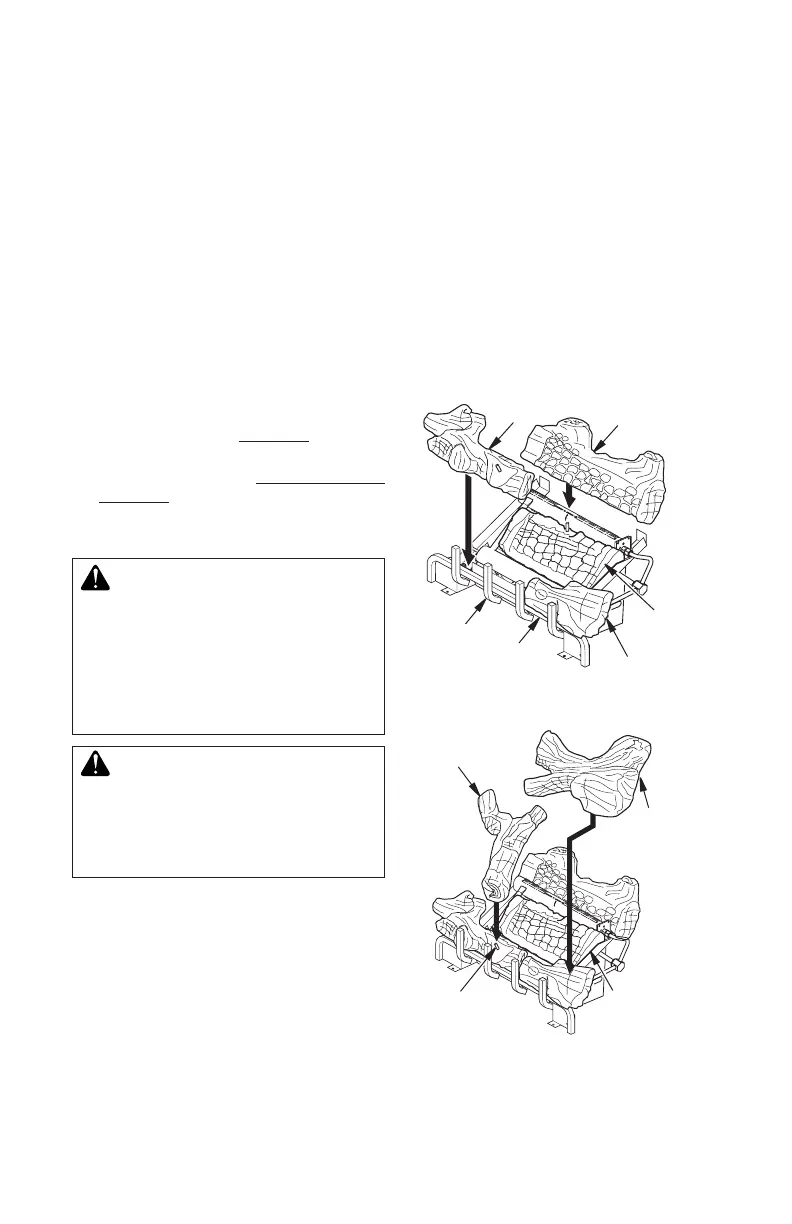
Figure 24 - Installing Bottom Logs
Figure 25 - Installing Top Logs
Rear Log
Grate
Prongs
Bottom
Log
Base
Assembly
Front Right
Log
Front
Left Log
Middle
Right Log
Middle Left Log
Bottom
Log
Pin on Front
Left Log
CONNECTIONS
1. Open equipment shutoff valve (see Figure
21, page 16).
2. Open main gas valve located on or near
gas meter for natural gas or open pro-
pane/LP supply tank valve.
3. Make sure control knob of replace is in
the OFF position.
4. Check all joints from equipment shutoff
valve to gas control valve (see Figures
22 or 23, page 16). Apply noncorrosive
leak detection uid to all joints. Bubbles
forming show a leak.
5. Correct all leaks at once.
6. Light replace (see Operation, page 18).
Check all other internal joints for leaks.
7. Turn off replace (see To Turn Off Gas to
Appliance, page 19, depending on your
model).
INSTALLING LOGS
-
CAUTION: Do not remove
It is very important to install these logs exactly
as instructed. Do not modify logs. Only use
logs supplied with heater.
1. Place bottom log in center of the base as-
sembly as shown in Figure 24.
2. Rest rear log in back corner sections of
base assembly as shown in Figure 24.
Make sure log is completely vertical and
not leaning in toward burner where the
ame will touch the log.
3. Position front right log against right side
of grate prongs (see Figure 24).
4. Position front left log against left side of
grate prongs (see Figure 24).
5. Place middle right log over front right and
bottom logs as shown in Figure 25. Be sure
hole in middle right log seats over pin in
bottom log.
6. Place middle left log over front left and
bottom logs as show in Figure 25. Be sure
hole in middle left log seats over pin in front
left log.
7. Install replace screen by slipping notches
of replace screen over screws on front
of replace (see Figure 26, page 18).