Construction and usage
Once you remove the Devine M-Mic USB microphone and all the accessories from the box,
it's important to mount it on the included tripod right away using the included shock mount.
The tripod unfolds easily in order to free the three central legs. Together they form a stable
base and have tips which absorb vibrations and provide extra grip as well.
The included shock mount can be screwed on
top.
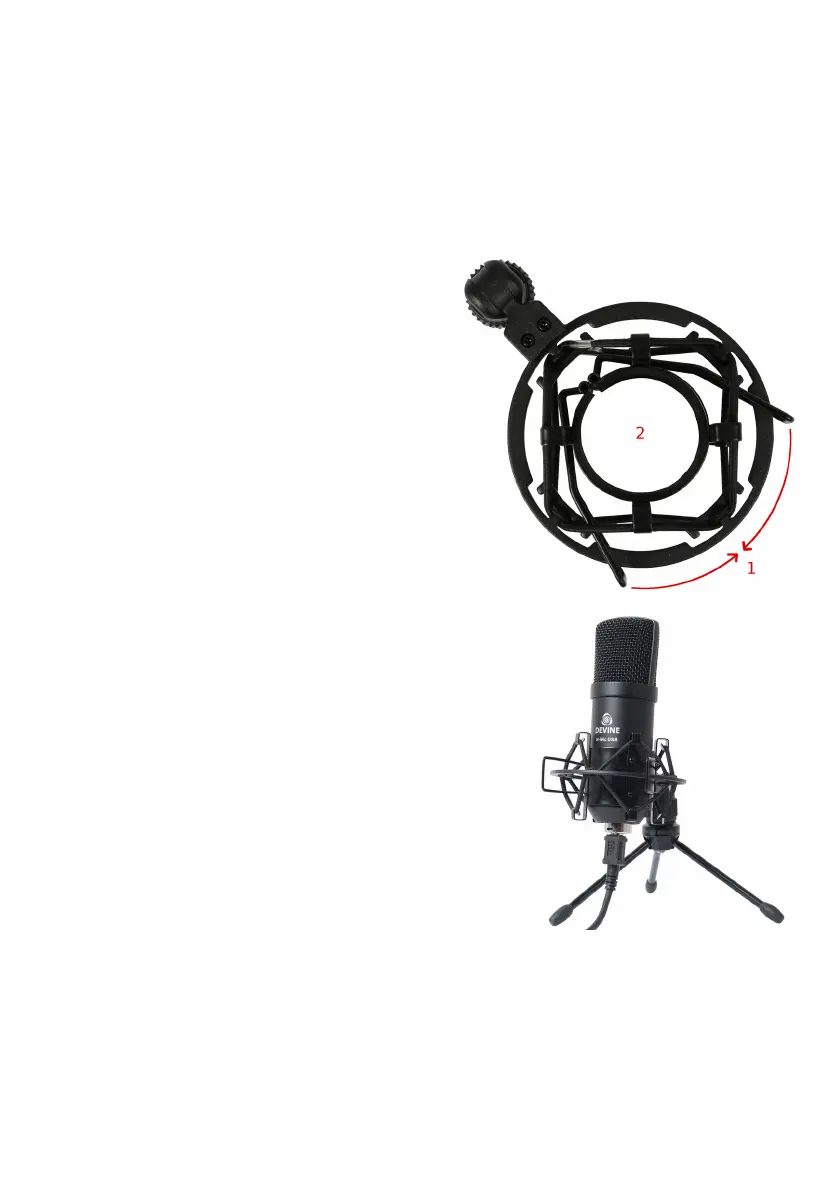
The microphone can then be installed in the
shock mount with the help of the illustration on
this page. Position the mic as shown in (2) while
squeezing the two brackets (1) together. This will
widen the round opening for easy mic positioning.
Release your grip on the brackets (1) to secure
the microphone in place.
Once you've completed the steps above, you can
connect the included USB cable by plugging one
end into the small square-shaped connector
underneath the microphone and the other end
into the USB port of your device. You may need a special
adapter for connecting the microphone to a mobile device
such as a tablet or smartphone. Please contact your
dealer if you have any questions about this.
If assembled correctly, your microphone setup should
look like this:
Some important factors to bear in mind:
- Always ensure the brand and type number of the
microphone are facing towards you to capture the audio
as optimally as possible.
- Ensure one of the tripod legs is pointed towards you.
Because the microphone is mounted on the tripod at a
slight angle, this will enhance stability to prevent it from
accidentally getting knocked over.
- Ensure the microphone is positioned at an angle and
make sure the brand and type number are still visible from where you are seated for optimal
results.
- Always place the microphone tripod on a stable flat surface such as a desk or table.
The information in this user manual is subject to change at any time without notice.
Version:
1.0
Date of creation and author's initials:
05-07-2017 RV
Revision date and author's initials: -
 Loading...