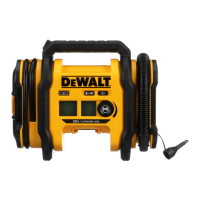
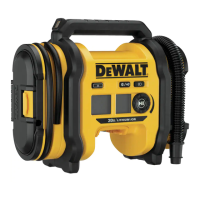
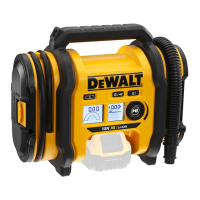
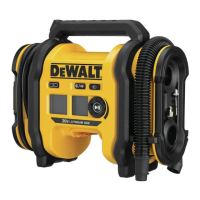
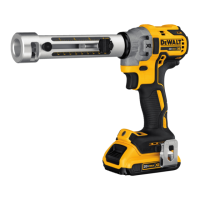
The DEWALT DCC020I is a 20V Max* Cordless Air Inflator designed for professional applications. This versatile tool can be powered by a 20V Max* or 60V Max* FLEXVOLT™ battery pack, a 12V DC vehicle connector, or an optional AC power supply, offering flexibility for various work environments.
Function Description
The DCC020I serves as an air inflator, capable of both high-volume and high-pressure inflation, as well as deflation. It features an LED worklight for improved visibility in dimly lit areas and a pressure gauge display for accurate readings. The inflator is designed to be user-friendly with clear controls for mode selection and pressure adjustment.
Usage Features
Powering the Inflator:
Before operation, the user must select a power source. The inflator can be powered by:
- 20V Max or 60V Max FLEXVOLT™ Battery Pack:** To use a battery pack, align it with the rails inside the inflator's battery port and slide it in until it is firmly seated. To remove, press the release button and pull the battery pack out.
- 12V DC Vehicle Connector: The 12V DC vehicle connector and cord are stored in a compartment on the side of the inflator. Connect it to your vehicle's 12V DC accessory socket, ensuring the socket is rated for at least 10A. Always fully extend the cord before use.
- AC Power Supply (Optional Accessory N557514): For AC power, attach the DC output cord from the external power supply to the external power connector on the side of the unit. Then, plug the 120V AC cord into a wall outlet or an appropriate extension cord. The external power supply has a polarized plug; if it doesn't fit, reverse the plug. Only the recommended external power supply should be used to avoid damage.
Switching On:
Once a power source is connected, press the power switch on the front of the unit. The LCD display will turn on for approximately 2 minutes before entering sleep mode if idle. To wake the system, press the power switch again.
LED Worklight:
The LED worklight is located on the handle. To turn it on, first power on the unit, then press the light switch on the front of the inflator. The light will turn off automatically after two minutes of idle time, or it can be turned off manually by pressing the light switch again.
Hose and Accessory Storage:
The inflator is designed with integrated storage for its hoses and accessories:
- 12V DC Vehicle Connector and Cord: Stored inside a compartment on the side.
- High-Pressure Hose: Located in a storage channel on the side, secured with clips.
- High-Volume Hose: Located in a storage channel on the side, secured with clips.
- Accessories: The inflation needle, high-pressure tapered nozzle, and Presta valve adapter are stored in snap clips on the side panel.
Fitting Accessories:
The high-volume hose comes with a standard tapered nozzle. The high-pressure hose can be fitted with the inflation needle, high-pressure tapered nozzle, and Presta valve adapter. Ensure all adapters are firmly locked in place before operating the inflator.
Fitting the High-Volume Hose:
Remove the high-volume hose from its storage. Align the notches of the hose with the nubs of the high-volume pump outlet/inflation port, then slide the hose on and twist counter-clockwise to secure. To remove, twist clockwise and slide off. When inflating items with internal flaps (like air mattresses), push the nozzle firmly into the valve to displace the flap and ensure inflation.
Inflation/Deflation Using High-Volume:
This mode is for objects holding large amounts of air, such as air mattresses, rafts, and pool floats. This mode does not have an auto shut-off feature.
- To Inflate: Remove the high-volume hose from storage and attach it to the high-volume outlet/inflation port. Insert the hose or tapered nozzle into the object. Press the power switch, then the inflation mode switch (the inflator/deflator symbol will appear on the display). Press the inflation start/pause button to begin pumping. Press it again to stop.
- To Deflate: Follow the same steps as inflation, but attach the high-volume hose to the inlet/deflation port.
Inflation Using High-Pressure:
This mode is for objects requiring more air pressure, such as tires and basketballs.
- To Inflate: Remove the high-pressure hose from storage. Attach the appropriate nozzle (e.g., chuck for tire stems) or accessory. Insert the nozzle into the object. Press the power switch; the inflator will default to high-pressure inflation mode. The pressure gauge display will only show inflation pressures in this mode.
- Setting Pressure Units: To switch between pressure units, press and hold the inflation mode switch and the LED light switch while rotating the pressure adjustment knob.
- Setting Desired Pressure: Rotate the pressure adjustment knob to set the desired pressure.
- Starting/Stopping Inflation: Press the inflation start/pause button to begin. Press it again to stop. The unit will automatically turn off when the preset value is reached. Note that the actual pressure reading may drop slightly after a few seconds, which is normal. If the power switch is turned off, all settings will be lost and need to be reentered, a safety feature to prevent over-inflation.
Using the Inflator as a Pressure Gauge:
Connect the high-pressure hose to the item to be checked. Press the power switch. The pressure gauge display will show the item's pressure.
Pressure Calibration:
The pressure sensor can be re-calibrated for use in high elevations (above 5000 ft [1524 m]). Calibration is not stored when the inflator is off and resets to sea level calibration upon power-up.
- Calibration Procedure: Ensure the inflator is OFF and the high-pressure hose is not connected to anything. Press and hold the LED light switch. While holding it, press and release the power switch. Continue holding the LED light switch for 5 seconds. Once complete, the pressure display will flash and then show "0.0".
Maintenance Features
General Maintenance:
- Cleaning: To reduce the risk of serious personal injury, always turn the unit off, remove the battery pack, and disconnect it from the power source before making any adjustments or cleaning.
- Air Vents: Blow dirt and dust out of all air vents with clean, dry air at least once a week. Always wear ANSI Z87.1 approved eye protection when performing this.
- Exterior Cleaning: Use a cloth dampened with water and mild soap to clean the non-metallic parts of the tool. Never use solvents or harsh chemicals, as they can weaken plastic materials. Do not allow any liquid inside the tool or immerse any part of the tool in liquid.
Lubrication:
This unit requires no additional lubrication.
Storage Recommendations:
- Store the inflator indoors in a cool, dry place, away from direct sunlight and excessive heat or cold.
- For long storage, it is recommended to store a fully charged battery pack in a cool, dry place, out of the charger, for optimal results. Battery packs should not be stored completely depleted of charge.
Repairs:
The charger, battery pack, and external power supply are not serviceable. If the inflator does not turn on, check the battery, all connections, and the fuse in the 12V DC vehicle connector. If the inflator display shows an error code, refer to the Troubleshooting Error Codes chart (not provided in this excerpt). For product safety and reliability, repairs, maintenance, and adjustments should be performed by a DEWALT factory service center or an authorized service center using identical replacement parts.
Important Safety Notes:
- Always read all safety warnings and instructions to prevent electric shock, fire, and/or serious injury.
- Never modify the power tool or any part of it.
- Do not operate the inflator in explosive atmospheres.
- Keep children and bystanders away during operation.
- Use personal protective equipment, including eye protection, and hearing protection during use.
- Do not overreach; maintain proper footing and balance.
- Dress properly; keep hair, clothing, and gloves away from moving parts.
- Do not force the power tool; use the correct tool for the application.
- Do not use the power tool if the switch does not turn it on and off.
- Store idle power tools out of the reach of children.
- The compressed air from the inflator is not safe for breathing.
- Check the manufacturer's maximum pressure rating for objects being inflated to avoid bursting.
- Do not leave the inflator running unattended.
- Use a tire gauge to check tire pressure before and during inflation.
- Do not modify or attempt to repair the inflator or its attachments.
- Operate only with included accessories or air handling parts acceptable for not less than 160 psi.
- Never "horseplay" or direct airflow at yourself or others.
- Allow the inflator to cool for 30 minutes after use before storing.
- When not in use, place the tool on its side on a stable surface to prevent tripping or falling hazards.
- Air vents often cover moving parts; avoid loose clothes, jewelry, or long hair getting caught.