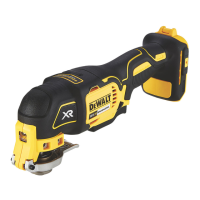
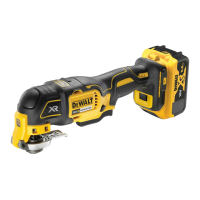
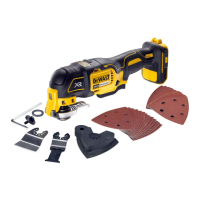
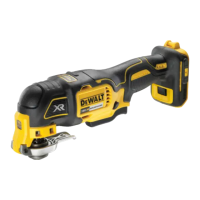
The DEWALT DCS355 is a cordless oscillating multi-tool designed for professional detail sanding, plunge cutting, flush cutting, removal of excess materials, and surface preparation applications. It is a versatile tool that operates on 18-volt XR Li-Ion battery packs, offering cordless convenience for various tasks.
The tool features a variable speed trigger, allowing the user to control the operating speed based on the application. The further the trigger is depressed, the faster the tool will operate. For optimal performance, it is recommended to test the tool at a low speed and gradually increase until a comfortable speed is found. The tool also includes a lock on/off button for extended use applications, which can lock the trigger in the depressed position for added comfort. An integrated LED Worklight activates when the trigger is depressed, illuminating the work area and automatically shutting off after a short period once the trigger is released.
The DCS355 incorporates a quick-change accessory system, enabling faster accessory changes without the need for wrenches or hex keys. To install an accessory, the user grasps the tool and squeezes the accessory clamping lever. After cleaning any residual debris from the tool shaft and accessory holder, the accessory is slid between the shaft and the accessory holder, ensuring it engages all eight pins and is flush with the shaft. The accessory clamp lever is then released. Some accessories, such as scrapers and blades, can be mounted at an angle if required.
For sanding applications, a diamond-shaped platen uses a hook-and-loop adhesion system to attach sanding sheets. The platen is suitable for both large flat surfaces and tight spots or corners. To attach a sanding sheet, the sanding platen is first attached to the tool. Then, the edges of the sanding sheet are aligned with the edges of the sanding platen and pressed onto the platen. Firmly pressing the base with the sanding sheet attached against a flat surface and briefly switching the tool on ensures good adhesion and helps prevent premature wear. When the tip of the sanding sheet becomes worn, it can be detached, rotated, and reapplied.
The tool also supports non-DEWALT accessories through a universal adapter. To use this, a washer is placed on the tool, followed by the accessory, and then the adaptor nut is tightened and secured using a hex wrench.
A depth/cut guide can be attached to the tool for precise cutting at a specified depth and more accurate tracking of marked cut lines. The cut guide block is inserted into the accessory side mount slots on the main body of the tool and secured with a supplied screw and washer, tightened with a hex wrench. The depth guide allows adjustment of the guide arm by pulling out or pushing inward to achieve the desired cut depth, which is then secured by turning the depth/cut adjustment knob clockwise. Similarly, for a cut guide, the guide arm is inserted into the slots on the left and right sides of the guide block, adjusted to the desired length, and secured with the adjustment knob. The guide arm can also be placed in the guard assembly vertically to set the height of a cut.
For dust management, a dust extraction adaptor can be attached to either side of the tool by inserting its tabs into the accessory side mount slots and securing it with a screw and washer, tightened with a hex key. This adaptor allows connection to an external dust extractor, either using the AirLock™ system or a standard 35 mm dust extractor fitment. When using the dust extraction adaptor with the sanding platen, the adaptor and sanding platen are attached first, followed by the sanding sheet. For plunge cutting with dust extraction, the dust extraction adaptor is attached, and then the dust extraction arm is pushed into the lower aperture of the adaptor. The plunge cutting blade is then attached, and the dust extraction arm is adjusted for best results.
Regarding battery usage, the tool operates on 18-volt XR Li-Ion battery packs (DCB180, DCB181, DCB182, or DCB183). Some battery packs include a fuel gauge with three green LED lights that indicate the remaining charge level. Pressing the fuel gauge button illuminates these lights. When the charge is below the usable limit, the fuel gauge will not illuminate, and the battery will need recharging. The fuel gauge is an indication of charge level and is subject to variation based on product components, temperature, and end-user application.
For maintenance, the DEWALT power tool is designed for long-term operation with minimal maintenance, provided proper care and regular cleaning are performed. Before any adjustments, changing accessories, or storing the tool, the battery pack should always be removed, and the tool switched off to prevent accidental start-up. The charger and battery pack are not serviceable, as there are no serviceable parts inside. The tool requires no additional lubrication.
Cleaning involves blowing dirt and dust out of the main housing with dry air, especially around the air vents. Approved eye protection and a dust mask should be worn during this procedure. Solvents or harsh chemicals should not be used for cleaning non-metallic parts, as they can weaken the materials. Instead, a cloth dampened with water and mild soap should be used. No liquid should enter the tool, and no part of the tool should be immersed in liquid. For charger cleaning, the charger should be disconnected from the AC outlet. Dirt and grease can be removed from the exterior using a cloth or soft non-metallic brush, avoiding water or cleaning solutions.
Helpful hints for usage include ensuring the workpiece is firmly held or clamped to prevent movement, as this affects the quality of the finish. Sanding should not begin without the sandpaper attached to the sanding platen. Using appropriate grit paper for different surfaces (coarse for rough, medium for smooth, fine for finishing) is recommended, with a test run on scrap material if necessary. Excessive force should be avoided as it reduces working efficiency and can overload the motor. Regular replacement of accessories maintains optimum working efficiency. The sandpaper should not be allowed to wear away completely, as this can damage the sanding pad. If the tool overheats, particularly at low speeds, it should be set to maximum speed and run with no load for 2-3 minutes to cool the motor. Prolonged usage at very low speeds should be avoided, and the blade should always be kept sharp.