ENGLISH
8
Collapsing and Carrying the Tripod Light
(Fig. A)
CAUTION: Keep hands and fingers clear when
collapsing the light head back into the housing to
avoid pinching of fingers andhands.
To collapse your tripod light into the carrying position, first
collapse the extension poles
2
so the light head rests in the
lowest position and is inside the housing. Lock the latches
3
. Press the leg release button
6
and slide the carrying
handle
8
up until the legs fold in completely.
CAUTION: Keep hands clear of the legs as they
collapse to avoid pinching of fingers andhands.
Storing the Tripod Light
Store your tripod light either in its closed carrying position
(refer to Collapsing and Carrying the Tripod Light) lying
on its side on the handle/rest
5
, or standing vertically with
the legs extended and the light head fully collapsed into
thebase.
CAUTION: Do not store the light vertically when in the
closed position as it could tip over causing injury or
damage to thelight.
OPERATION
WARNING: To reduce the risk of serious personal
injury, turn unit off and remove the battery pack
before making any adjustments or removing/
installing attachments or accessories. An
accidental start-up can causeinjury.
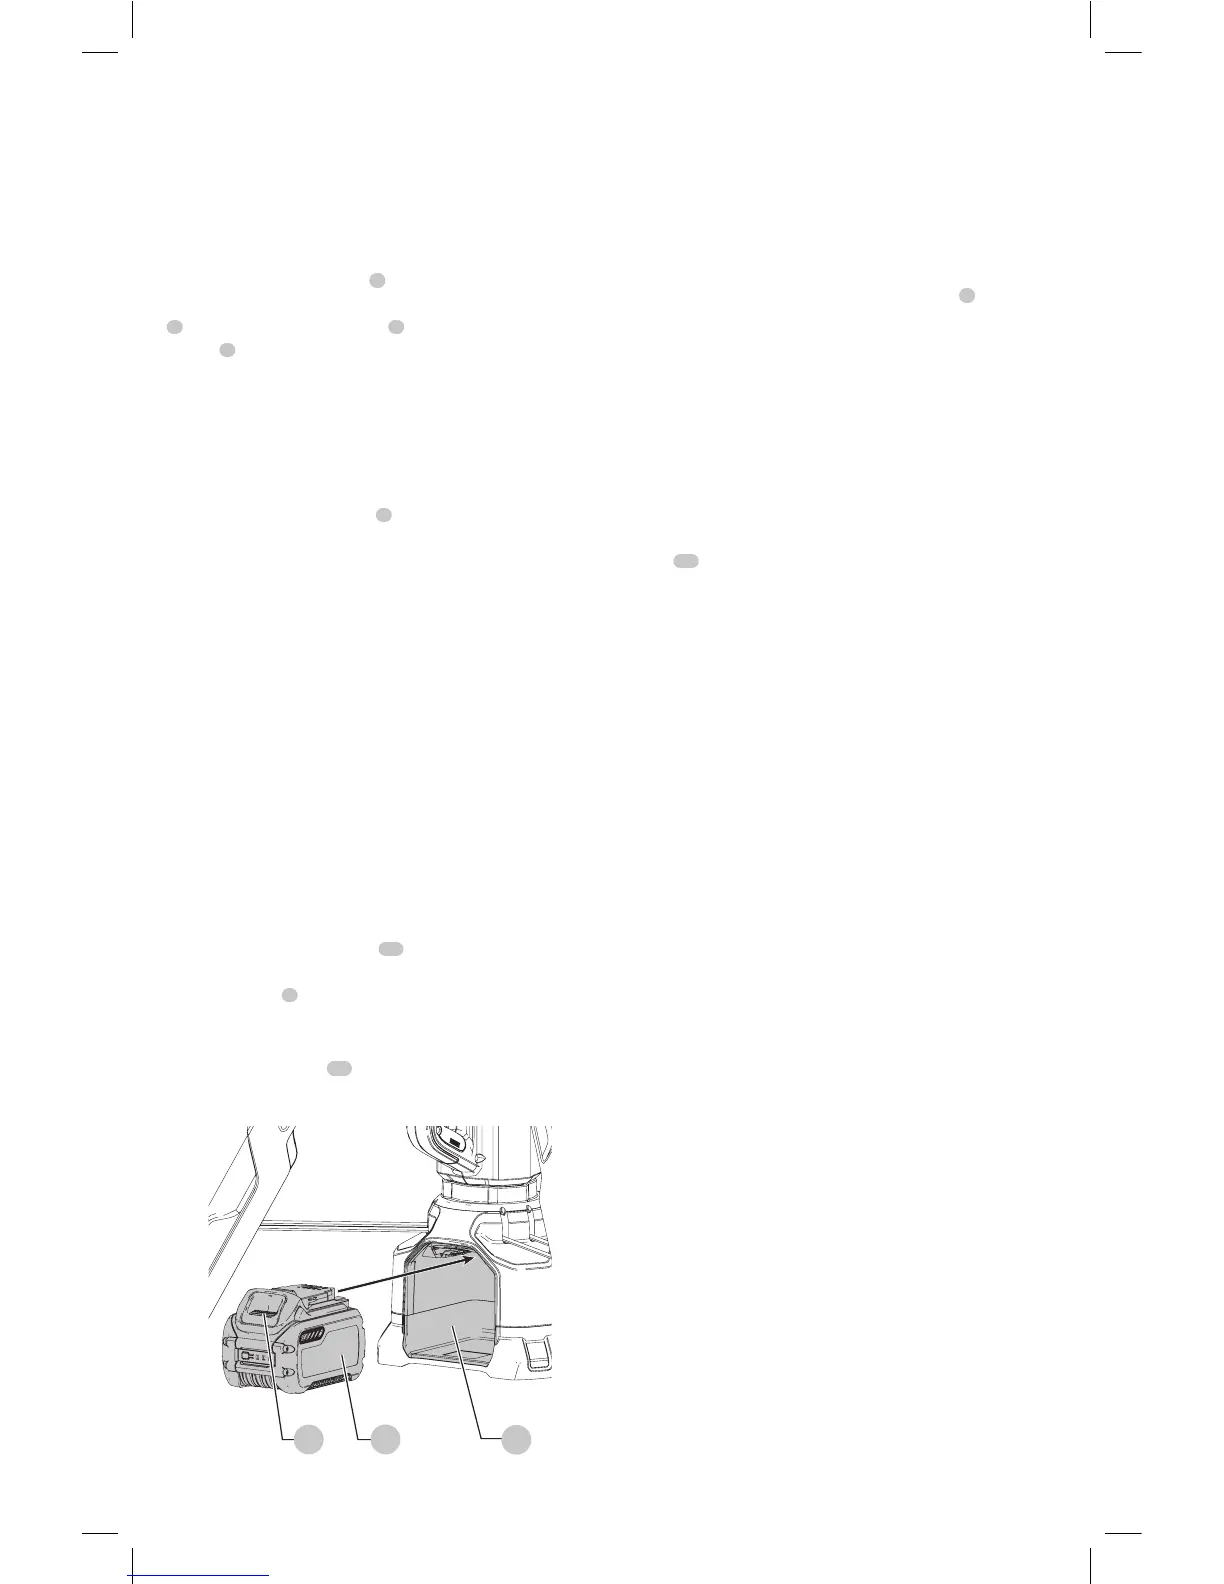
Installing and Removing the Battery Pack
(Fig. F)
NOTE: For best results, make sure your battery pack is
fullycharged.
• To install the battery pack
10
into the tripod light, align
the battery pack with the rails inside the tripod light's
battery port
9
and slide it in until the battery pack is
firmly seated. Ensure that it does notdisengage.
• To remove the battery pack from the tripod light, press
the release button
11
on the battery pack and firmly
pull the battery pack out.
Fig. F
1011
9
Usage (Fig. A, E)
WARNING: Burn hazard. The lens and heatsink get
very hot during use. To reduce the risk of burns and
fire, do not touch and keep away from combustible
materials while inoperation.
1. Place the tripod light on a stable, level surface resting on
its three extendedlegs.
2. To turn the light on, press the power button
4
. The
light will turn on at the brightest setting. Pressing the
power button a second time will change the light to
middle brightness, and pressing it a third time will
change the light to the lowest brightness. Pressing the
power button a fourth time will turn the lightoff.
3. Pivot the light head as needed using the light
head'sframe.
4. When finished using the tripod light, press the power
button until the light turnsoff.
WARNING: Burn hazard. The light head's heatsink
14
(Fig. E) becomes hot during use. Do not touch
the heatsink when worklight is on or immediately
after use, and keep away from combustible materials.
Always pivot the head using only the head'sframe.
Low Battery Indicator
As the battery nears a fully discharged state, the light will
blink twice and then dim, dropping the brightness of the
light below the normal level. The light will continue to blink
twice every 45 seconds until the battery is fully discharged
at which time the light will turn off. Indication time will vary
based on battery packcapacity.
WARNING: Stop work and replace the battery when
this occurs. To reduce the risk of injury, always have a
back-up battery or secondary lighting available if the
situation warrantsit.
MAINTENANCE
WARNING: To reduce the risk of serious personal
injury, turn unit off and remove the battery pack
before making any adjustments or removing/
installing attachments or accessories. An
accidental start-up can causeinjury.
The light source contained in this light shall only be
replaced by the manufacturer or his service agent or a
similar qualifiedperson.
Cleaning
WARNING: Blow dirt and dust out of all air vents with
clean, dry air at least once a week. To minimize the risk
of eye injury, always wear ANSI Z87.1 approved eye
protection when performingthis.
WARNING: Never use solvents or other harsh
chemicals for cleaning the non-metallic parts of
the tool. These chemicals may weaken the plastic
materials used in these parts. Use a cloth dampened
only with water and mild soap. Never let any liquid
get inside the tool; never immerse any part of the tool
into aliquid.