WALT
replacement line Model No.
DWO1DT801 or DWO1DT802.
•Whenreplacingtheline,useonly2.032mm
diameter line (Model No. DWO1DT801 or
DWO1DT802) is recommended. For optimal
performance, do not use 2.413 mm line. Other
sized may degrade performance and cause
damage to the trimmer.
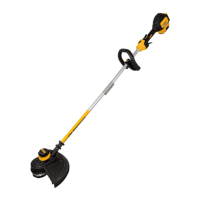
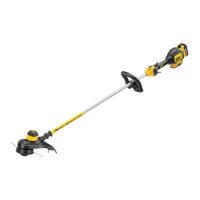
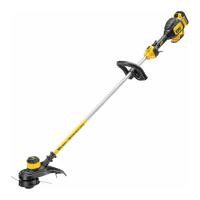
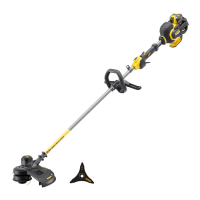
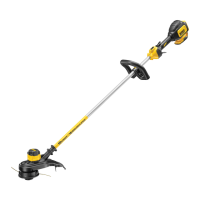
Replacing the Cutting Line (fig. 9–12)
CAUTION: To avoid appliance
damage, if the cutting line protrudes
beyond the trimming blade, cut it off so
that it just reaches the blade.
1. Remove battery.
2. Turn spool (o) clockwise to unlock as shown
in Figure 9. The white nub (u) inside the spool
will rotate away from the spool window (p) to
indicate it is unlocked.
3. Pull the spool straight out to remove.
4. Remove any dirt and grass from the spool
and housing.
5. First, wind new line in the channel of the
spool closest to the holding slots (s) as shown
in Figure 10.
6. Place the end of the cutting line (q) into the
retaining hole (r).
7. Wind the cutting line onto the spool in the
direction of the arrow on the bottom of the spool.
8. When the wound cutting line reaches the
beginning of the holding slots (s), cut the line
approximately 106mm.
9. Push the line in the holding slots on one side
of the spool to hold the first line while you wind
the second line.
10. Repeat the above procedure for the second
cutting line on the lower section of the spool.
CAUTION: Before you begin
trimming, only use the appropriate type
of cutting line. Ensure that cutting line is
present in both sections of the spool as
shown in Figure 11.
11. Once both lines are wrapped around the
spool (o), place your thumb and finger on the
holding slots to further secure the string and
feed the end of each line through the two
Maintain a minimum distance of 610 mm between the
guard and your feet as shown in Figure 8.
WARNING: Keep the rotating
string roughly parallel with the ground
(tilted no more than 30 degrees). This
trimmer is not an edger. DO NOT TILT
the trimmer so that the string is spinning
near a right angle to the ground. Flying
debris can cause serious injury.
Bump Feed Trimmer Line Feed
Your trimmer uses 2.032 mm diameter nylon line.
Cutting line will wear faster and require more feeding if
the cutting is done along sidewalks or other abrasive
surfaces or heavier weeds are being cut.
As you use the trimmer, the string will get shorter
due to wear. Gently bump the trimmer on the ground
while running at normal speed and the line will feed.
NOTE:
Extending nylon line beyond the 330mm
swath will negatively affect performance, runtime, and
the life of the trimmer due to potential of damaging
motor. Doing so may void the warranty.
Helpful Cutting Tips
•Usethetipofthestringtodothecutting;do
not force string head into uncut grass.
•Wireandpicketfencescauseextrastringwear,
even breakage. Stone and brick walls, curbs,
and wood may wear string rapidly.
•Donotallowspoolcaptodragongroundor
other surfaces.
•Inlonggrowth,cutfromthetopdownanddo
not exceed 304.8 mm high.
•Keeptrimmertiltedtowardtheareabeingcut;
this is the best cutting area.
•Thetrimmercutswhenpassingtheunitfrom
the left to right. This will avoid throwing debris at
the operator.
•Avoidtreesandshrubs.Treebark,wood
moldings, siding, and fence posts can easily be
damaged by the string.
Replacement Accessories
WARNING: To reduce the risk of
serious personal injury, turn appliance
off and remove battery before making
any adjustments or removing/installing
attachments or accessories.
WARNING: The use of any
accessory not recommended by
D