8
ENGLISH
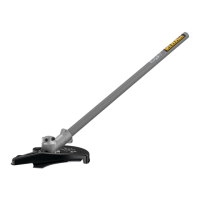
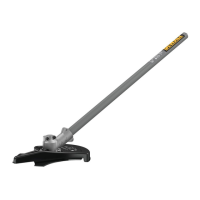
Replacing the Cutting Blade (Fig. A, C, D)
WARNING: To reduce the risk of serious personal
injury, turn unit off and remove the battery pack
before making any adjustments or removing/
installing attachments or accessories, or prior to
cleaning. An accidental start‑up can causeinjury.
When replacing the blade, use 8" (203 mm) diameter blades.
Use DeWALT replacement blade Model No. DT20680. Other
sizes may degrade performance or cause damage to thebrush
cutterattachment. DO NOT use toothed blades, such as saw
blades, with thisproduct.
1. Removebattery.
2. Remove brush cutter attachment from thepowerhead.
Reverse the steps under Assembling the Brush Cutter
Attachment to thePowerhead.
WARNING: Use gloves and proper eye protection. Turn the
brush cutter on its side. Be careful of sharp edges of blade.
Removing the Cutting Blade
1. Align the shaft bushing hole
16
with the locking rod slot
17
and insert a screwdriver (not supplied) into the bushinghole.
Hold the screwdriver inposition.
2. While holding the screwdriver, remove the flange nut
18
by turning it counterclockwise with a 13mm wrench (not
supplied) as shown in Fig.C.
3. Remove the blade spacer
19
and the blade
4
as shown
in Fig. C. Examine all pieces for damage and replace
ifnecessary.
Installing the New Cutting Blade
1. Install new blade
4
on shoulder of the blade cutter shaft
bushing
15
as shown in Fig.C.
2. Align the shaft bushing hole
16
with the locking rod slot
17
and insert a screwdriver into the bushinghole.
3. Hold the screwdriver inposition.
4. Install the blade spacer
19
on the blade so that the wide
flat side faces theblade.
5. Install flange nut
18
with the flange against the blade
spacer
19
and securely tighten with a13mm wrench
(notsupplied).
6. Tighten nut counterclockwise against the blade while
holding the locking rod:
‑ If using a torque wrench and an 13mm socket tighten
to: 325‑335 in lb, 27‑ 28ft. lb, 37‑ 38Nm.
‑ Without a torque wrench, use a 13mm closed‑end or
socket wrench, turning the nut until the blade retainer is
snug against the shaft bushing. Ensure that the blade is
installed correctly, then rotate the nut an additional 1/4
to 1/2 turncounterclockwise.
7. Remove the screwdriver from the locking rod slot
17
.
Use a transport cover on the metal blades when transporting
and storing the brush cutterattachment.
Optional Accessories
WARNING: Since accessories, other than those offered
by DeWALT, have not been tested with this product, use
of such accessories with this tool could be hazardous.
To reduce the risk of injury, only DeWALT recommended
accessories should be used with thisproduct.
Consult your dealer for further information on the
appropriateaccessories.
D
Cleaning
WARNING: Blow dirt and dust out of the main housing
with dry air as often as dirt is seen collecting in and around
the air vents. Wear approved eye protection and approved
dust mask when performing thisprocedure.
WARNING: Never use solvents or other harsh chemicals
for cleaning the non‑metallic parts of the tool. These
chemicals may weaken the materials used in these parts.
Use a cloth dampened only with water and mild soap.
Never let any liquid get inside the tool; never immerse any
part of the tool into aliquid.
C
Lubrication
Your power tool requires no additionallubrication.
MAINTENANCE
Your power tool has been designed to operate over a long
period of time with a minimum of maintenance. Continuous
satisfactory operation depends upon proper tool care and
regularcleaning.
WARNING: To reduce the risk of serious personal
injury, turn tool off and disconnect battery pack
before making any adjustments or removing/
installing attachments or accessories. An accidental
start‑up can causeinjury.
The charger and battery pack are notserviceable.
• Wire and picket fences cause extra blade wear, even
breakage. Stone and brick walls, curbs, and wood may wear
stringrapidly.
• In long growth, cut from the top down and do not exceed
12" (305mm)high.
• Keep brush cutter head tilted toward the area being cut; this
is the best cuttingarea.
• The brush cutter cuts best when passing the unit from the
left to right. This will avoid throwing debris at theoperator.
• Avoid trees and shrubs. Tree bark, wood moldings, siding,
and fence posts can easily be damaged by theblade.
 Loading...