15
English
Running in the Tool
Please note that this tool requires a run-in period
before it operates with full power due to parts which
need to mesh or wear in together. It may be that
the tool does not drive long nails flush consistently
during this period.
After driving between 500 and 1000 nails the tool
should have run-in and perform at full capacity.
Actuating the Tool (Fig. 1)
The tool can be operated using one of two modes:
SEQUENTIAL ACTION MODE
The sequential action mode is used for intermittent
nailing when very careful and accurate placement is
desired. It also offers the maximum delivery of power
for driving the longest nails.
1. Using the mode selector switch(I), select the
sequential action mode (
) or ( ).
2. Release the trigger safety lock-off(B).
3. Push the contact trip(C) against the work
surface.
4. Pull the trigger switch(A) to actuate the tool.
5. Release the trigger and raise the nailer from the
work surface.
6. Repeat steps 3–5 to actuate the next nail.
CONTACT TRIP MODE (DCN692)
Contact trip mode (also known as bump mode) is
used for rapid nailing on flat, stationary surfaces and
typically most effective for application driving shorter
nails.
1. Using the mode selector switch(I) to select the
bump action mode (
).
2. Release the trigger safety lock-off(B).
3. To drive a single nail, operate the tool as
described for sequential action:
A. Push the contact trip(C) against the work
surface.
B. Pull the trigger switch(A) to actuate the tool.
Each trigger pull with the contact trip pushed
against the work surface will drive one nail.
4. To drive several nails, depress and hold the
trigger switch(A), and then push the contact
trip(C) repeatedly against the work surface.
WARNING: Do not keep the trigger
depressed when the tool is not in use.
Keep the trigger safety lock-off(B) in the
locked position to prevent accidental
actuation when the tool is not in use.
1
Increased
tool durability,
Increased
battery life,
Increased speed
of firing, Less
recoil
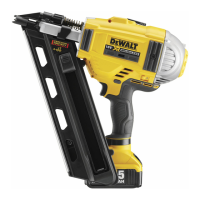
Flooring
50 –
70mm
Cladding
Fencing
Boarding
Battening
OPERATION
Instructions for Use
WARNING: Always observe the safety
instructions and applicable regulations.
WARNING: To reduce the risk of
serious personal injury, turn tool
off and disconnect battery pack
before making any adjustments or
removing/installing attachments or
accessories. An accidental start-up can
cause injury.
Proper Hand Position (Fig. 7)
WARNING: To reduce the risk of serious
personal injury, ALWAYS use proper
hand position as shown.
WARNING: To reduce the risk of serious
personal injury, ALWAYS hold securely in
anticipation of a sudden reaction.
Proper hand position requires one hand on the main
handle(R) as shown.
Preparing the Tool (Fig. 1)
1. Remove the battery pack(L) from the tool and
ensure the tool is locked off.
2. Remove all nails from the magazine(G).
3. Check if the contact trip(C) can move freely.
4. Reload the nails to the magazine.
5. Insert battery pack.
WARNING: Do not use the tool if the
contact trip or nail pusher cannot move
freely.
NOTICE: NEVER spray
or in any other way apply
lubricants or cleaning
solvents inside the tool.
This can seriously affect
the life and performance of the tool.
 Loading...