49
ENGLISH
LOW BATTERY
Replace battery with a charged
pack.
HOT PACK
Let the battery cool or replace it
with a cool pack.
JAM/STALL CONDITION
Rotate the stall release lever to
release. Refer to Stall Release.
HOT TOOL
Let the tool cool down before
continuing use.
+/OR
or any other
combination.
ERROR
Reset tool by removing and
reinserting battery pack or cycling
trigger lock off. If error code
persist, take tool to an authorized
service center.
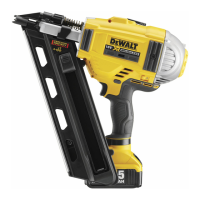
Stall Release (Fig. A, C)
If the nailer is used in rigorous application where all available
energy in the motor is used to drive a fastener, the tool may
stall. The driver blade did not complete the drive cycle and the
jam/stall indicator
5
will flash. Rotate the stall release lever
6
on the tool and the mechanism will release. If the driver blade
does not automatically return to the home position, proceed
to Clearing a Jammed Nail. If the unit continues to stall please
review the mode selection, material and fastener length to be
sure that it is not too rigorous an application.
If continuous stalling occurs, review speed selection.
Depending upon the application, a different speed setting may
benecessary.
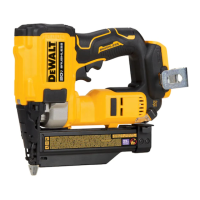
Clearing a Jammed Nail (Fig. A, C)
If a nail becomes jammed in the nosepiece, the
jam/stall indicator light
5
will flash.
NOTE: The jam could be as a result of debris build up in the
nose channel. Please check and clear out any debris as outlined
below immediately if you notice any change of performance in
the tool.
1. Remove battery pack from tool and engage trigger safety
lock-off
2
.
2. Slide the spring-loaded pusher latch
8
to the base of the
magazine to lock it into place and unload nail strip.
3. Using the hex tool
11
provided, loosen the two hex
bolts
17
at the top of the magazine.
4. Rotate the magazine
7
forward.
5. Remove jammed/bent nail, using pliers if necessary. Clear
out any debris in the nail channel if required.
6. If driver blade is in the down position, rotate the stall release
lever
6
on the top of the nailer.
NOTE: If the driver blade will not reset after rotating the
stall release lever, manually resetting the blade with a long
screwdriver may be necessary.
7. Rotate the magazine back into position under the nose of
the tool and tighten hex bolts
17
.
8. Reinsert battery pack.
NOTE: The tool will disable itself and not reset until the
battery pack has been removed and reinserted.
9. Reinsert nails into magazine (refer to Loading the Tool).
10. Release the pusher latch
8
.
11. Disengage the trigger safety lock-off
2
when ready to
continue nailing.
If nails become jammed in the nosepiece frequently, have the
tool serviced by an authorised D
WALT service centre.
MAINTENANCE
Your
power tool has been designed to operate
over a long period of time with a minimum of maintenance.
Continuous satisfactory operation depends upon proper tool
care and regularcleaning.
WARNING: To reduce the risk of serious personal
injury, turn tool off and disconnect battery pack
before making any adjustments or removing/
installing attachments or accessories. An accidental
start-up can causeinjury.
The charger and battery pack are notserviceable.
Lubrication
Your power tool requires no additionallubrication.
NOTICE: NEVER spray or in any other way apply
lubricants or cleaning solvents inside the tool. This can
seriously affect the life and performance of the tool.
Cleaning
WARNING: Blow dirt and dust out of the main housing
with dry air as often as dirt is seen collecting in and around
the air vents. Wear approved eye protection and approved
dust mask when performing thisprocedure.
WARNING: Never use solvents or other harsh chemicals
for cleaning the non-metallic parts of the tool. These
chemicals may weaken the materials used in these parts.
Use a cloth dampened only with water and mild soap.
Never let any liquid get inside the tool; never immerse any
part of the tool into aliquid.
Optional Accessories
WARNING: Since accessories, other than those offered
by
, have not been tested with this product, use
of such accessories with this tool could be hazardous.
To reduce the risk of injury, only
recommended
accessories should be used with thisproduct.
Consult your dealer for further information on the
appropriateaccessories.
 Loading...