11
ENGLISH
from right- or left-hand usage simply remove the screw and
install the utility hook on the oppositeside.
3. Load staples and replace battery pack .
OPERATION
Instructions for Use
WARNING: Always observe the safety instructions and
applicableregulations.
WARNING: To reduce the risk of serious personal
injury, turn unit off and remove the battery pack
before loading staples, making any adjustments or
removing/installing attachments or accessories. An
accidental actuation can causeinjury.
WARNING: Read the section titled Stapler Safety
Warnings at the beginning of this manual. Always wear
eye and ear protection when operating this tool. Keep the
stapler pointed away from yourself and others. For safe
operation, complete the following procedures and checks
before each use of thestapler.
WARNING: To reduce the risk of personal injury,
disconnect battery pack from tool before performing
maintenance, clearing a jammed staple, leaving work
area, moving tool to another location or handing the tool
to anotherperson.
WARNING: NEVER use a tool that has the contact trip
restrained in the upposition.
WARNING: NEVER use a tool that has damagedparts.
Proper Hand Position (Fig. D)
WARNING: To reduce the risk of serious personal injury,
ALWAYS use proper hand position asshown.
WARNING: To reduce the risk of serious personal
injury, ALWAYS hold securely in anticipation of a
suddenreaction.
Proper hand position requires one hand on the handle
14
as
shown in Fig. D.
Preparing the Tool (Fig. A)
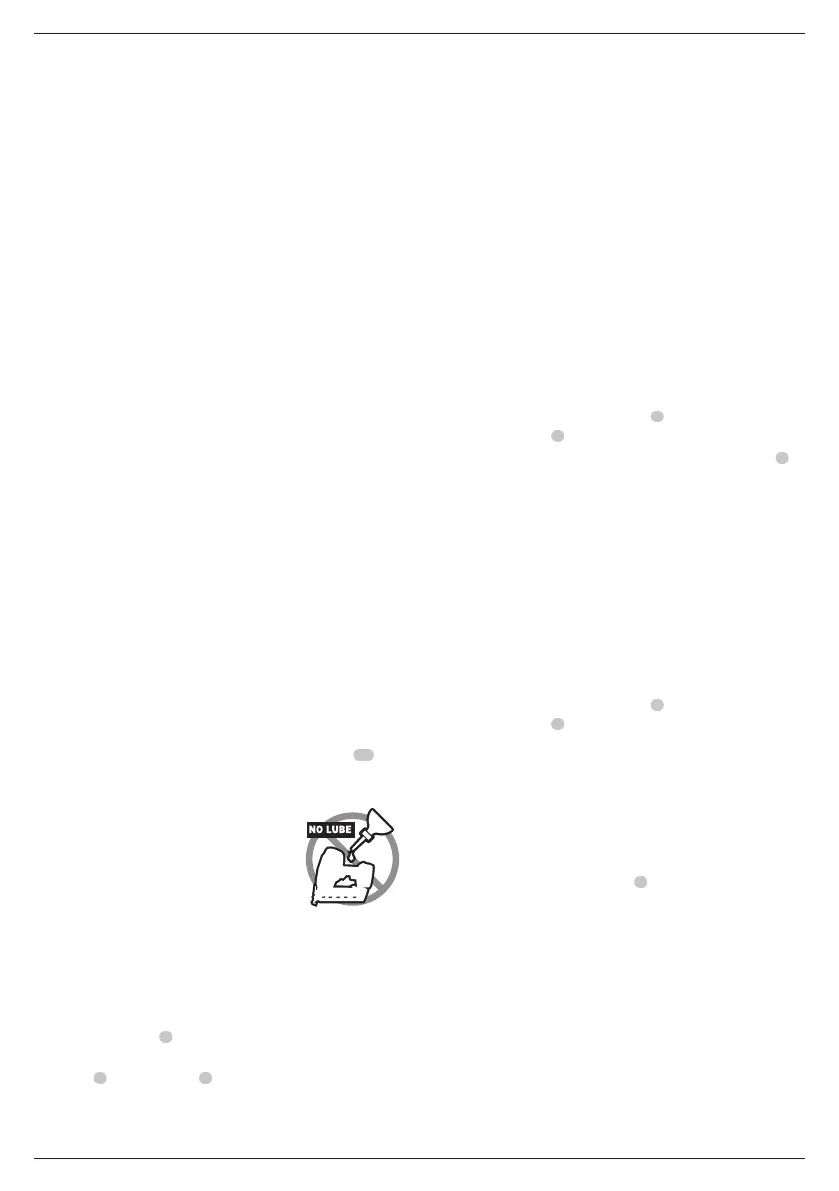
NOTICE: NEVER spray or in any
other way apply lubricants or
cleaning solvents inside the tool.
This can seriously affect the life and
performance of thetool.
NOTE: The battery pack is not fully charged out of the carton.
Follow instructions outlined (refer to Charging aBattery).
1. Read the Stapler Safety Warnings section of thismanual.
2. Wear eye and earprotection.
3. Remove battery fromtool.
4. Ensure magazine
6
is empty of allstaples.
5. Check for smooth and proper operation of cable alignment
guide
3
, wire indicator
4
and pusher assemblies. Do
not use tool if either assembly is not functioning properly.
NEVER use a tool that has the contact trip restrained in the
actuatedposition.
6. Keep tool pointed away from yourself andothers.
7. Insert fully charged batterypack.
NOTICE: Do not store tool with battery pack installed. To
prevent damage to the pack and to ensure best battery
life, store battery packs out of the tool or charger in a cool,
drylocation.
Loading the Tool (Fig. E)
WARNING: Keep the tool pointed away from yourself
andothers.
WARNING: Never load staples with the contact trip or
triggeractivated.
WARNING: Always remove battery pack before loading or
unloadingstaples.
CAUTION: Keep fingers clear of pusher latch track to
preventinjury.
WARNING: This stapler requires the use of
DeWALTstaples.
1. Depress magazine release button
7
and slide the magazine
core and pusher
8
out until it reaches the end of itstravel.
2. Drop staple strips into the loading slot of the magazine
6
,
making sure the staple heads align correctly with the
slot opening. (Refer to Technical Data to determine
compatiblesize.)
3. Keeping fingers clear of the track, close the magazine by
releasing the pusher latch. Carefully allow the latch to slide
forward and engage the staplestrip.
NOTE: Do not slam magazine core assembly into magazine
or you could damagestaples.
Unloading the Tool
WARNING: Always remove battery pack before loading or
unloadingstaples.
1. Depress magazine release button
7
and slide the magazine
core and pusher
8
out until it reaches the end of itstravel.
2. Tip the tool right side up until the staple strips fall freely out
of themagazine.
3. Close the magazine by sliding the magazine core back into
the magazine fully until it latches. Do not slam magazine
core into themagazine.
Headlight/LED Worklight (Fig. F)
There is a headlight/LED worklight
5
located at the front of the
unit. The headlight turns on upon battery insertion, activation
of the trigger, or depressing the contact trip. The light will
automatically shut off after 20 seconds unless tool remains
inuse.
NOTE: The headlight is for lighting the immediate work surface
and is not intended to be used as aflashlight.
LOW BATTERY INDICATOR: The headlight will flash four
consecutive times and then shut down to indicate lowbattery.
Actuating the Tool (Fig. G)
WARNING: Always turn off power to circuit before
attempting to staple wires. Do not staple “live”wires.
 Loading...