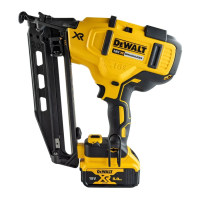
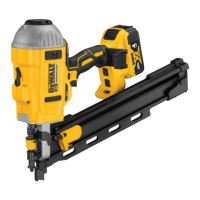
13
ENGLISH
WARNING: Always remove battery pack before loading or
unloading pins.
CAUTION: Keep fingers clear of pusher latch track to
prevent injury.
WARNING: The trigger lock-off should always be engaged
whenever any adjustments are made or when tool is not
in use.
WARNING: Fasteners used to install metal connectors
must meet the requirements of the applicable building
codes and must be installed in compliance with code
requirements and metal connector hardware supplier
specifications. Failure to properly install connectors may
result in structural failures.
1. Turn the nailer upside down.
2. Slide the spring-loaded pusher latch
15
to the base of the
magazine to lock it into place.
3. Drop pin strips into the loading slot of the magazine,
making sure the pin heads align correctly with the slot
opening. (Refer to Technical Data to determine compatible
size.)
4. Keeping fingers clear of the track, close the magazine by
releasing the pusher latch. Carefully allow the latch to slide
forward and engage the pin strip.
Unloading the Tool
WARNING: The trigger lock-off should always be locked
off whenever any adjustments are made or when tool is
not in use.
1. Remove the battery from your nailer.
2. Slide the spring-loaded pusher latch to the base of the
magazine to lock it into place.
3. Tip the tool up until the fastener strip slides freely out of the
magazine.
4. With battery removed, check the nosepiece to verify there
are no pins remaining.
NOTE: The tool is equipped with a magnet in the nose area for
improved tool performance. When unloading, always verify that
the small sticks of pins are not held to the magnetized nose
piece.
Speed Setting Summary (Fig. A, G, H)
This nailer is equipped with a speed selection switch
3
to adjust
the tool when driving into different materials.
Speed 1: Softer materials (low strength concrete/cinder block)
Speed 2: Medium hardness materials (High strength concrete)
Speed 3: Hard materials (Structural steel)
In the event pins are not driving to depth in speed 1, you may
have to switch to speed 2 or 3 for additional driving power.
NOTICE: Driving pins into soft materials at high
speed settings will cause excessive wear to your tool
and may result in early failures.
Speed Setting Application Typical Pin Length
1
Fastening Steel/Wood to Low Strength
Concrete/Masonry (<4000 psi)
19-25 mm
2
Fastening Steel/Wood to High Strength
Concrete (>4000 psi)
19-29 mm
3
Fastening to structural steel;
2x4 to Concrete
13-57 mm
WARNING: Pins must be driven straight into the material.
Do not tilt nailer while driving fasteners. Refer to Fig.H.
Pin retention values improve when the tool is fired
perpendicular to the material.
The tool can be fired/actuated by pulling the trigger
1
in one
of two modes: sequential mode or RapidCycle mode. Refer
to Selecting the Mode for detailed instructions for firing in
eachmode.
Selecting the Mode (Fig. A, G)
To select standard sequential mode, slide the mode selector
switch
4
to display the single arrow ( ) icon.
To select rapid sequential operating mode (RapidCycle), slide
the mode selector switch
4
to display the double arrow ( )
icon.
NOTE: Battery life in RapidCycle mode will be shorter than
in standard sequential mode. Leaving the tool in standard
sequential will give maximum battery life.
Sequential Mode
The sequential mode is used for intermittent nailing. It offers the
maximum battery life for driving pins.
1. Using the mode selector switch
4
, select the
sequentialmode.
2. Release the trigger lock-off
2
.
3. Push the contact trip
6
against the work surface.
4. Pull the trigger switch
1
to actuate the tool.
5. Release the trigger and raise the nailer from the
worksurface.
6. Repeat steps 3–5 to actuate the next nail.
RapidCycle Mode
In RapidCycle mode, the motor rotation speed is automatically
restored after driving a pin to allow fast consecutive nailing.
While offering the ability to drive more pins in less time, this
mode quickly depletes the batterycharge.
1. Using the mode selector switch
4
to select the RapidCycle
mode.
2. Release the trigger lock-off
2
.
3. Push the contact trip
6
against the work surface.
4. Pull the trigger switch
1
to actuate the tool.
5. Release the trigger and raise the nailer from the work
surface. NOTE: The tool motor returns to full speed
automatically without the contact trip
6
beingdepressed.
6. Repeat steps 3–5 to actuate the next nail.

 Loading...