ENGLISH
12
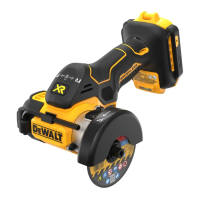
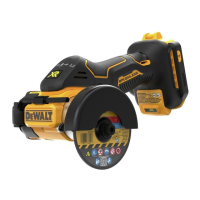
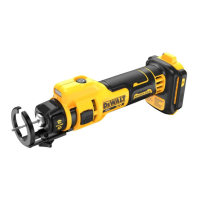
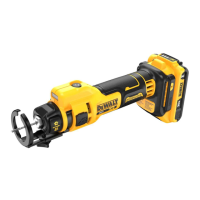
To Operate (Fig. A)
CAUTION: Before attempting to start, grasp toolfirmly.
WARNING: To reduce the risk of injury, DO NOT use a
toothed blade.
WARNING: This tool is intended to be used dry.
If water cooling is necessary, use a spray bottle
with clean water to lightly wet surface only, avoid
over‑wetting the workpiece. NEVER immerse your tool
or battery pack in any liquid or allow liquid insidethem.
Forward/Reverse/Lock Off Button (Fig. A)
Your cut‑off tool is equipped with a forward/reverse/lock
off button
5
. Some applications or accessories may require
the tool to be run in forward or reverse. When making a cut,
select the direction of cut that allows the tool to be pushed
away from your body. When installing a diamond wheel,
select the rotation that matches the arrow on the wheel.
• For forward (clockwise) rotation, push the forward/
reverse/lock off button all the way to the right, as shown
by the direction indicator
7
.
• For reverse (counterclockwise) rotation, push the
forward/reverse/lock off button all the way to the left, as
shown by the directionindicator.
• To lock the trigger switch, push the forward/reverse/
lock off button to the centre position, as shown by the
directionindicator.
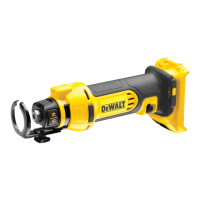
Proper Hand Position (Fig. I)
WARNING: To reduce the risk of serious personal injury,
ALWAYS use proper hand position asshown.
WARNING: To reduce the risk of serious personal
injury, ALWAYS hold securely in anticipation of a
suddenreaction.
WARNING: Keep your free hand far from
cuttingaction. Do not reach underneath the workpiece.
Proper hand position requires one hand on the main
handle
3
.
Installing and Removing the Battery Pack
(Fig. H)
NOTE: For best results, make sure your battery pack is
fullycharged.
To install the battery pack
8
into the tool handle, align the
battery pack with the rails inside the tool’s handle and slide
it into the handle until the battery pack is firmly seated in the
tool and ensure that it does notdisengage.
To remove the battery pack from the tool, press the release
button
2
and firmly pull the battery pack out of the tool
handle. Insert it into the charger as described in the charger
section of thismanual.
OPERATION
WARNING: To reduce the risk of serious personal
injury, turn unit off and remove the battery pack
before making any adjustments or removing/
installing attachments or accessories. An
accidental start‑up can causeinjury.
Attaching an AirLock
™
Compatible Dust
Extractor (Fig. G)
WARNING: Do not use dust extraction when cutting
metal. Swarf from metal cutting may be hot and may
spark which can melt vacuum hoses and may cause a
fire inside thevacuum.
WARNING: When using dust extraction, empty
vacuum before work begins and often during work.
Use care in disposing of dust. Materials in fine dust can
beexplosive.
Your tool is compatible with the DeWALT AirLock™
connection system. The AirLock™ allows for a fast, secure
connection between the AirLock™ connector
23
and your
tool's dust extraction port
8
.
1. Remove thebattery.
2. Ensure the collar on the AirLock™ connector is in the
unlock position. (Refer to FigureG.) Align notches
24
on
collar and AirLock™ connector as shown for unlock and
lockpositions.
3. Push the AirLock™ connector onto the adapter
connectorpoint.
4. Rotate the collar to the lockedposition.
NOTE: The ball bearings inside collar lock into slot and
secure the connection.The power tool is now securely
connected to the dustextractor.
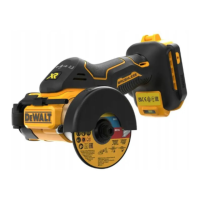
Mounting, Removing and Adjusting the
Dust Shroud (Fig. F)
NOTE: The dust shroud is only for tile/concrete and drywall
cutting applications to connect to a vacuum for dust
collecting. We do not recommend use of the shroud for
metal cuttingapplications.
1. Remove thebattery.
2. With the wheel properly installed, rotate the guard
12
all the wayforward.
3. Loosen the depth of cut wing nut
11
and fully extend
the shoe. Hand‑tighten the depth of cutknob.
4. Maneuver the upper guard and wheel into the dust
shroud assembly
9
and rotate tool to lock in place.
The front of the guard will rest against the stop inside
the assembly, and the back of the guard will catch the
release tab
21
.
To Remove the Dust Shroud
1. Remove thebattery.
2. Loosen the depth of cut wing nut and fully extend the
shoe. Hand‑tighten the depth of cut wingnut.
3. Press in the shroud release button
22
and rotate the tool
out of the dust shroudassembly.
To Adjust the Depth of Cut
1. Loosen the depth of cut wing nut and slide the shroud
up or down. Use the markings on the depth of cut gauge
to help determine proper depth. Adjust the cutting
depth to the thickness of the workpiece. Less than 1/4" of
the wheel should be visible below theworkpiece.
 Loading...