ENGLISH
26
3. Plane your workpiece. The final thickness is now
76.0mm.
Depth Stop (Fig. A, D3, D5)
The depth stop
14
(Fig. A) can be used for repetitive
planing of preset depths. Stops are set at 0, 6, 12and
19 mm.
Use the 0 mm stop for cutting depths between 3.2
and 6 mm (Fig. D5).
1. Turn the depth stop until the desired measurement
is indicated.
2. Unlock the head lock lever
2
(Fig. D3) and turn the
depth adjustment handle clockwise until it contacts the
depth stop. Do not turn the handle any further.
Use the 19 mm stop for other thicknesses. This will
not affect the other depth stop settings.
1. Unlock the head lock lever
2
and turn the depth
adjustment handle
3
counterclockwise to raise the
head fully.
2. Loosen the nut
23
and adjust the depth adjustment
bolt
24
as required (Fig. D5).
3. Turn the depth adjustment handle until it contacts the
depth stop. Do not turn the handle any further.
4. Plane your workpiece and check its thickness. Make
additional adjustments if required.
Fig. D5
23
24
Calibrating the Depth Adjustment Scale
(Fig. D3)
The depth adjustment scale
8
is factory set. In the case
of extended use, it is recommended to check the scale
foraccuracy.
Plane a piece of wood, noting the measurement on the
depth adjustment scale
8
.
If adjustment is required, proceed as follows:
1. Loosen the screws
33
.
2. Adjust the prism until the indicator
34
matches the
finished thickness of the workpiece.
3. Firmly tighten the screws
33
.
Consult your dealer for further information on the
appropriate accessories.
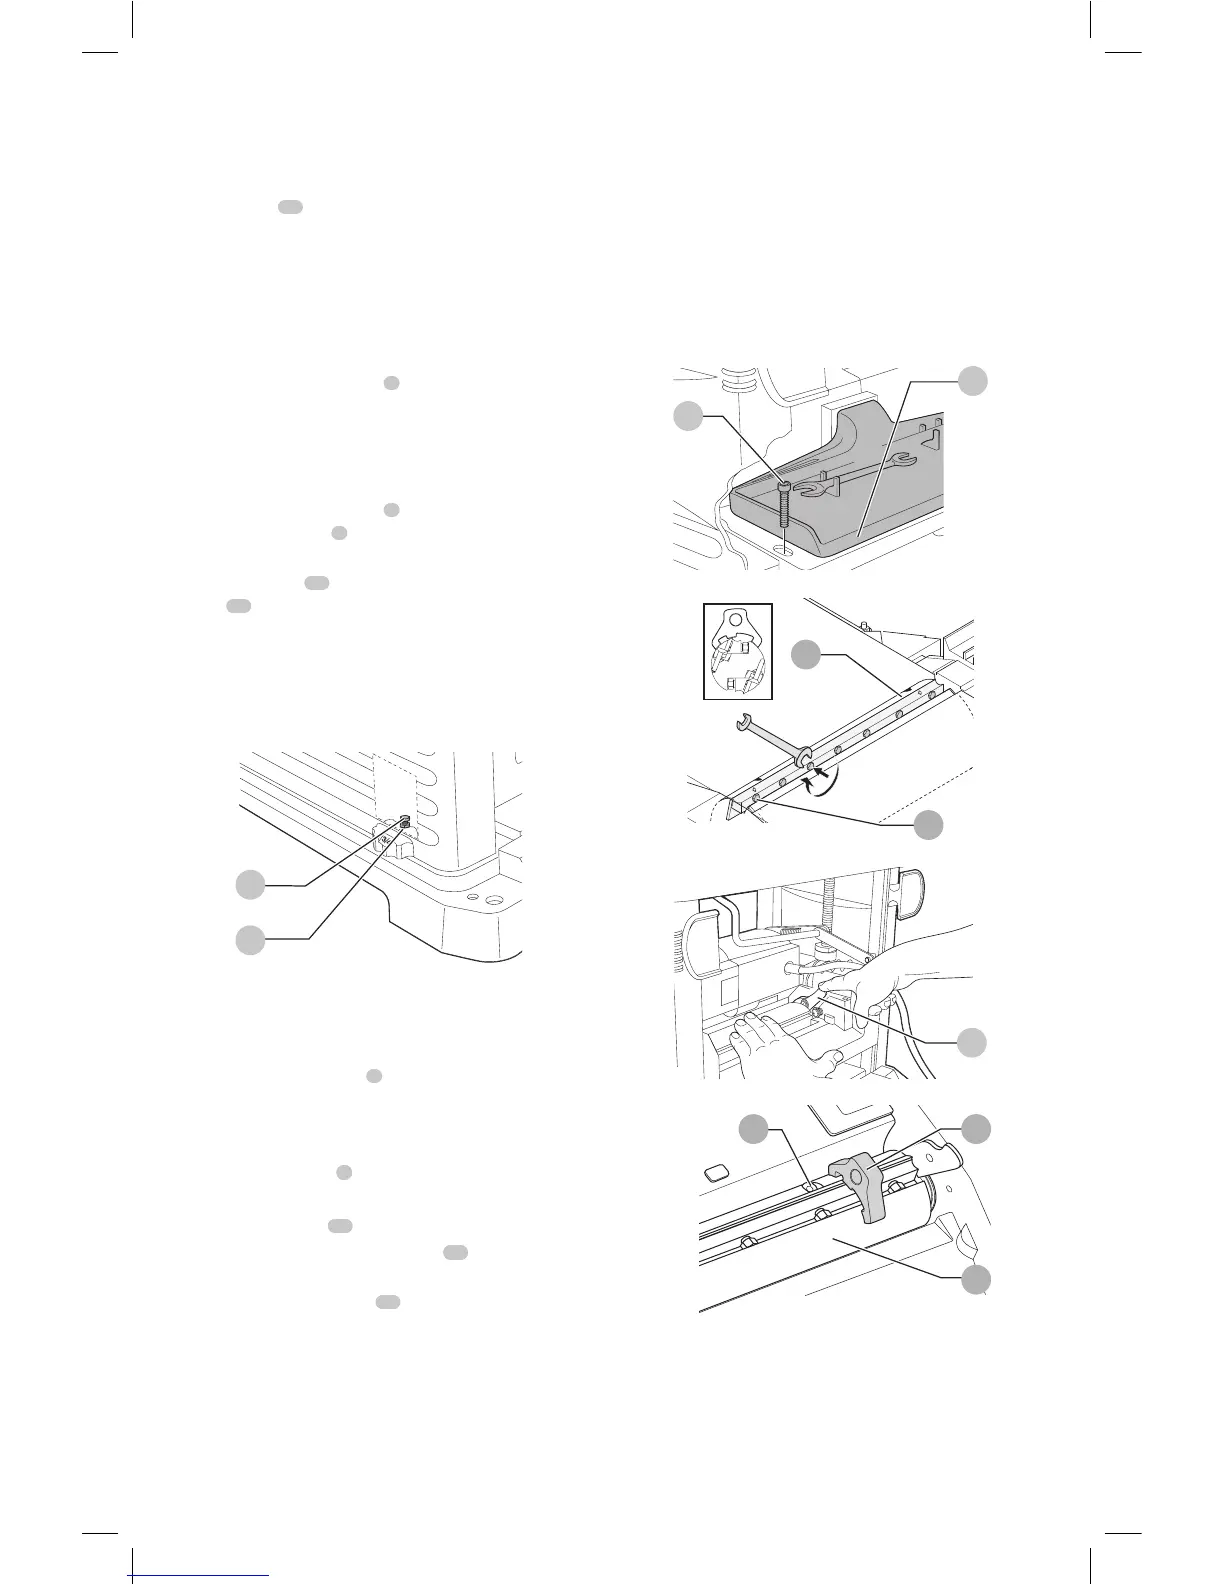
Changing Blades (Fig. A, E1–E5)
Your DW733 is equipped with a cutterhead which holds
two blades.
WARNING: Sharp edges.
WARNING: The blades can be re-sharpened max.
3 mm down from their original size. If the blade size
has decreased by more than 3 mm, the blades have to
be replaced. The blades can be re-sharpened at 42°.
Fig. E1
12
25
Fig. E2
26
28
Fig. E3
29
Fig. E4
27 32
30

 Loading...


