9
ENGLISH
Accessories
WARNING: Since accessories, other than those offered
by DeWALT, have not been tested with this product, use of
such accessories with this appliance could be hazardous.
To reduce the risk of injury, only DeWALT recommended
accessories should be used with thisproduct.
ACCESSORIES
DWV9340 Dust Class M Filter
DWV9345 Dust Class H Filter
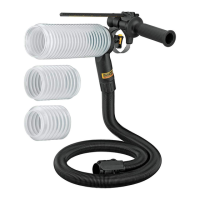
DWV9315 Crush-proof hose
DWV9316 Anti-static hose;
diameter 32mm
DWV9350 Floor cleaning kit
DWV9401 Paper bag
DWV9400 Plastic liner
DWV9402 Fleece bag
DWV9510 ToughSystem®, TSTAK®
Vac Rack
DeWALT AirLock System
DWV9000 Twist-Lock connection
DWV9110 29–35mm tapered
rubber adapter
DWV9120 35–38mm stepped
rubber adapter
DWV9130 35mm OD adapter
DWV9150 35mm OD angle
adapter
DWV9210 Construction Kit
(DWV9000 + DWV9120
+ DWV9130)
Storage (Fig.K)
CAUTION: Turn on/off tool control switch
14
to the OFF
position (O). Disconnect from the power supply.
1. Empty the canister, refer to To Empty Canister
underOperation.
2. Clean the vacuum inside andoutside.
3. Clean or replace filters, refer toFilters.
4. Remove the anti-static suction hose
7
from the twist-lock
hose inlet
10
and close the inlet with the inlet plug
20
.
5. Put the ends of the suction hose together to prevent dirt
particles fromescaping.
6. Store the suction hose and the power cord as shown in the
illustration. Place the unit in a dry room and secure it from
unauthorizeduse.
NOTE: Plug inlet plug into inlet to keep debris inside
canister when suction hose is removed. You can also attach
the ends of the hose together and lock together with the
twist-lockend.
NOTE: After wet applications, the internal parts of the liquid
container must be dried beforestorage.
Cleaning
WARNING: Never use solvents or other harsh chemicals
for cleaning the non‑metallic parts of the appliance. These
chemicals may weaken the materials used in these parts.
Never let any liquid get inside the machine; never immerse
any part of the appliance into aliquid.
1. Vacuum the outside of the dust extractor. For further
cleaning use a cloth dampened only with water and mild
soap ifnecessary.
2. After use dispose of cloth in an appropriatecontainer.
Lubrication
Your dust extractor requires no additionallubrication.
2. Release canister latches
4
and remove vacuum head
3
from canister. Place vacuum head on a level surface
upsidedown.
3. For DWV905H, loosen the 2.5mm socket head screw
30
using
a T-10 bit, then remove the filter plate
31
from the filters as
shown in Fig. L. Do not reuse the Class H main filter element
after it has been removed from theunit.
4. Turn each filter
9
counterclockwise by gripping it on the
plastic end cover as shown in Fig. M, and carefully remove
from head, ensuring debris does not fall into mountinghole.
NOTE: Use care to not damage filtermaterial.
5. If the bottom side of the vacuum head needs to be cleaned,
use a cloth dampened with water and mild soap and allow
it to dry. Dispose of cloth in an appropriatecontainer.
6. Inspect filters for wear, tears or otherdamage.
WARNING: If there is any doubt on the condition of the
filters, they MUST be replaced. DO NOT continue use if
filters aredamaged. Class H filters should not get cleaned
manually outside of the unit.
WARNING: Never use compressed air or a brush to clean
filters, otherwise damage to the filter membrane will occur
which will allow dust to pass through the filter. If needed,
gently tap against a hard surface or rinse with room
temperature water and let air dry. Cleaning of the filters
is typically unnecessary, even if the filter is covered with
dust. The automatic filter cleaning system will maintain
maximum performance and continue to function. If visual
damage to the filter membrane exists, replace filters. Filters
typically last between six and twelve months depending
on use andcare.
To Install Filters (Fig.L, N)
1. Ensure filter seal
32
is in place and is secure
2. Line up filter threads
33
to vacuum head threads and using
moderate force, turn filter clockwise untiltight.
NOTE: Use care to not damage filtermaterial.
3. For DWV905H, replace the filter plate
31
and tighten the
filter screw
30
on top of theplate.
4. Place the vacuum head
3
onto the container and secure it
by closing the canister latches
4
.
 Loading...